Deploy Application from Git
The Deploy Application from Git method allows you to deploy an application directly from a Git repository. This method is useful for teams that manage their code in version control systems and want deployments to be triggered directly from their repositories.
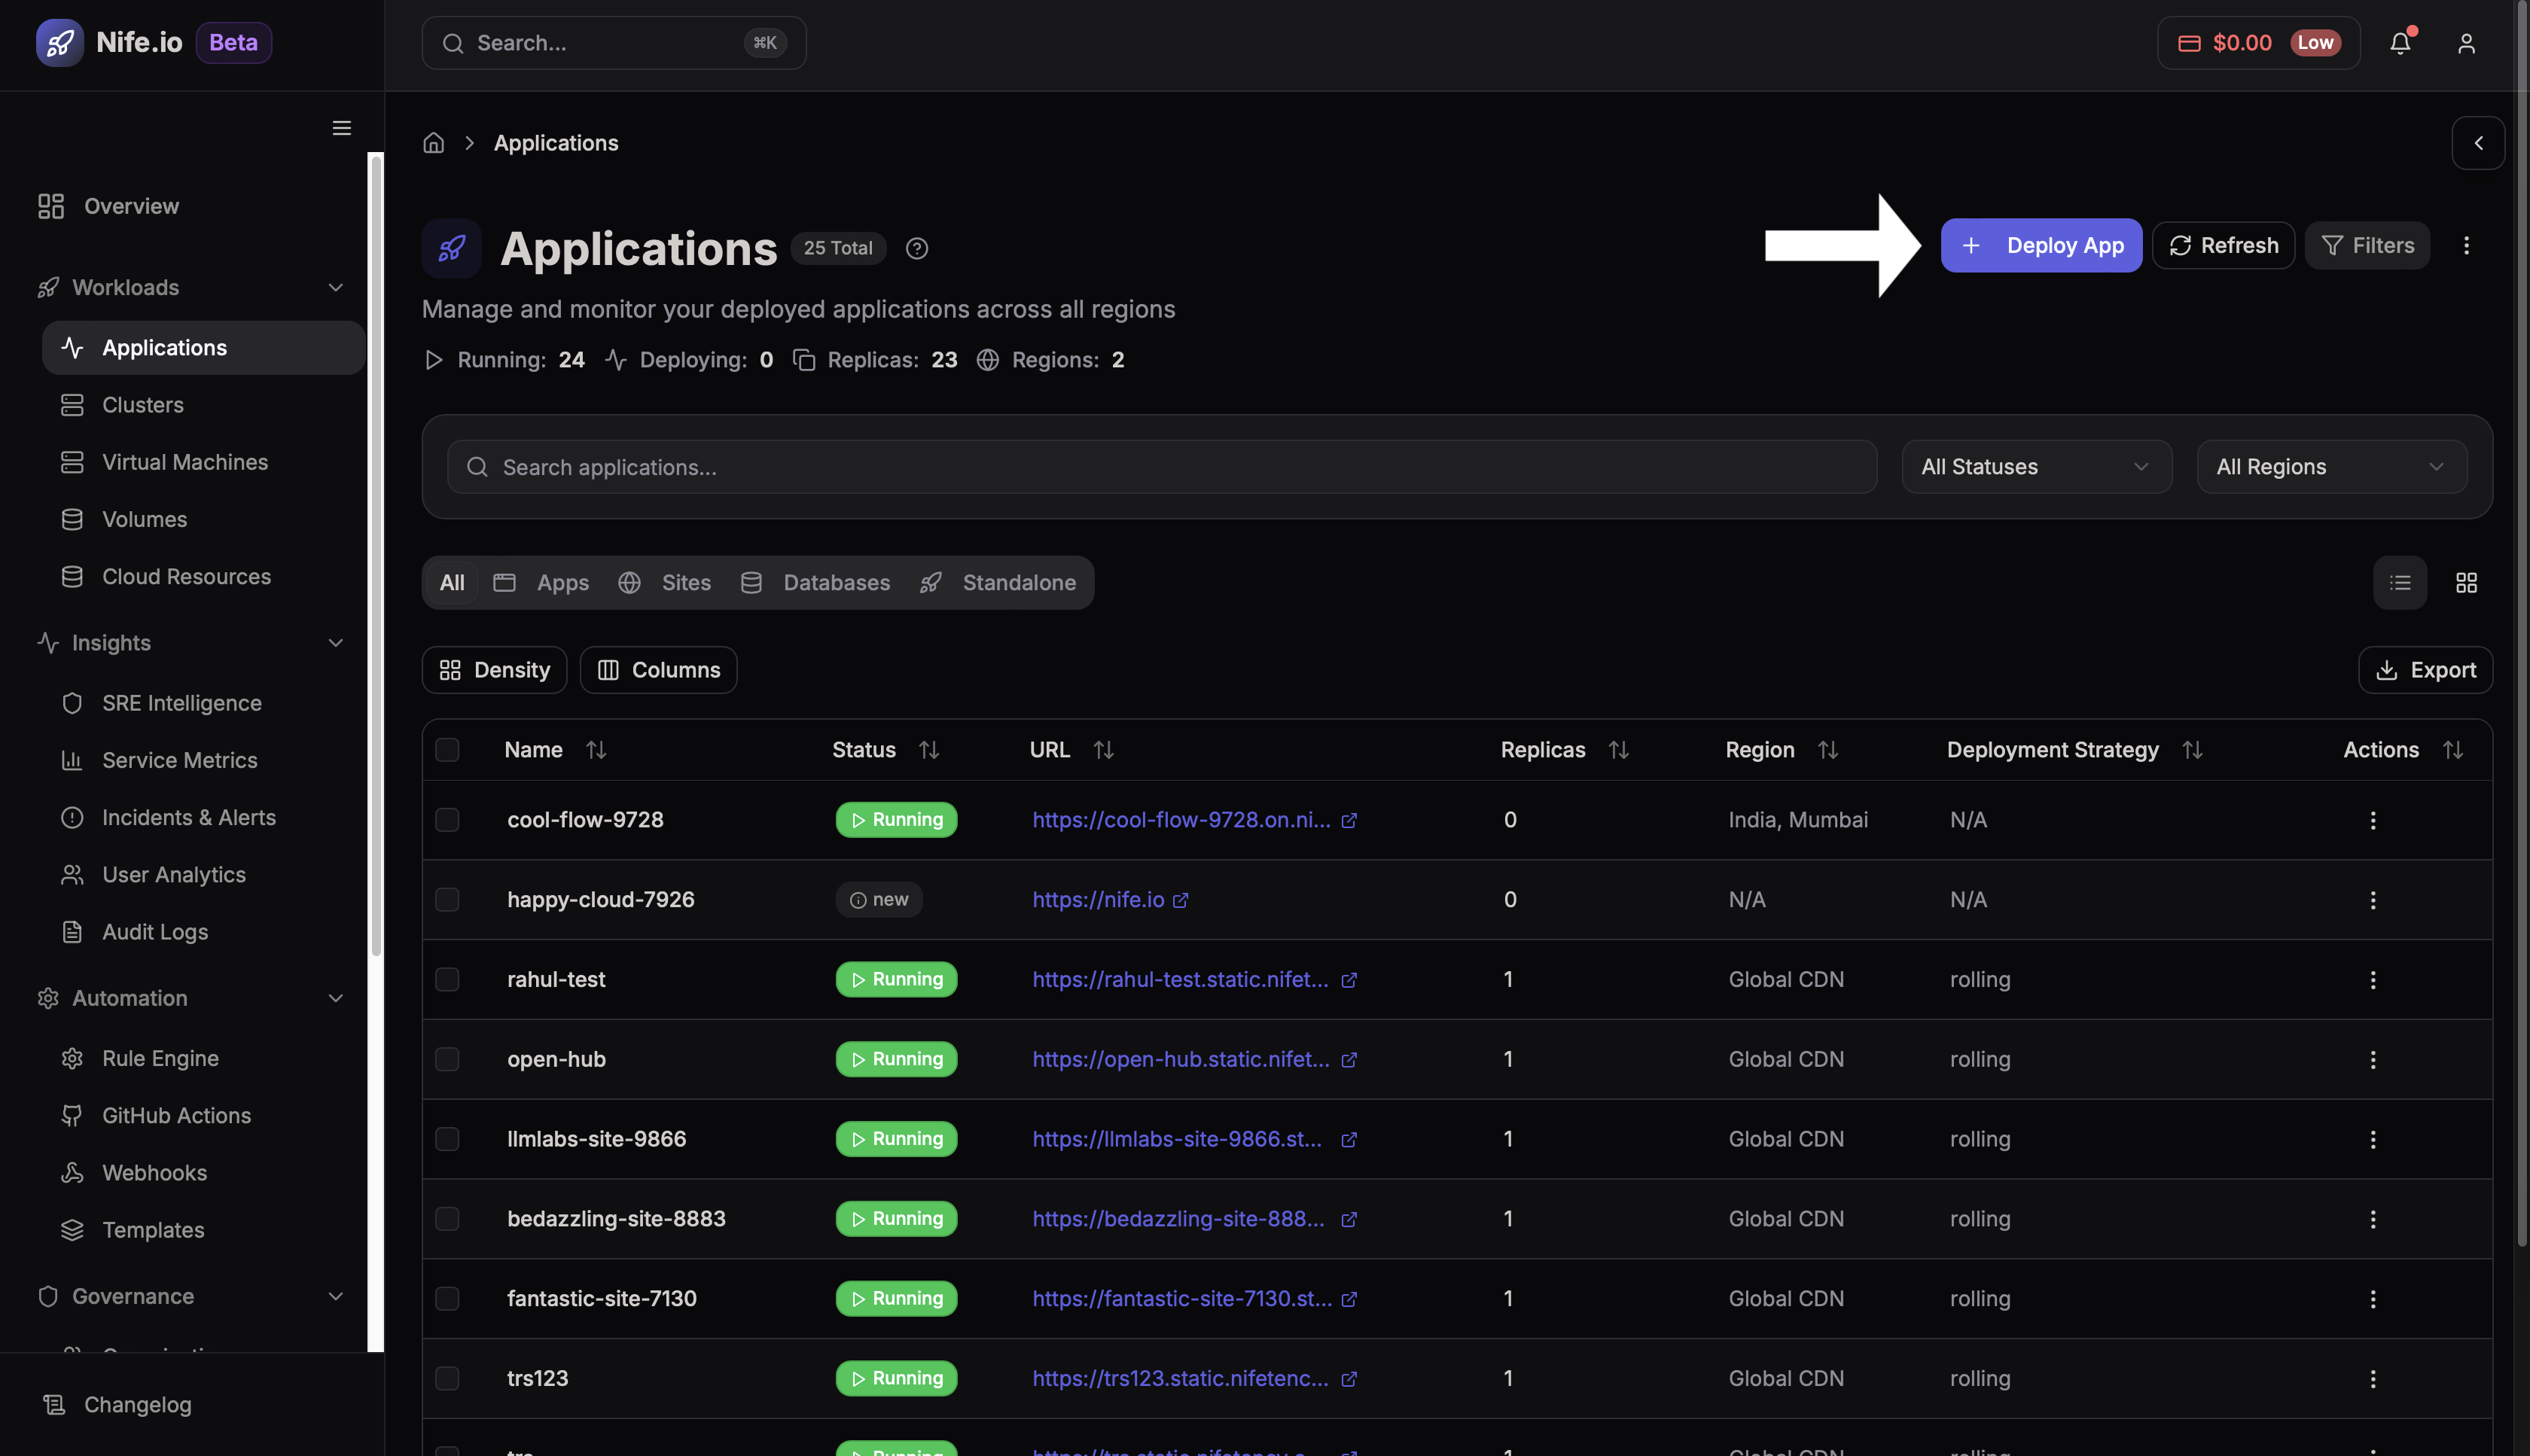
Step 1: Open Deploy Application
From the dashboard, navigate to Applications and select Deploy Application.
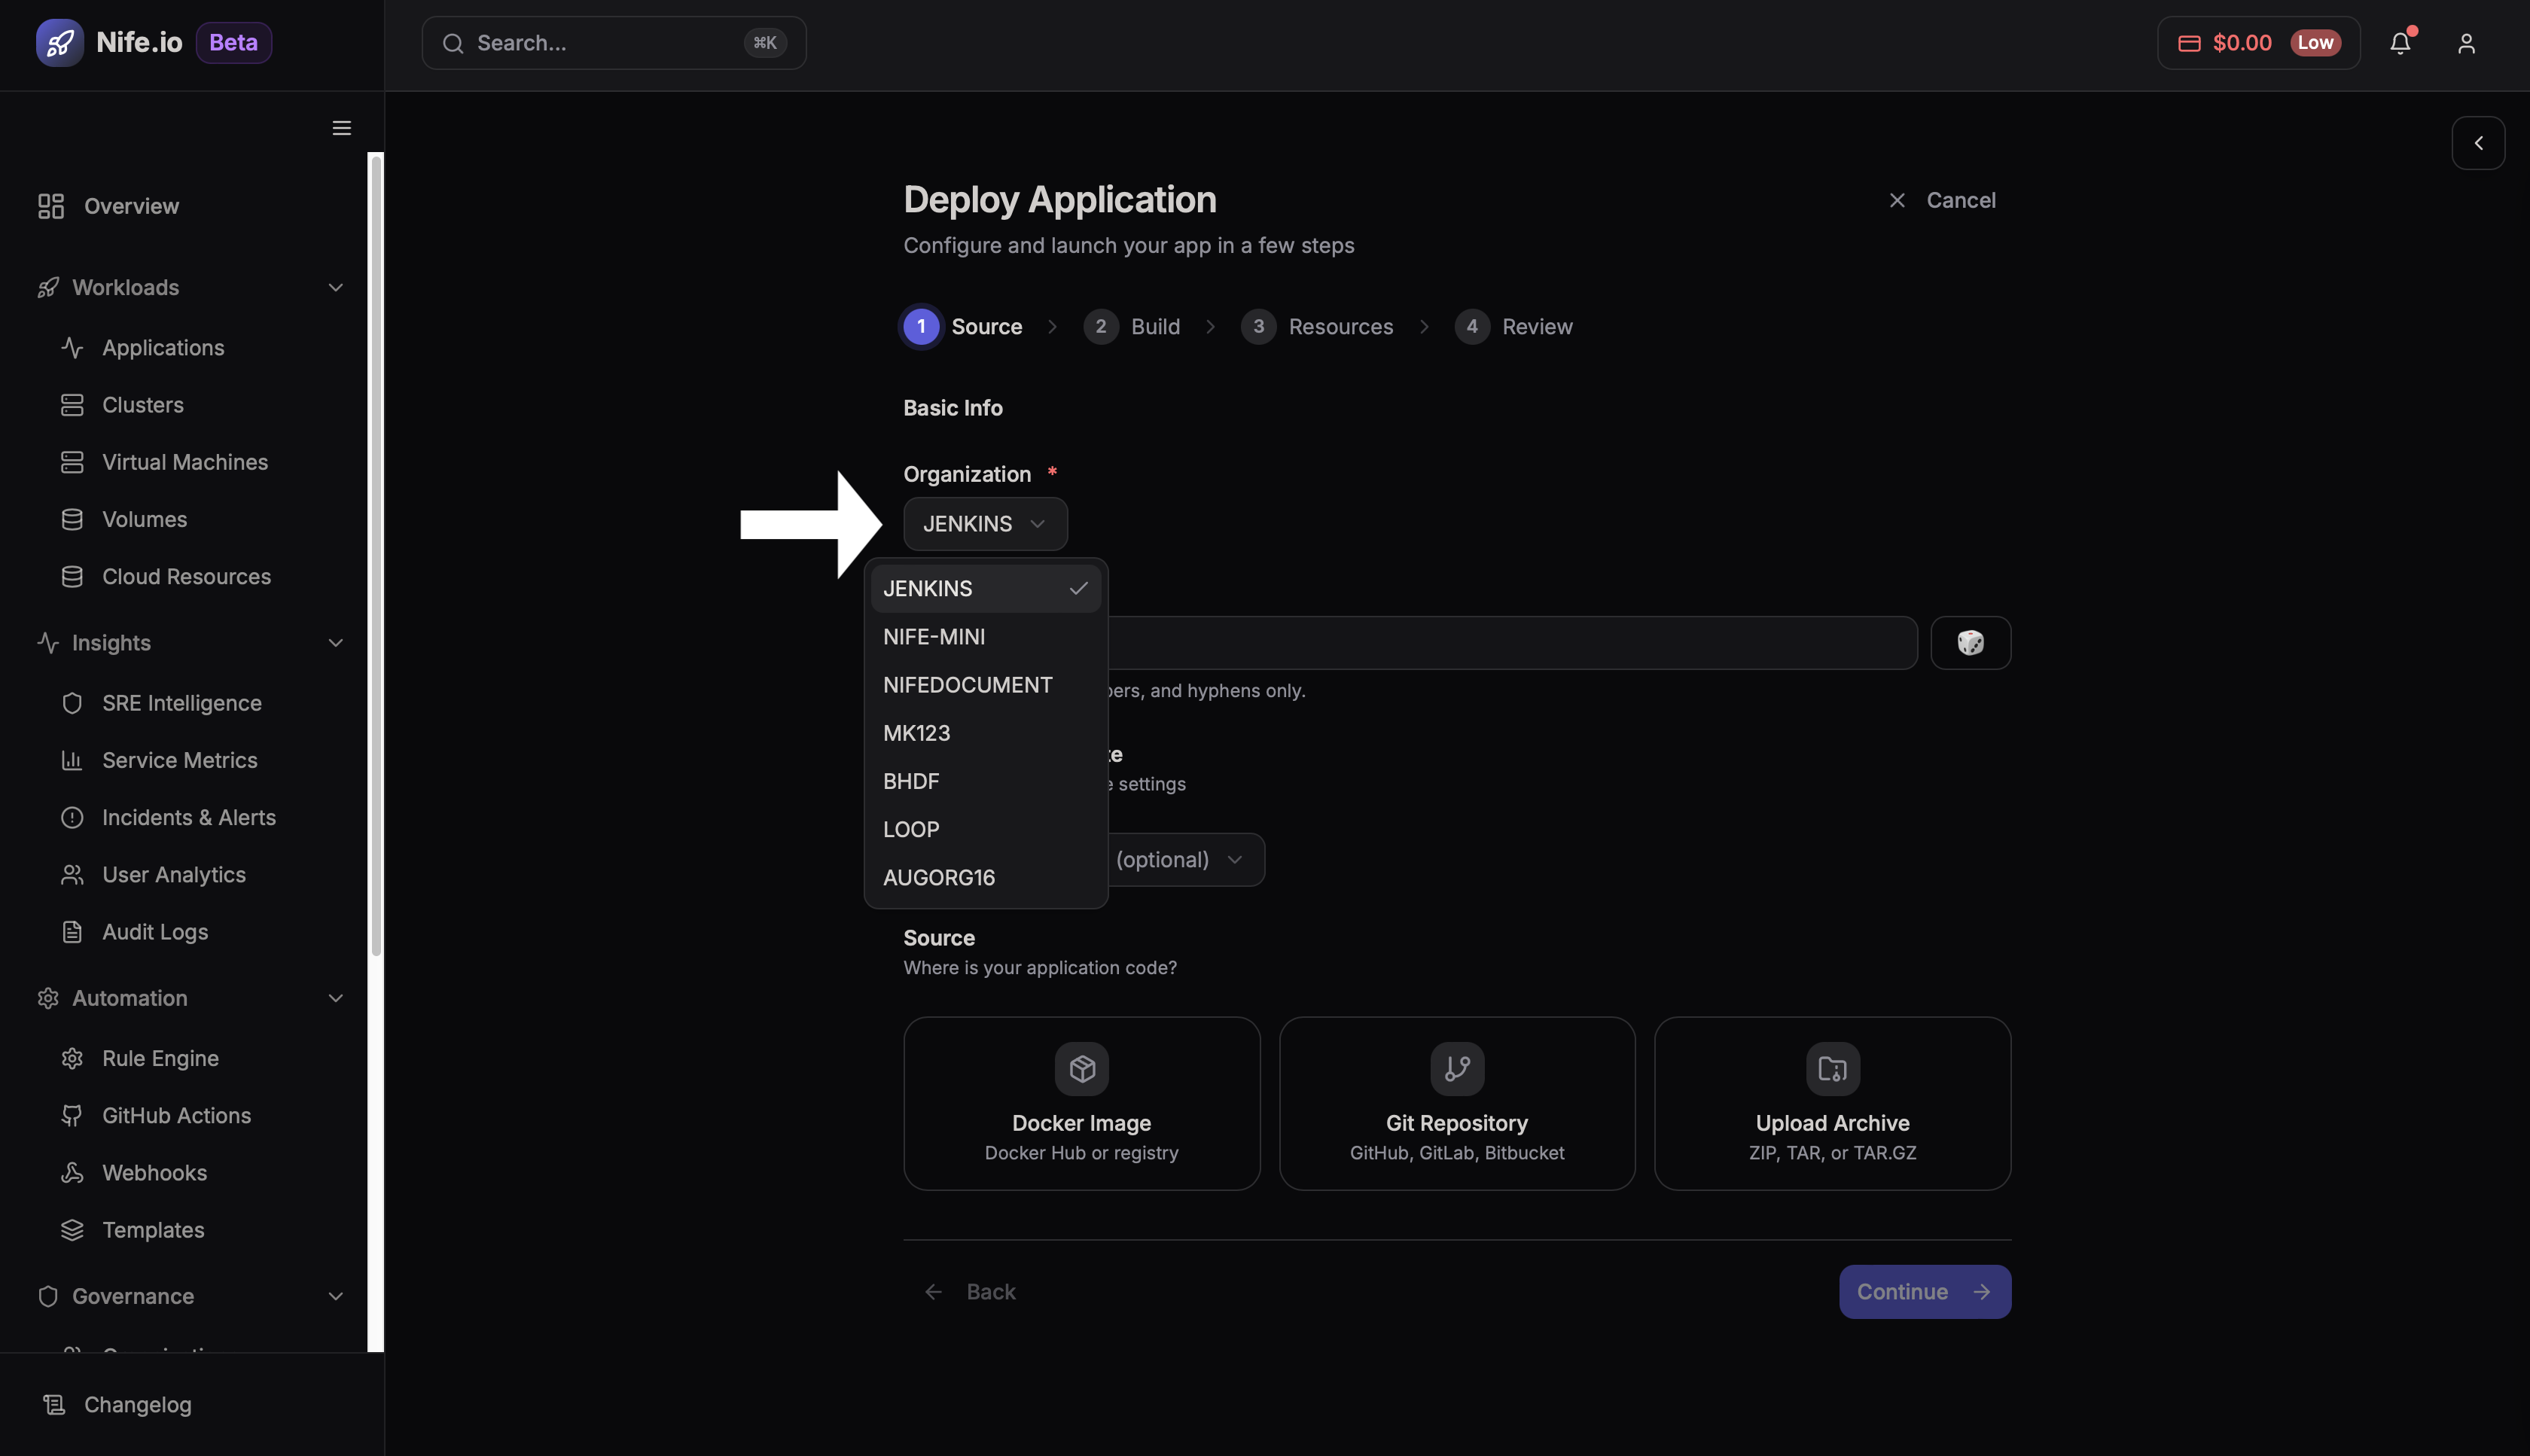
Step 2: Select Organization
Choose the organization where the application will be deployed.
Step 3: Configure Application Details
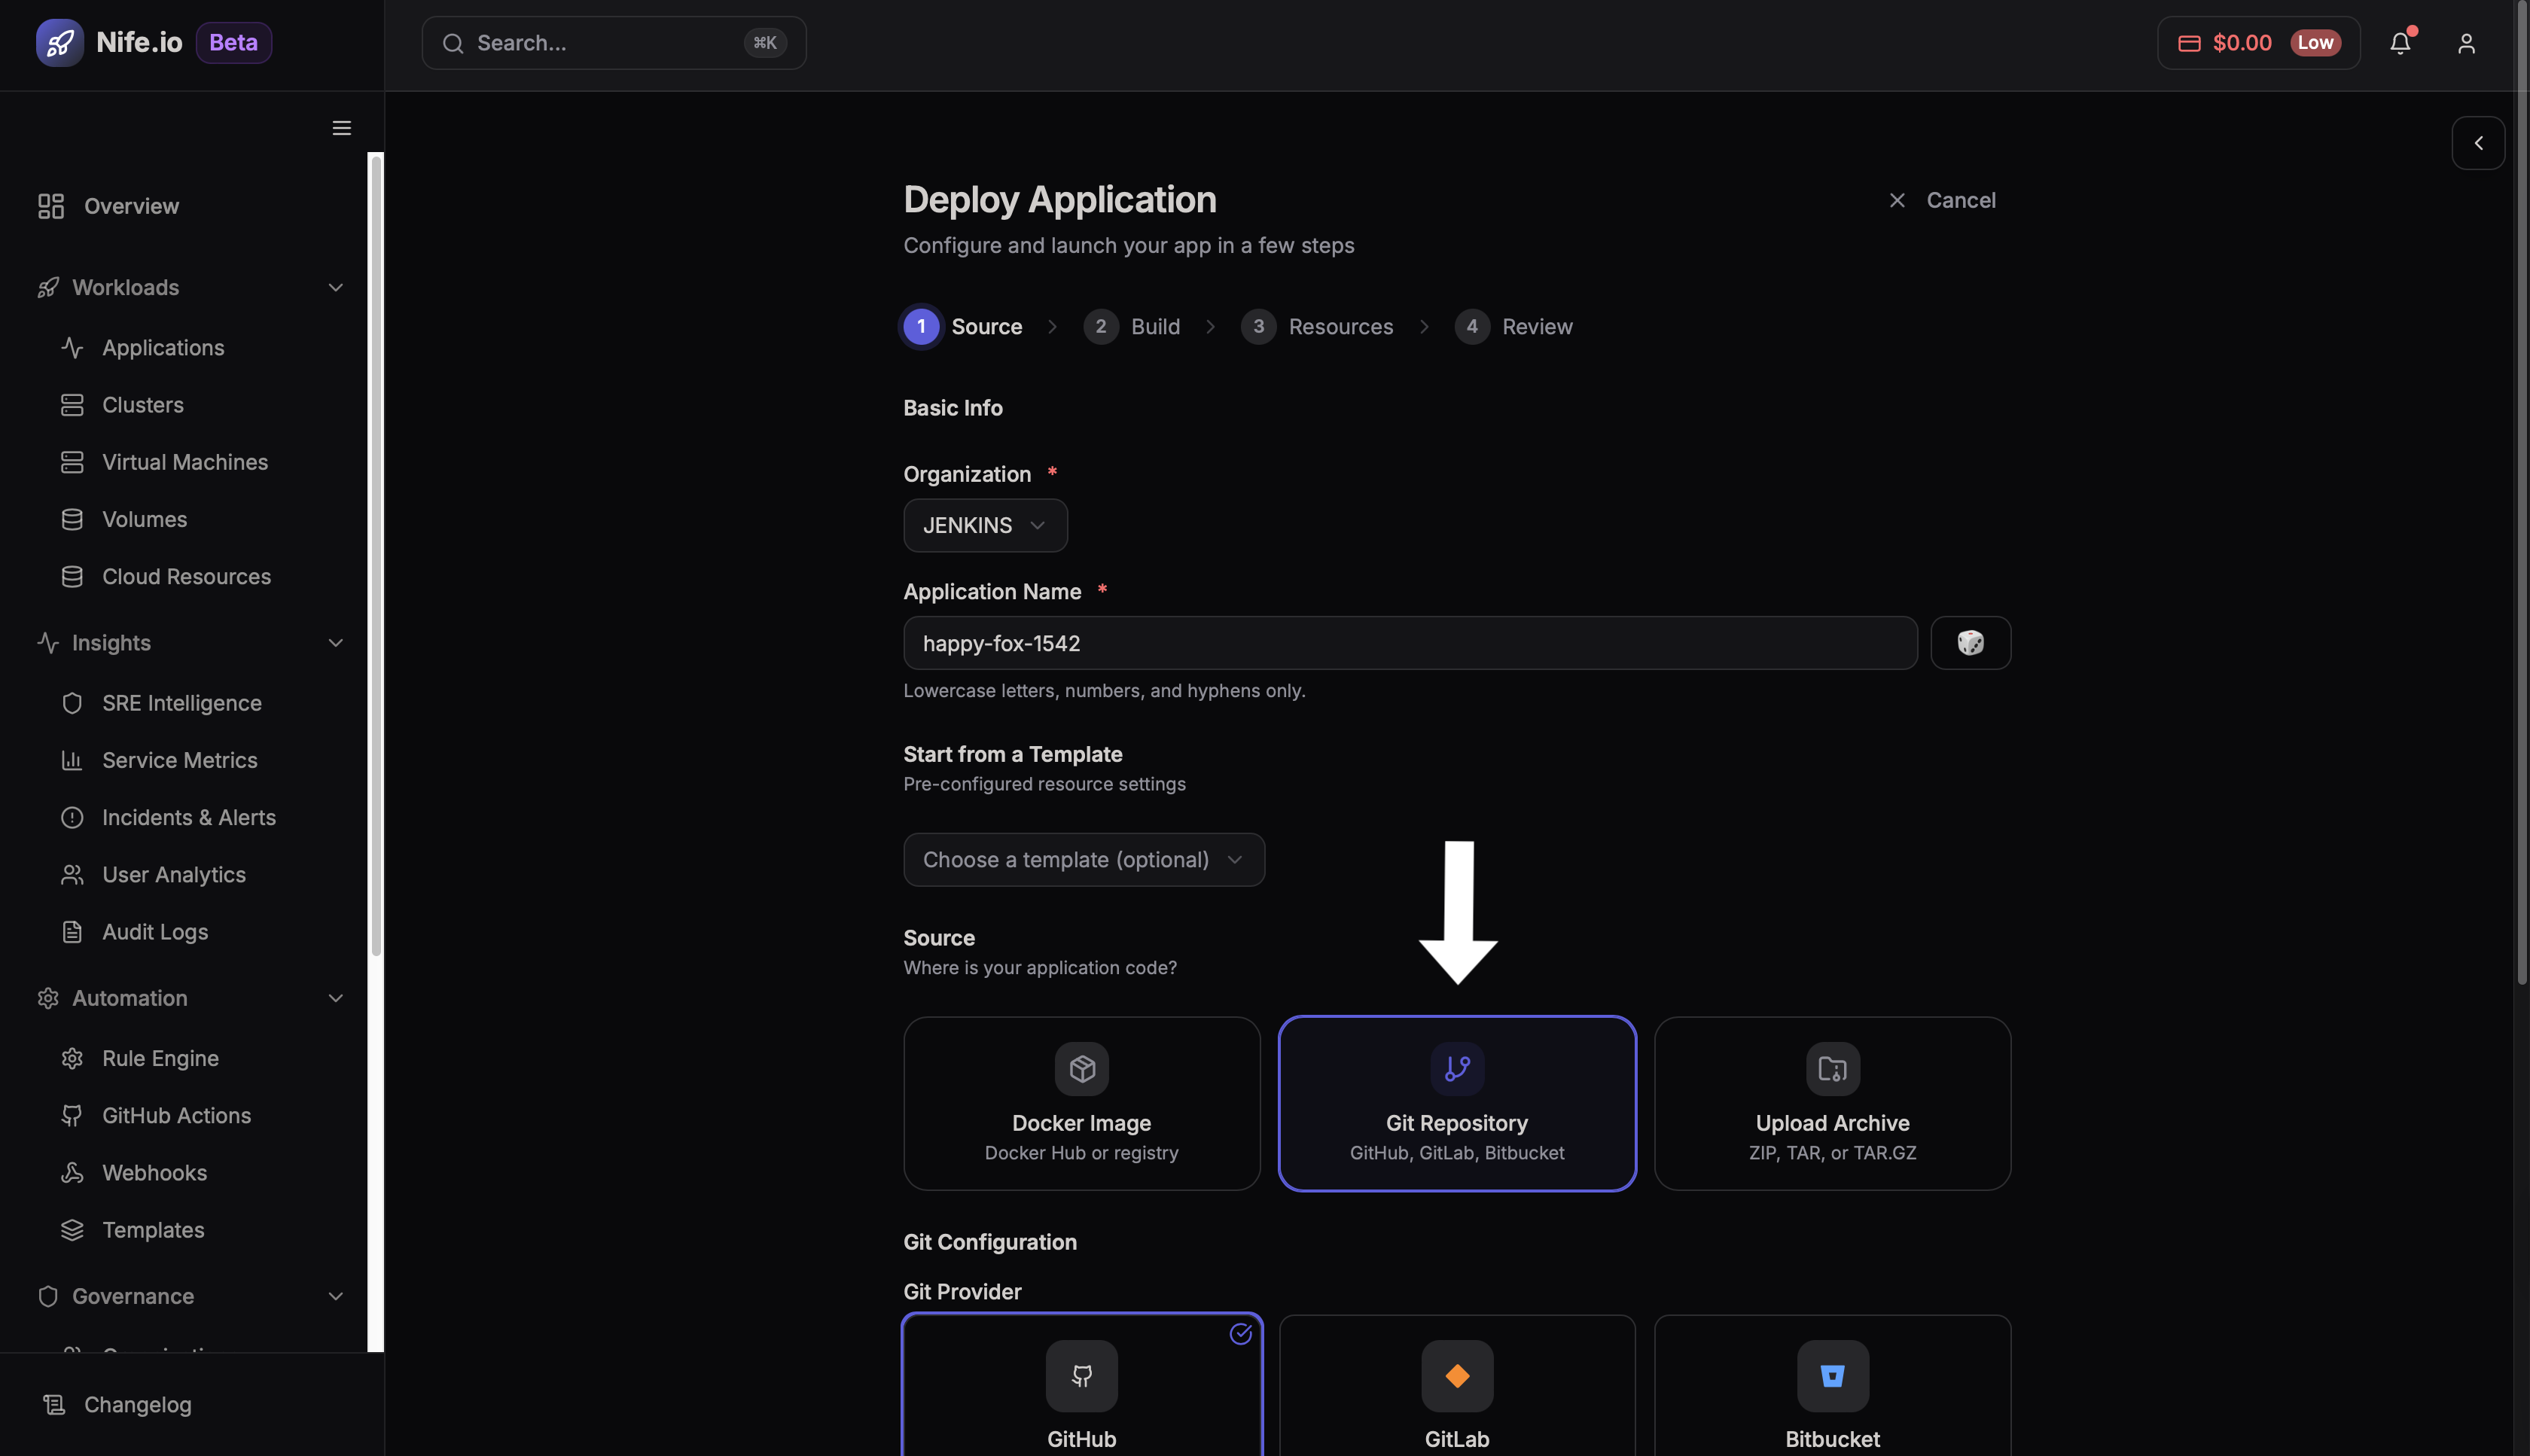
Provide the required deployment information such as the application name and other configuration details required by the platform.
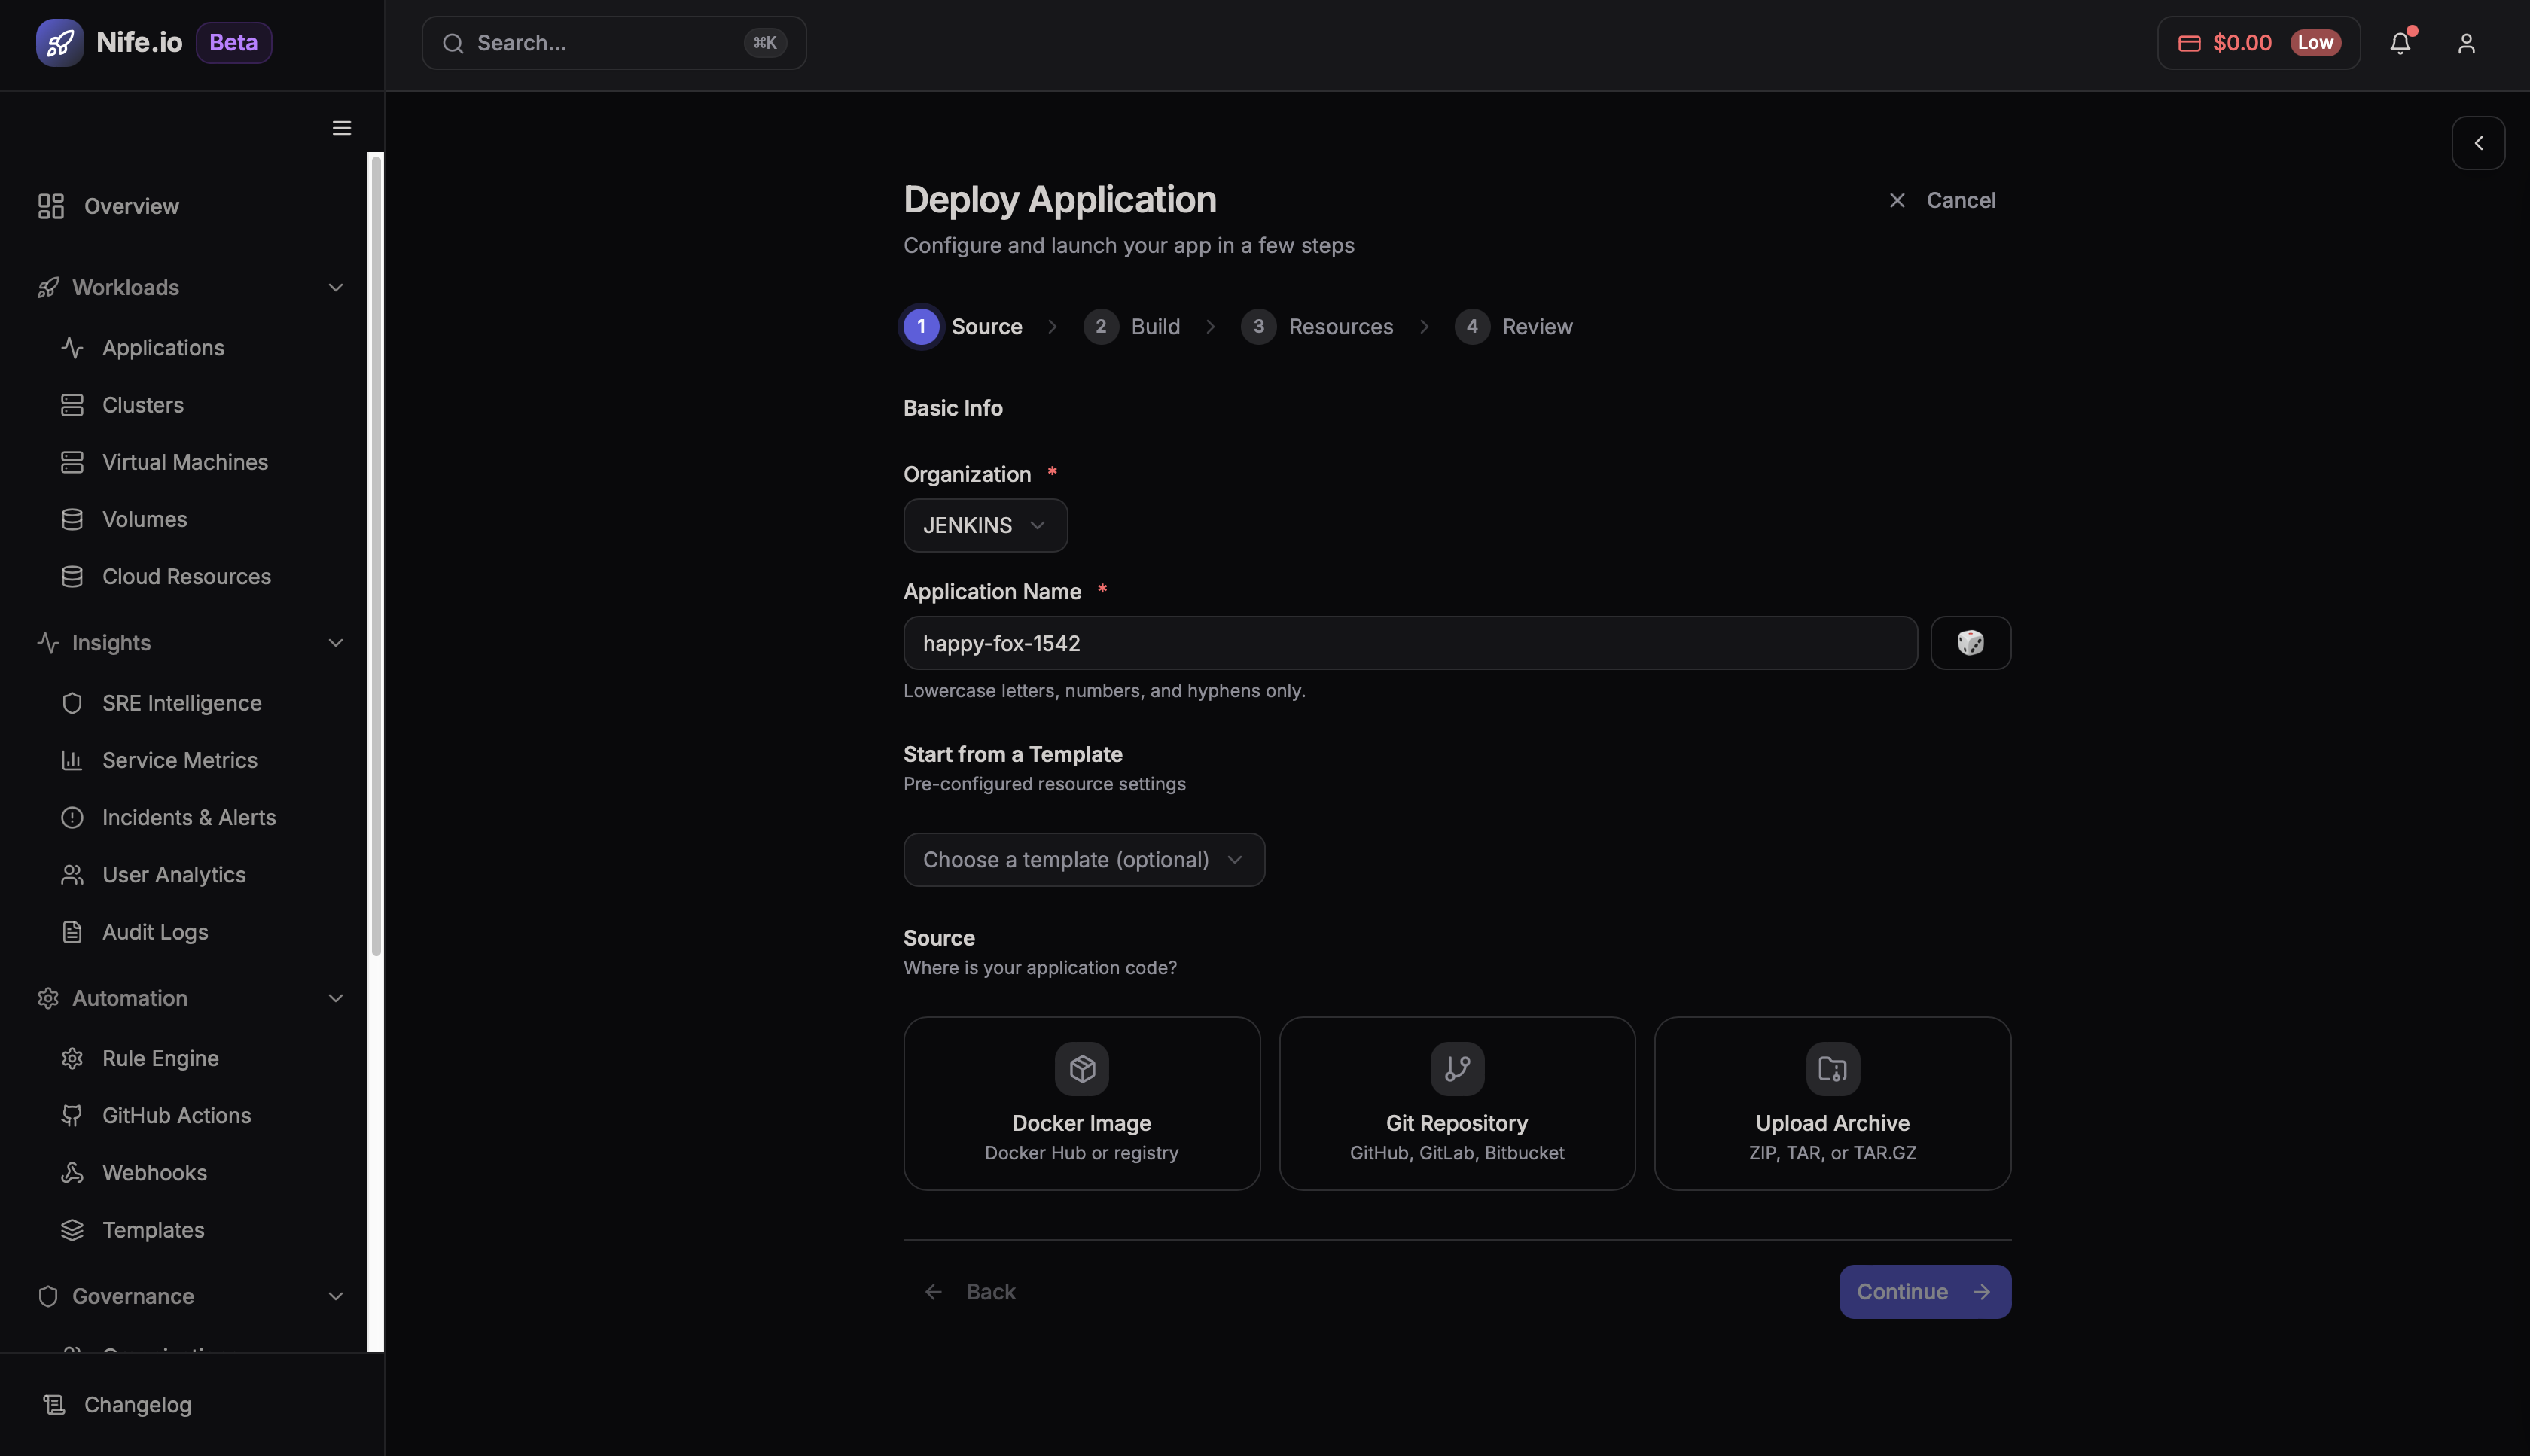
Step 4: Select Git Repository
Choose Git Repository from the available deployment methods.
Step 5: Connect Repository
Enter the required repository details such as the Git provider, repository URL, and branch name.
Step 6: Configure Repository Settings
Provide the required repository configuration fields so the platform can access the project.
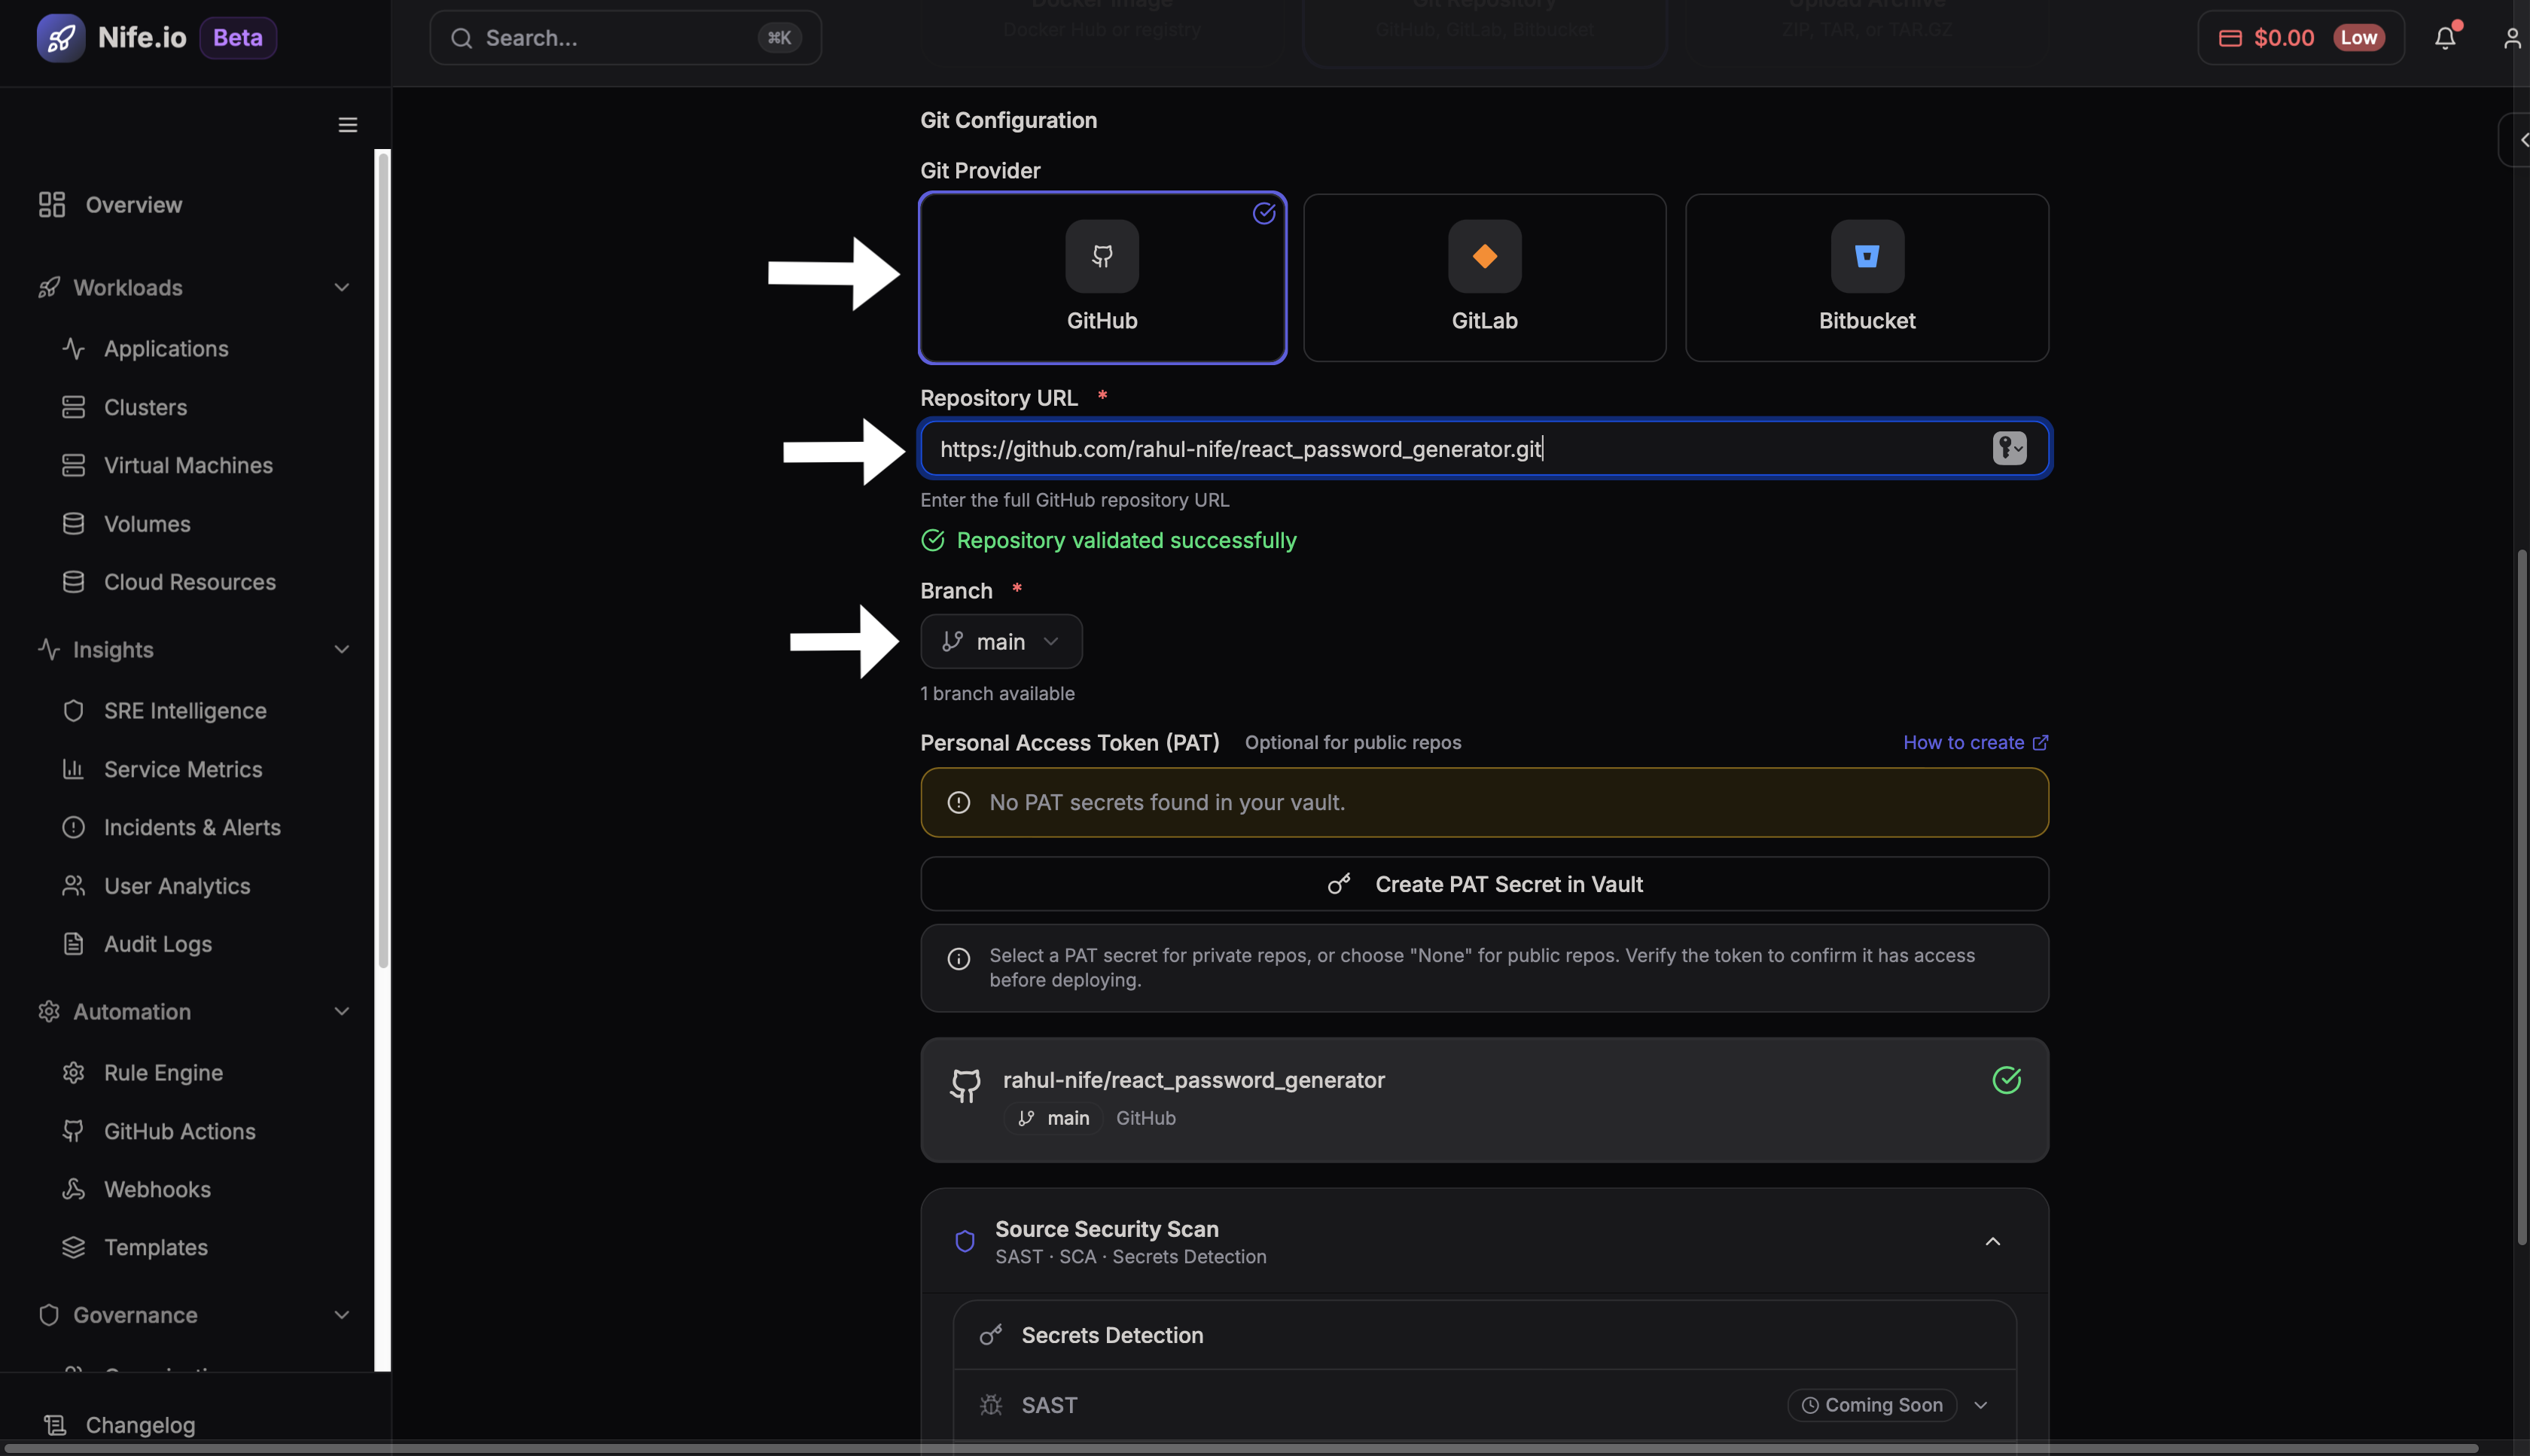
1. Git Provider & Repository URL
Provider: Select the Git provider where the repository is hosted. Supported providers include GitHub, GitLab, and Bitbucket.
Repository URL: Enter the Git repository URL containing the application source code. Once entered, the platform validates the repository connection.
Branch: Select the branch from which the code should be pulled during deployment.
2. Personal Access Token (PAT)
There is an optional field for Personal Access Token.
When to use it: This field is only required when deploying from a private repository. If the repository is public, the platform can validate it without a PAT.
If the repository is private, you can create a PAT secret or select an existing one from the platform vault.
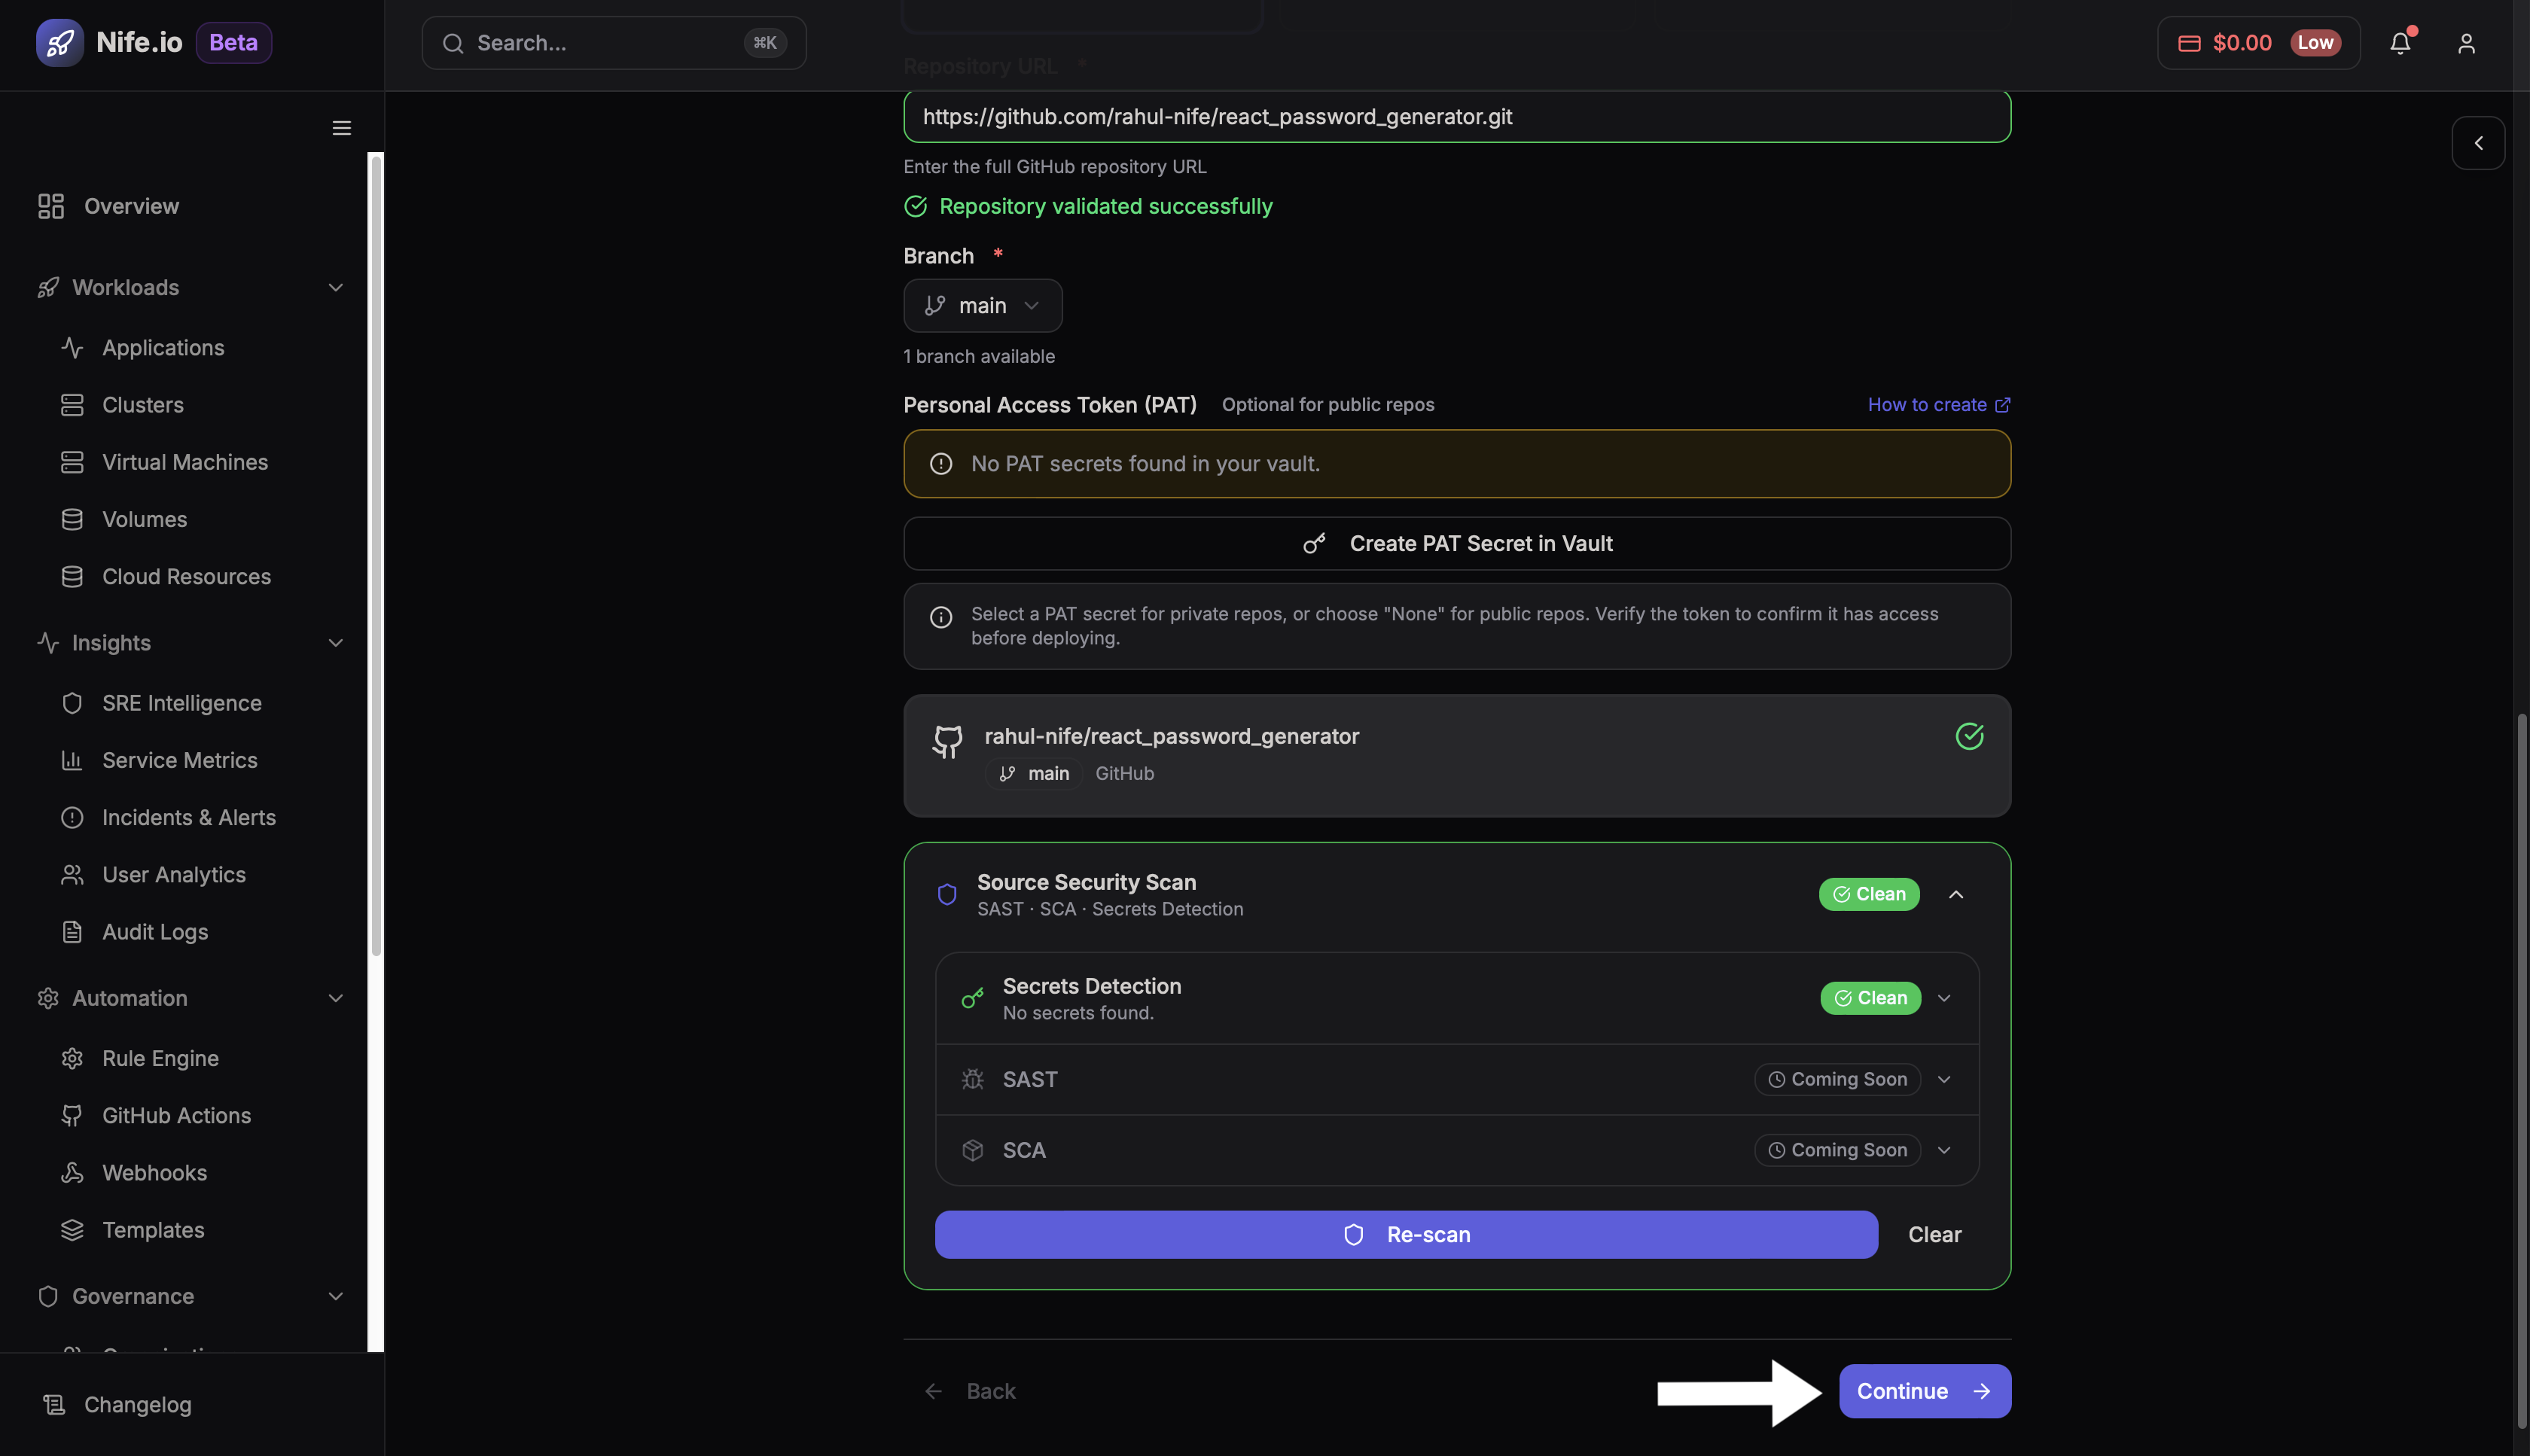
3. Source Security Scan (SAST)
This is an advanced security feature used for enterprise-grade deployments.
SAST (Static Application Security Testing): By clicking Run Security Scan, the platform scans the repository source code for vulnerabilities such as insecure code patterns or exposed credentials.
Secrets Detection: This feature helps detect sensitive information such as API keys or tokens that may have been accidentally committed to the repository.
SCA (Software Composition Analysis): Currently listed as Coming Soon, this feature will analyze project dependencies and identify known vulnerabilities in third-party libraries.
Once the repository configuration is complete, click Continue.
Step 7: Configure Build Settings
After configuring the repository, click Continue to proceed to the build settings phase.
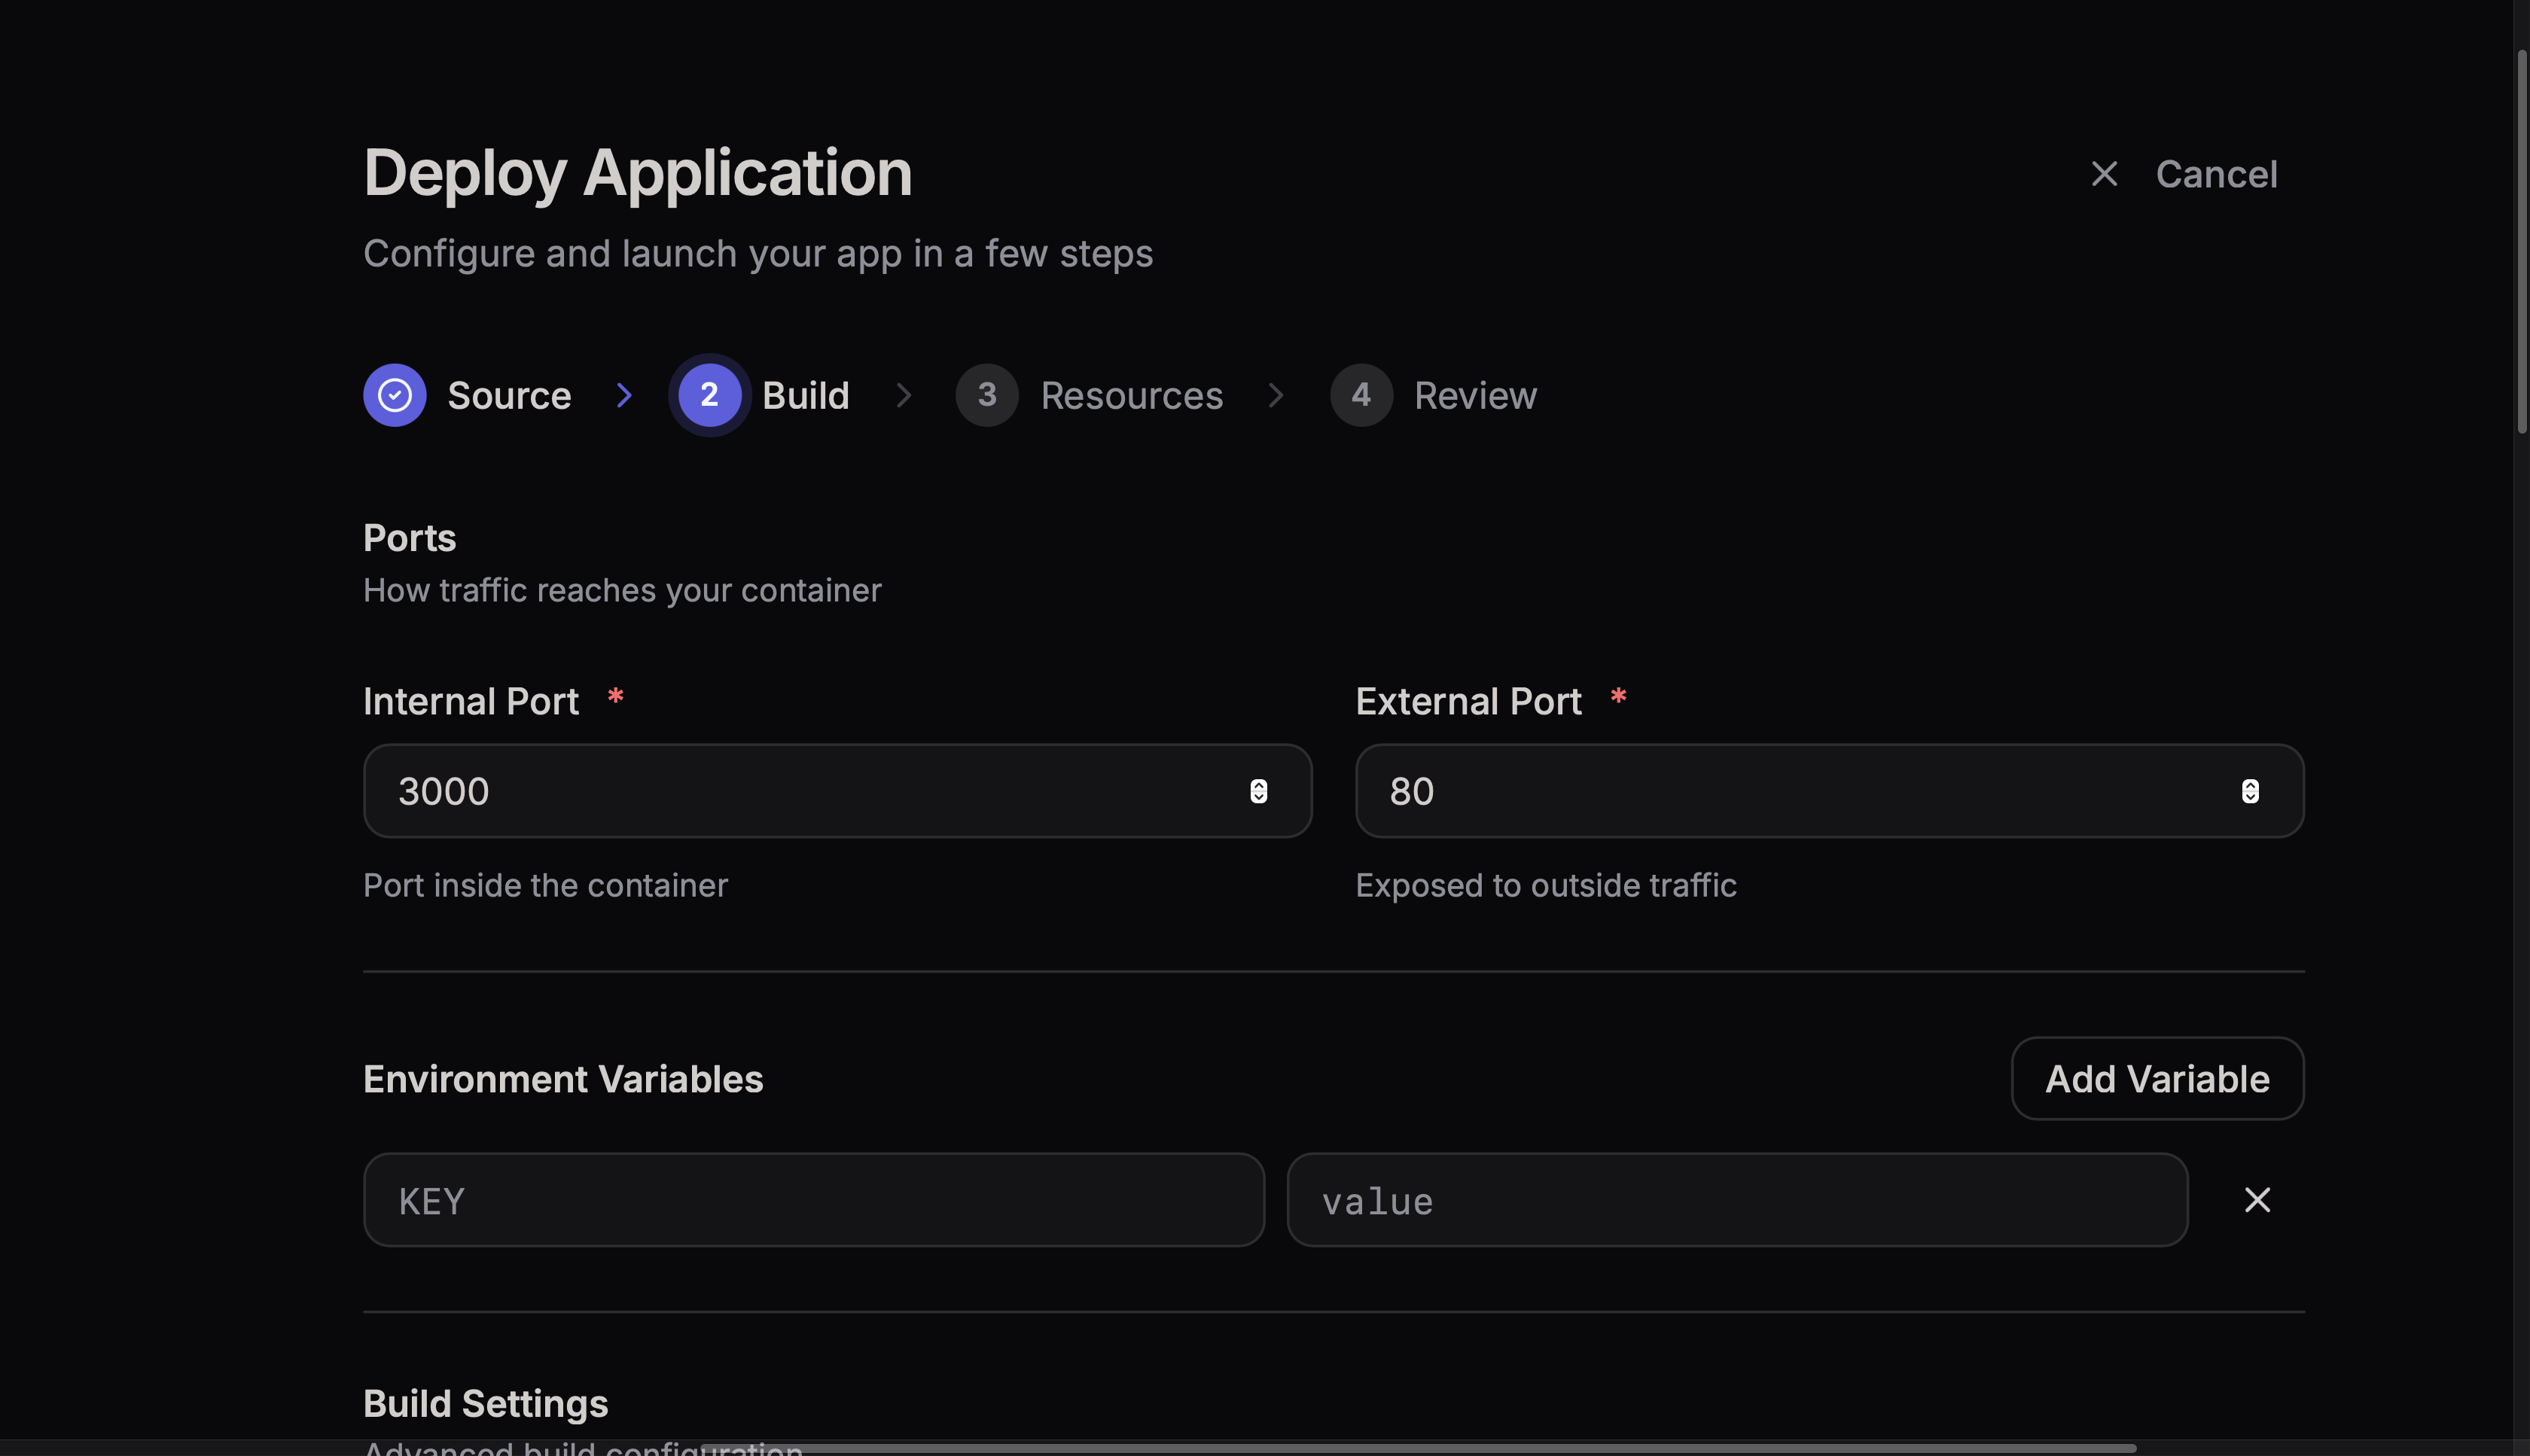
This section allows you to configure the following:
1. Ports Configuration
Define the ports used by your application.
Internal Port: The port inside the container where the application listens.
External Port: The public-facing port used to access the application.
2. Environment Variables
Environment variables allow you to manage runtime settings without changing the source code.
You can configure environment modes, API endpoints, or other application settings. Add new variables by selecting Add Variable.
3. Build Configuration
This section defines how your container image will be created.
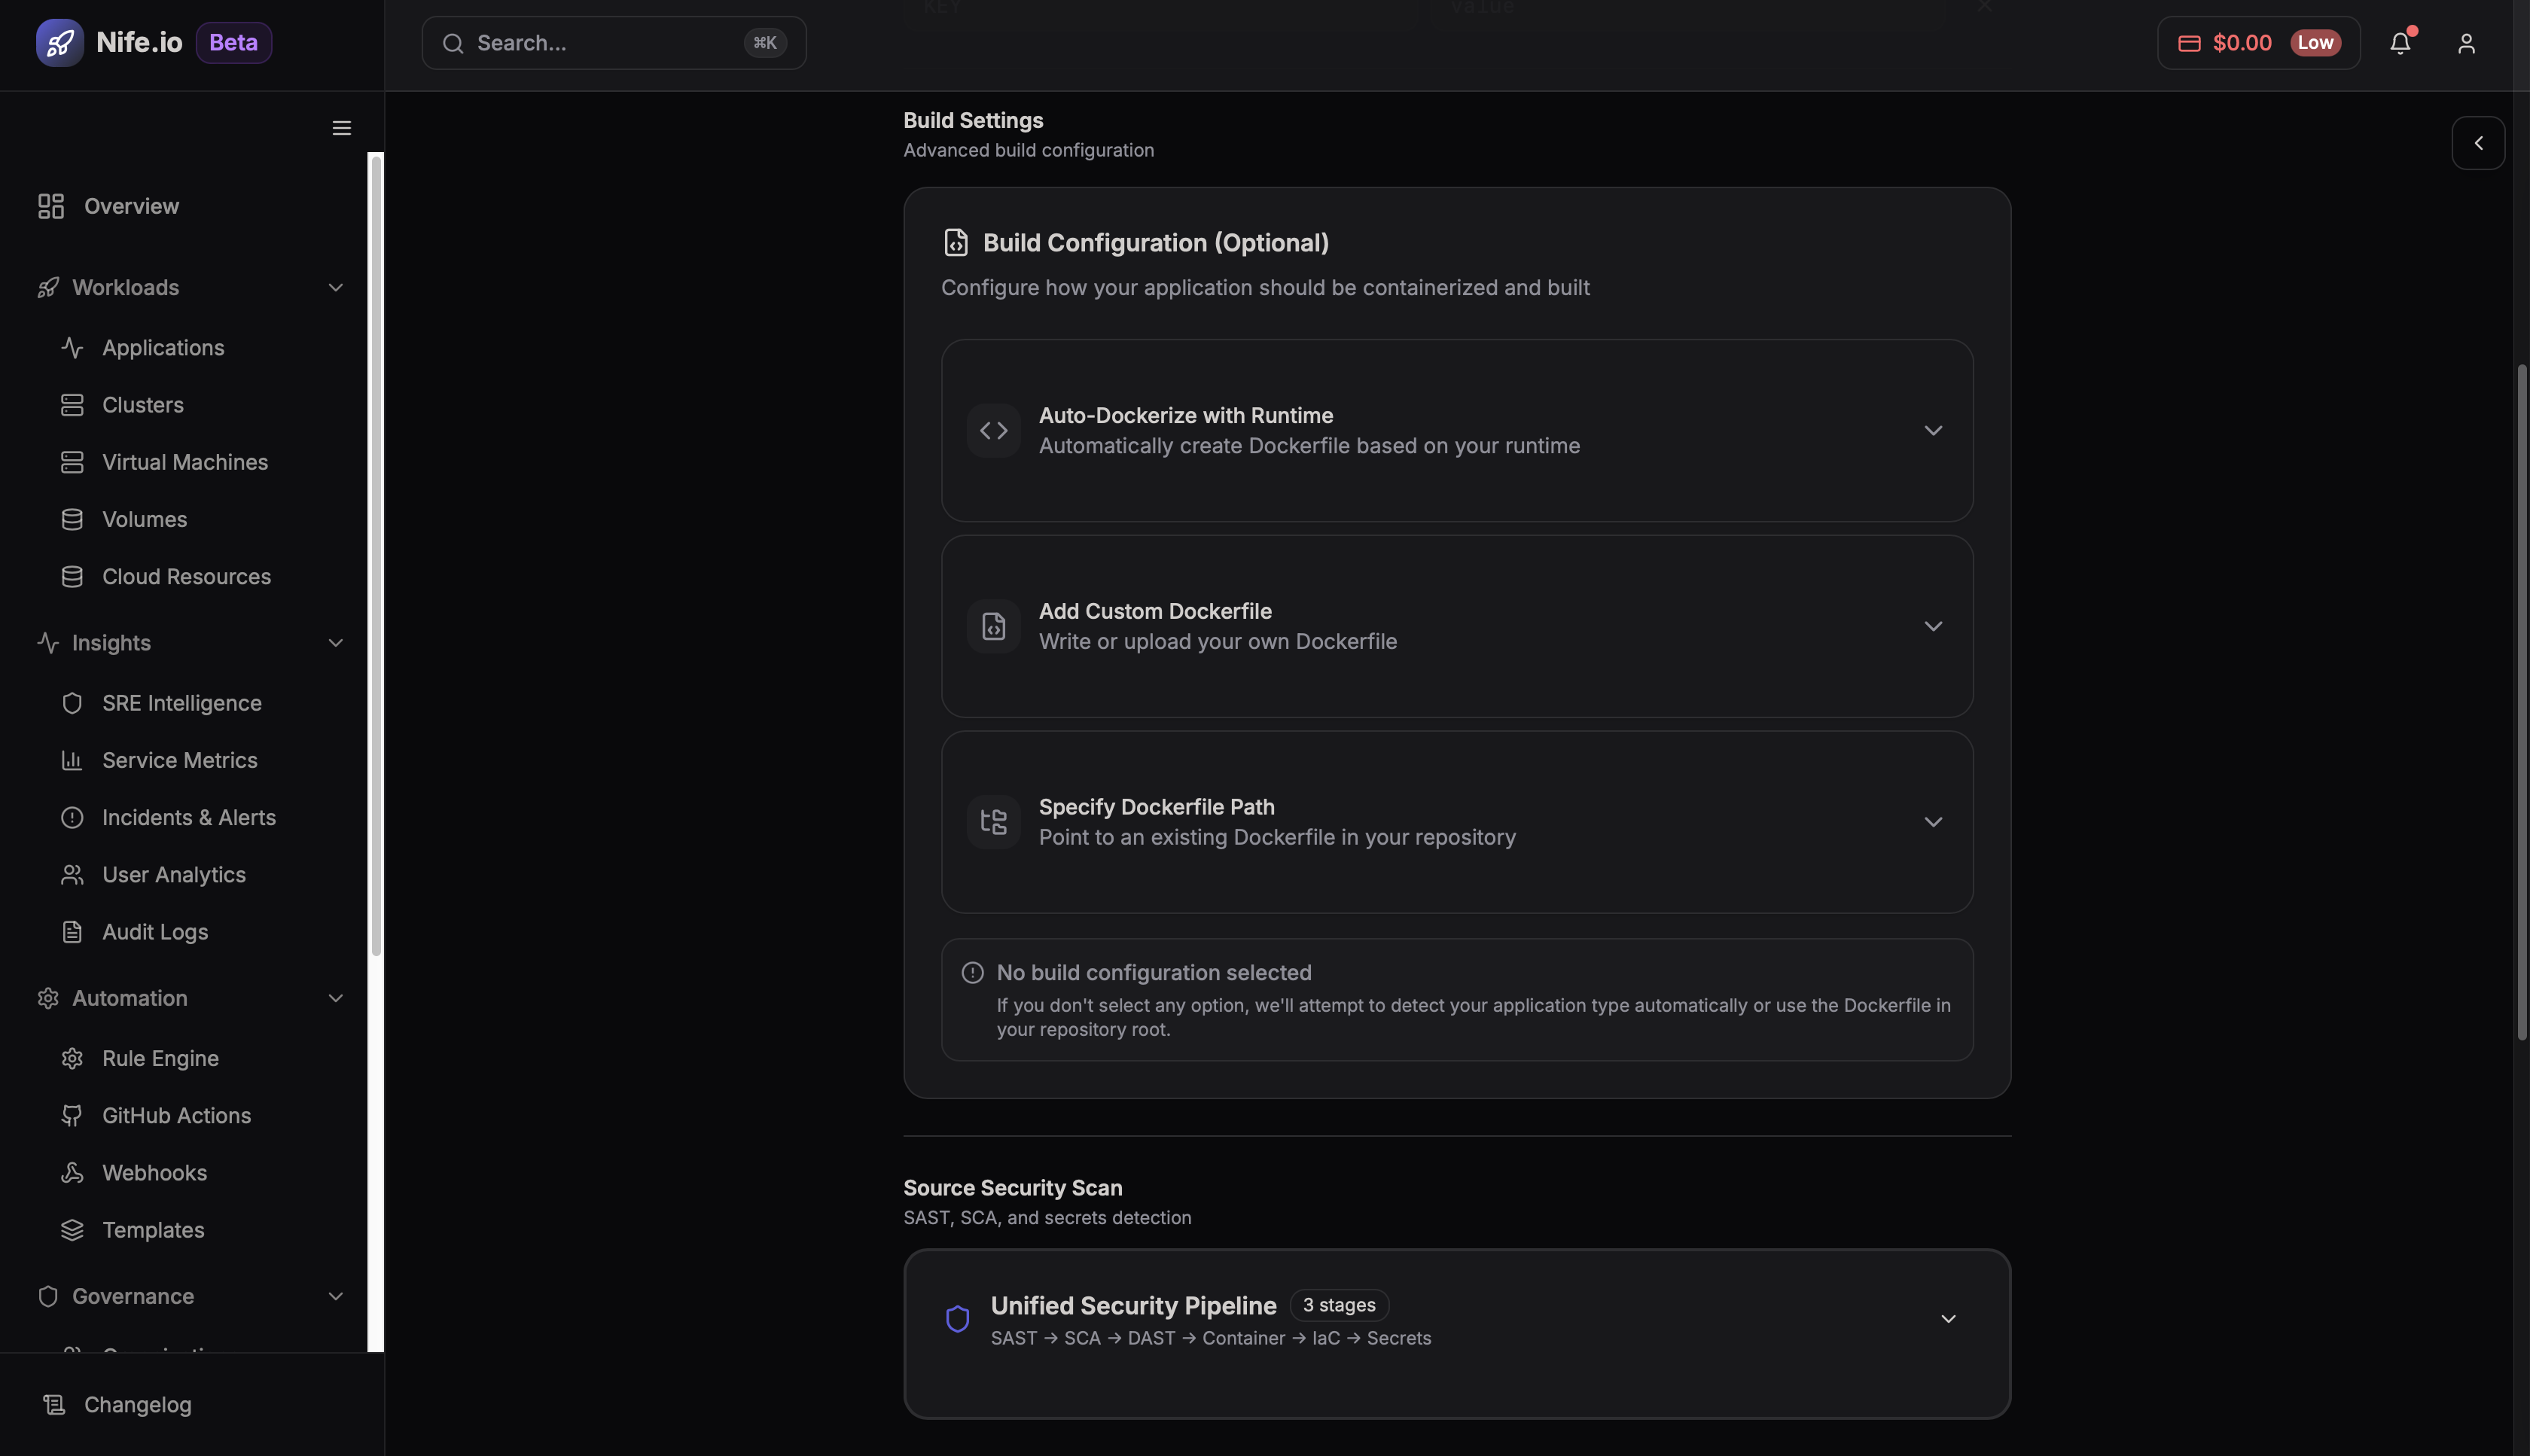
Auto Dockerize with Runtime
This option automatically generates a Dockerfile based on your selected runtime environment (e.g., Node.js, Python, Go, Java, Ruby, PHP, Rust, or .NET).
Add Custom Dockerfile
If your repository already includes a Dockerfile, you can instruct the platform to use it directly.
Specify Dockerfile Path
Provide the path to your Dockerfile if it is not in the root directory.
Once the build configuration is complete, click Continue.
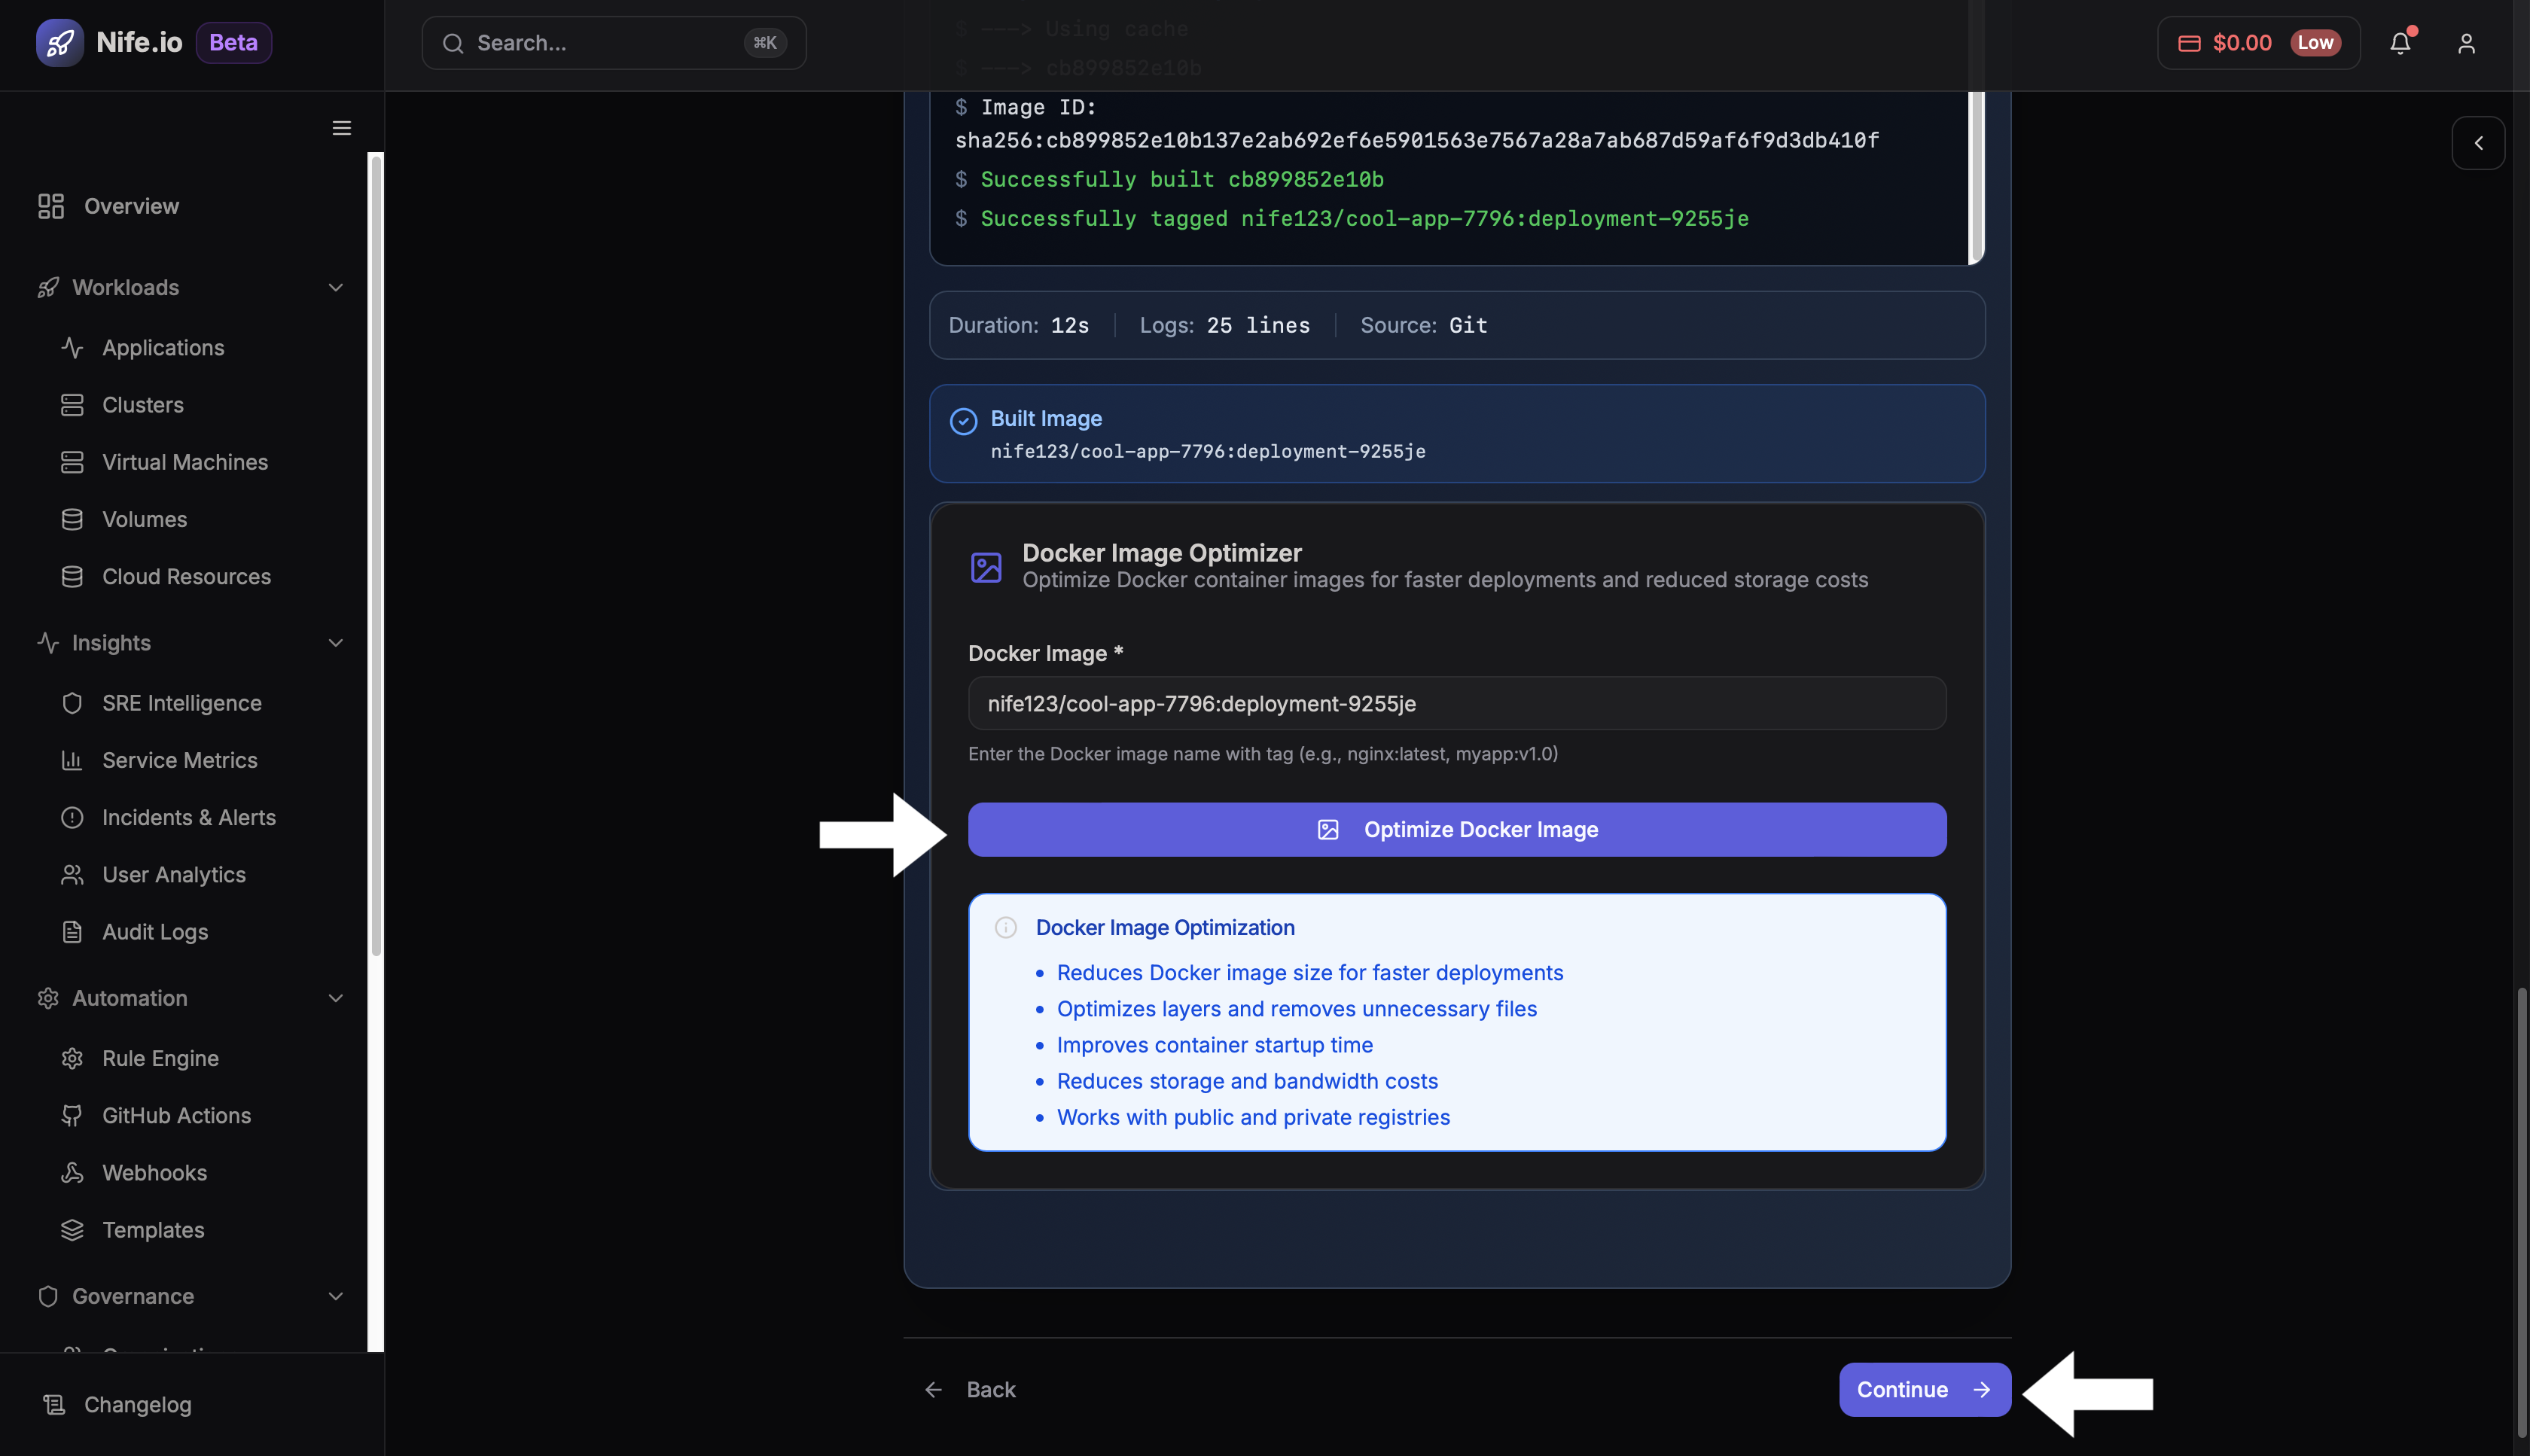
Step 8: Start Build
Click Start Build to initiate the containerization process.

Once the build is complete, you can click Optimize Docker Image to reduce its size and improve deployment speed. After optimization, click Continue to move to the resource configuration.
Step 9: Configure Resources
In this section, you define the compute environment, scaling, and deployment logic. You can configure:
- CPU and Memory allocation
- Storage requirements
- Networking settings
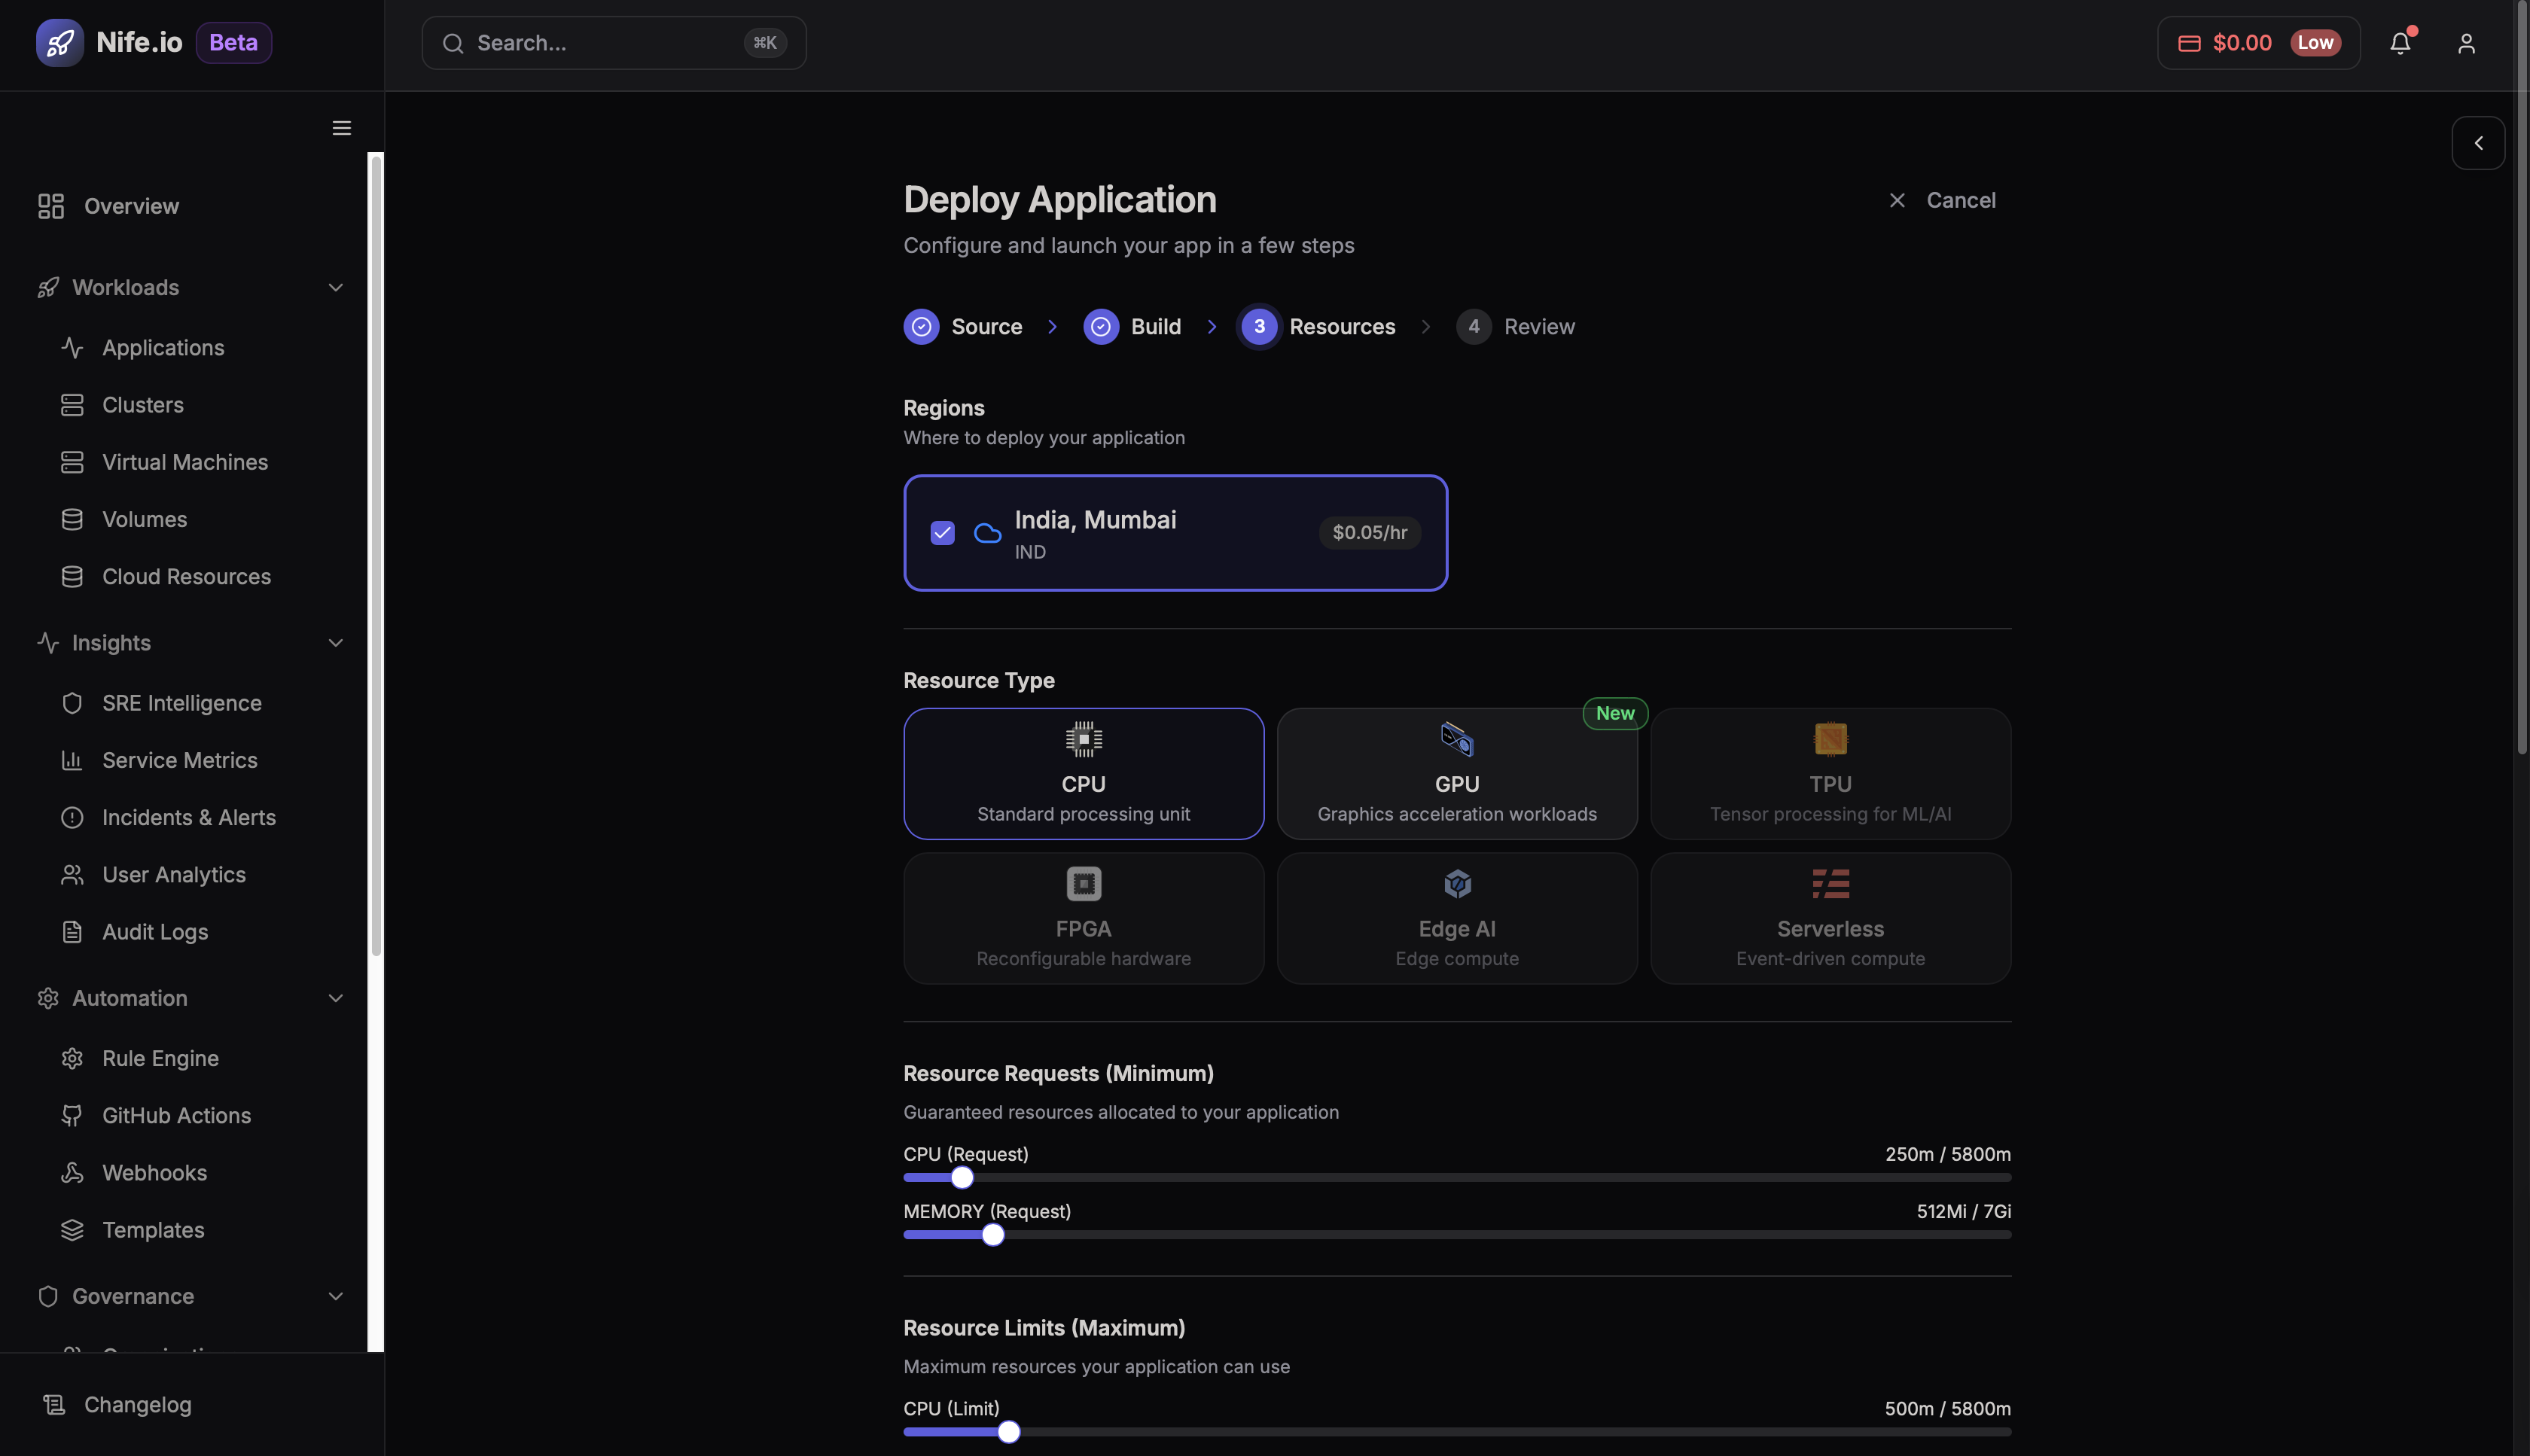
Infrastructure & Resources
- Regions: Select the geographic data center for your deployment.
- Resource Type: Choose the hardware (CPU, GPU, etc.) required for your workload.
- Resource Requests / Limits: Set the baseline resources and maximum usage caps for CPU and memory.
Deployment Strategy & Workload
- Strategy: Choose your rollout method (e.g., Rolling, Canary, Blue-Green).
- Workload: Define the execution type, such as a standard Deployment, CronJob, or StatefulSet.
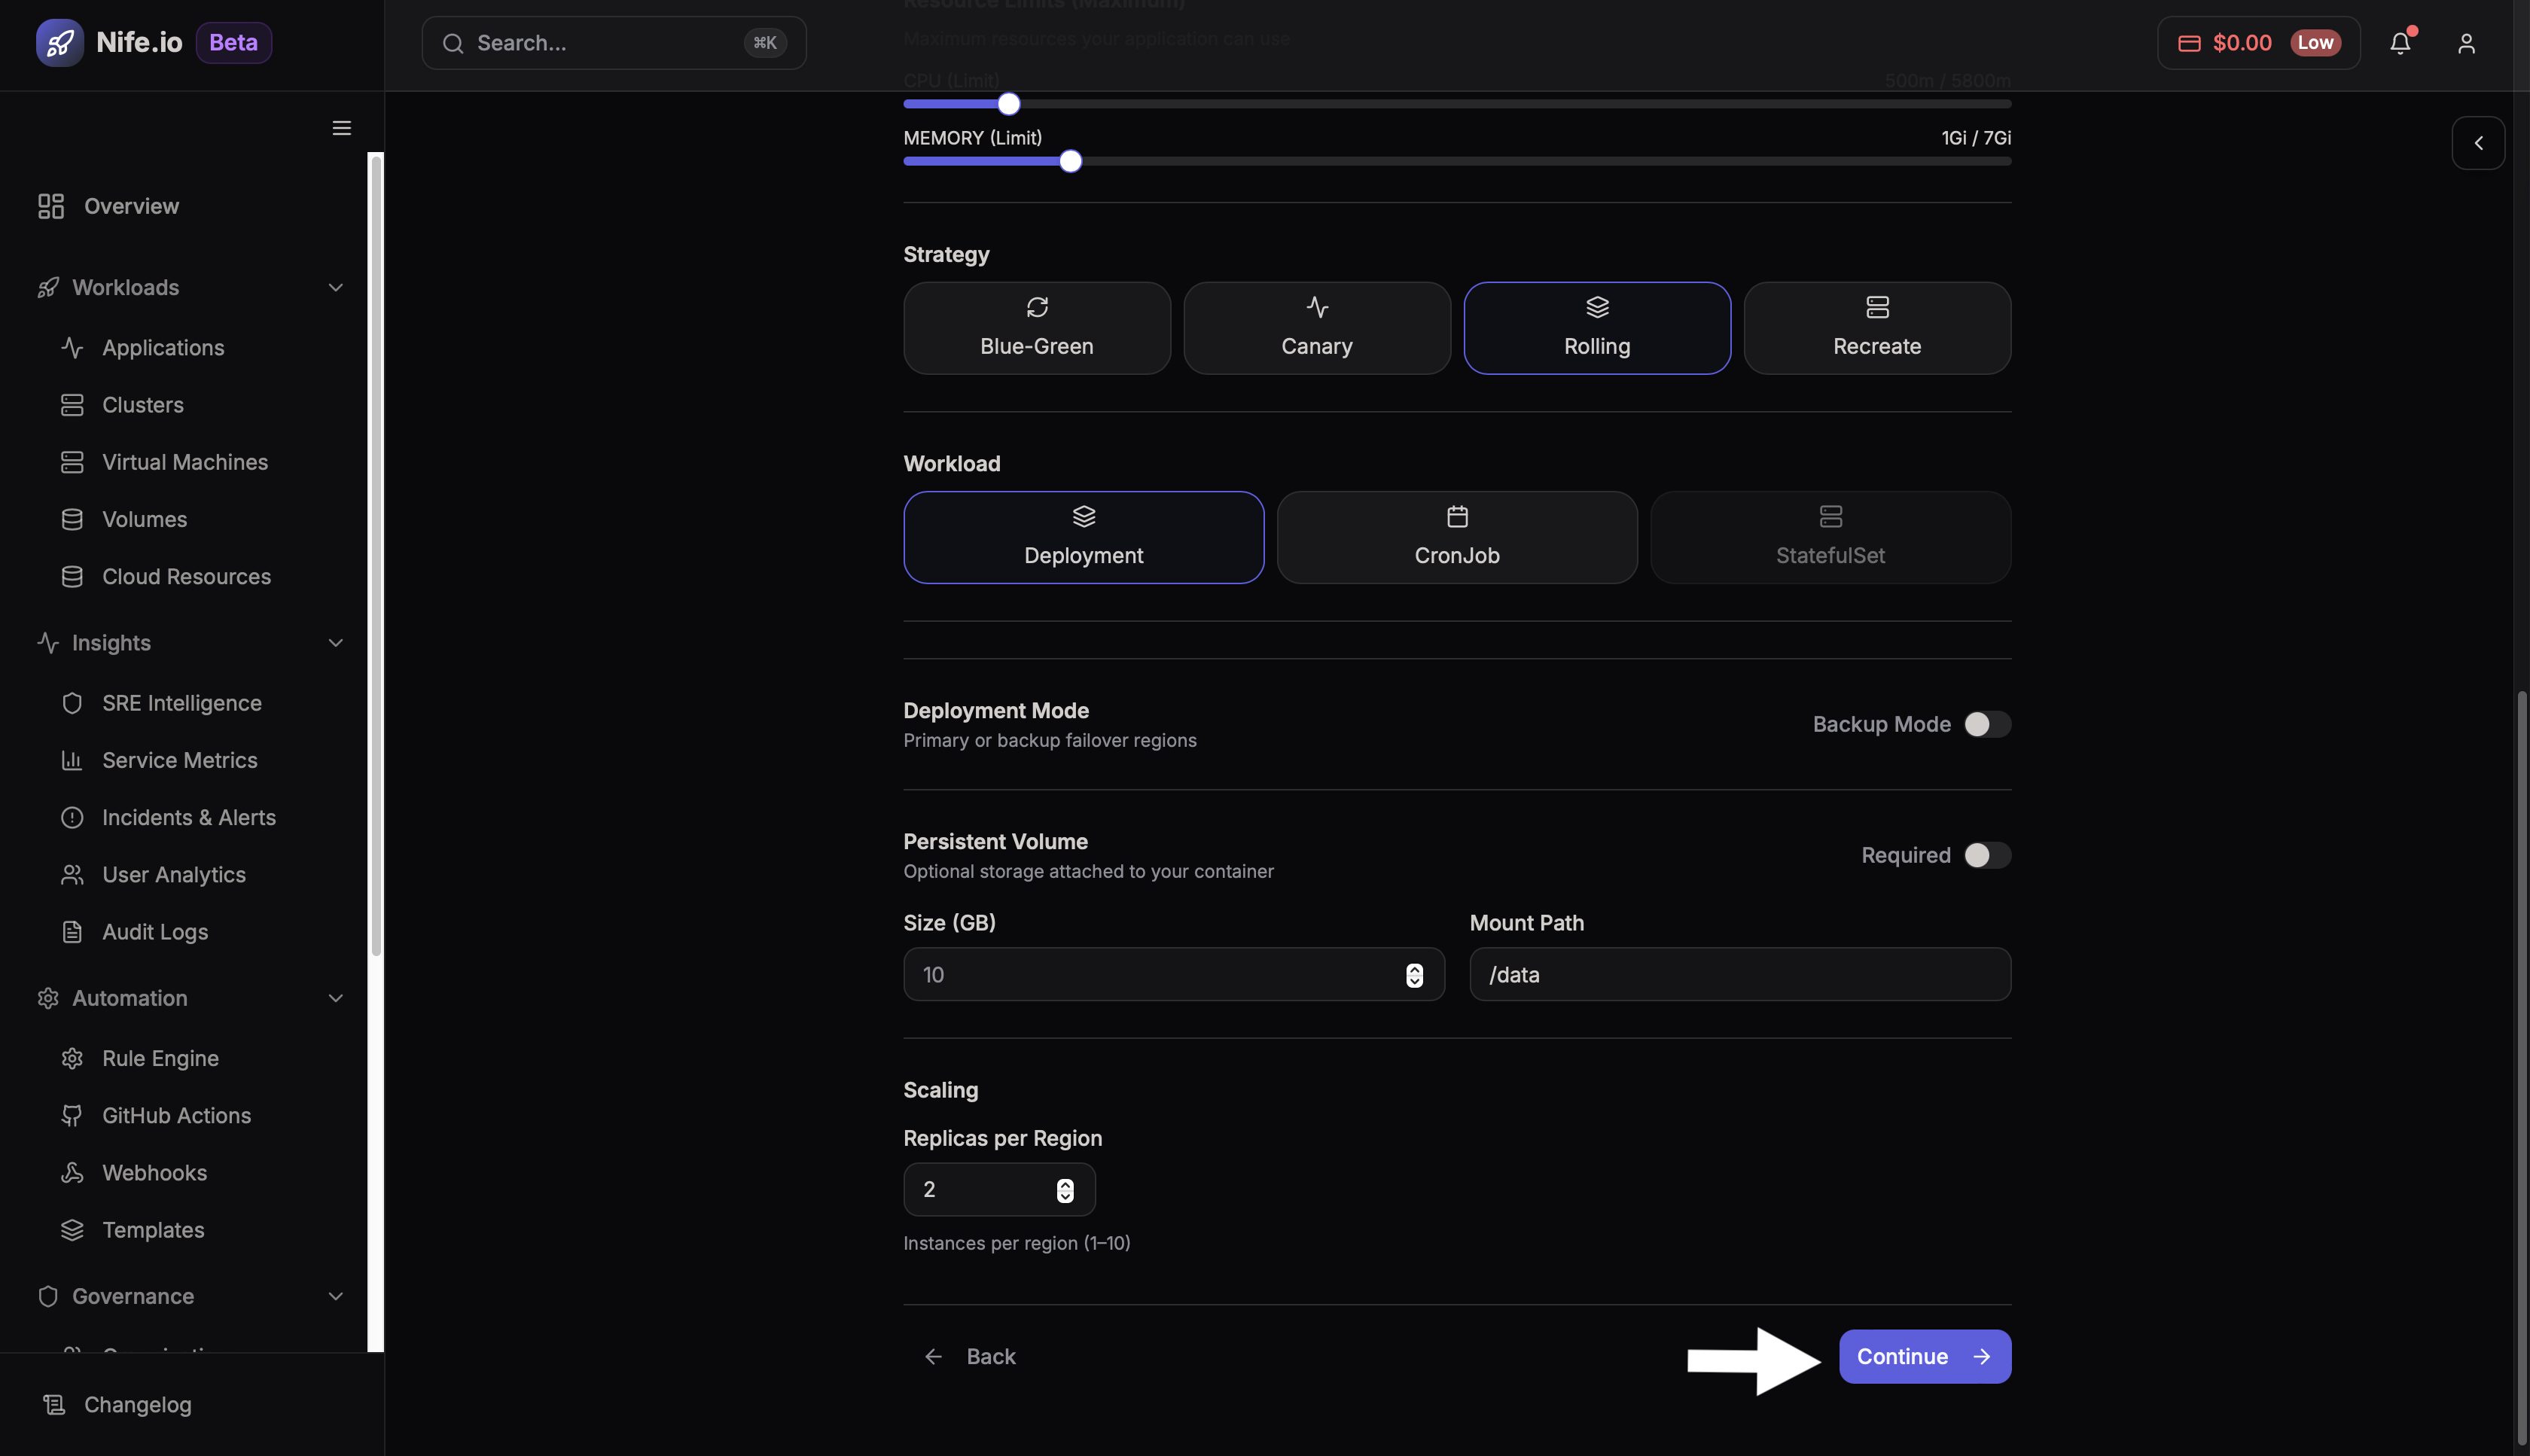
Storage & Scaling
- Deployment Mode: Enable primary or backup failover configurations.
- Persistent Volume: Configure optional storage size and its mount path.
- Scaling: Specify the number of active replicas (1–10) per region.
If you selected a template earlier, these values may be pre-filled.
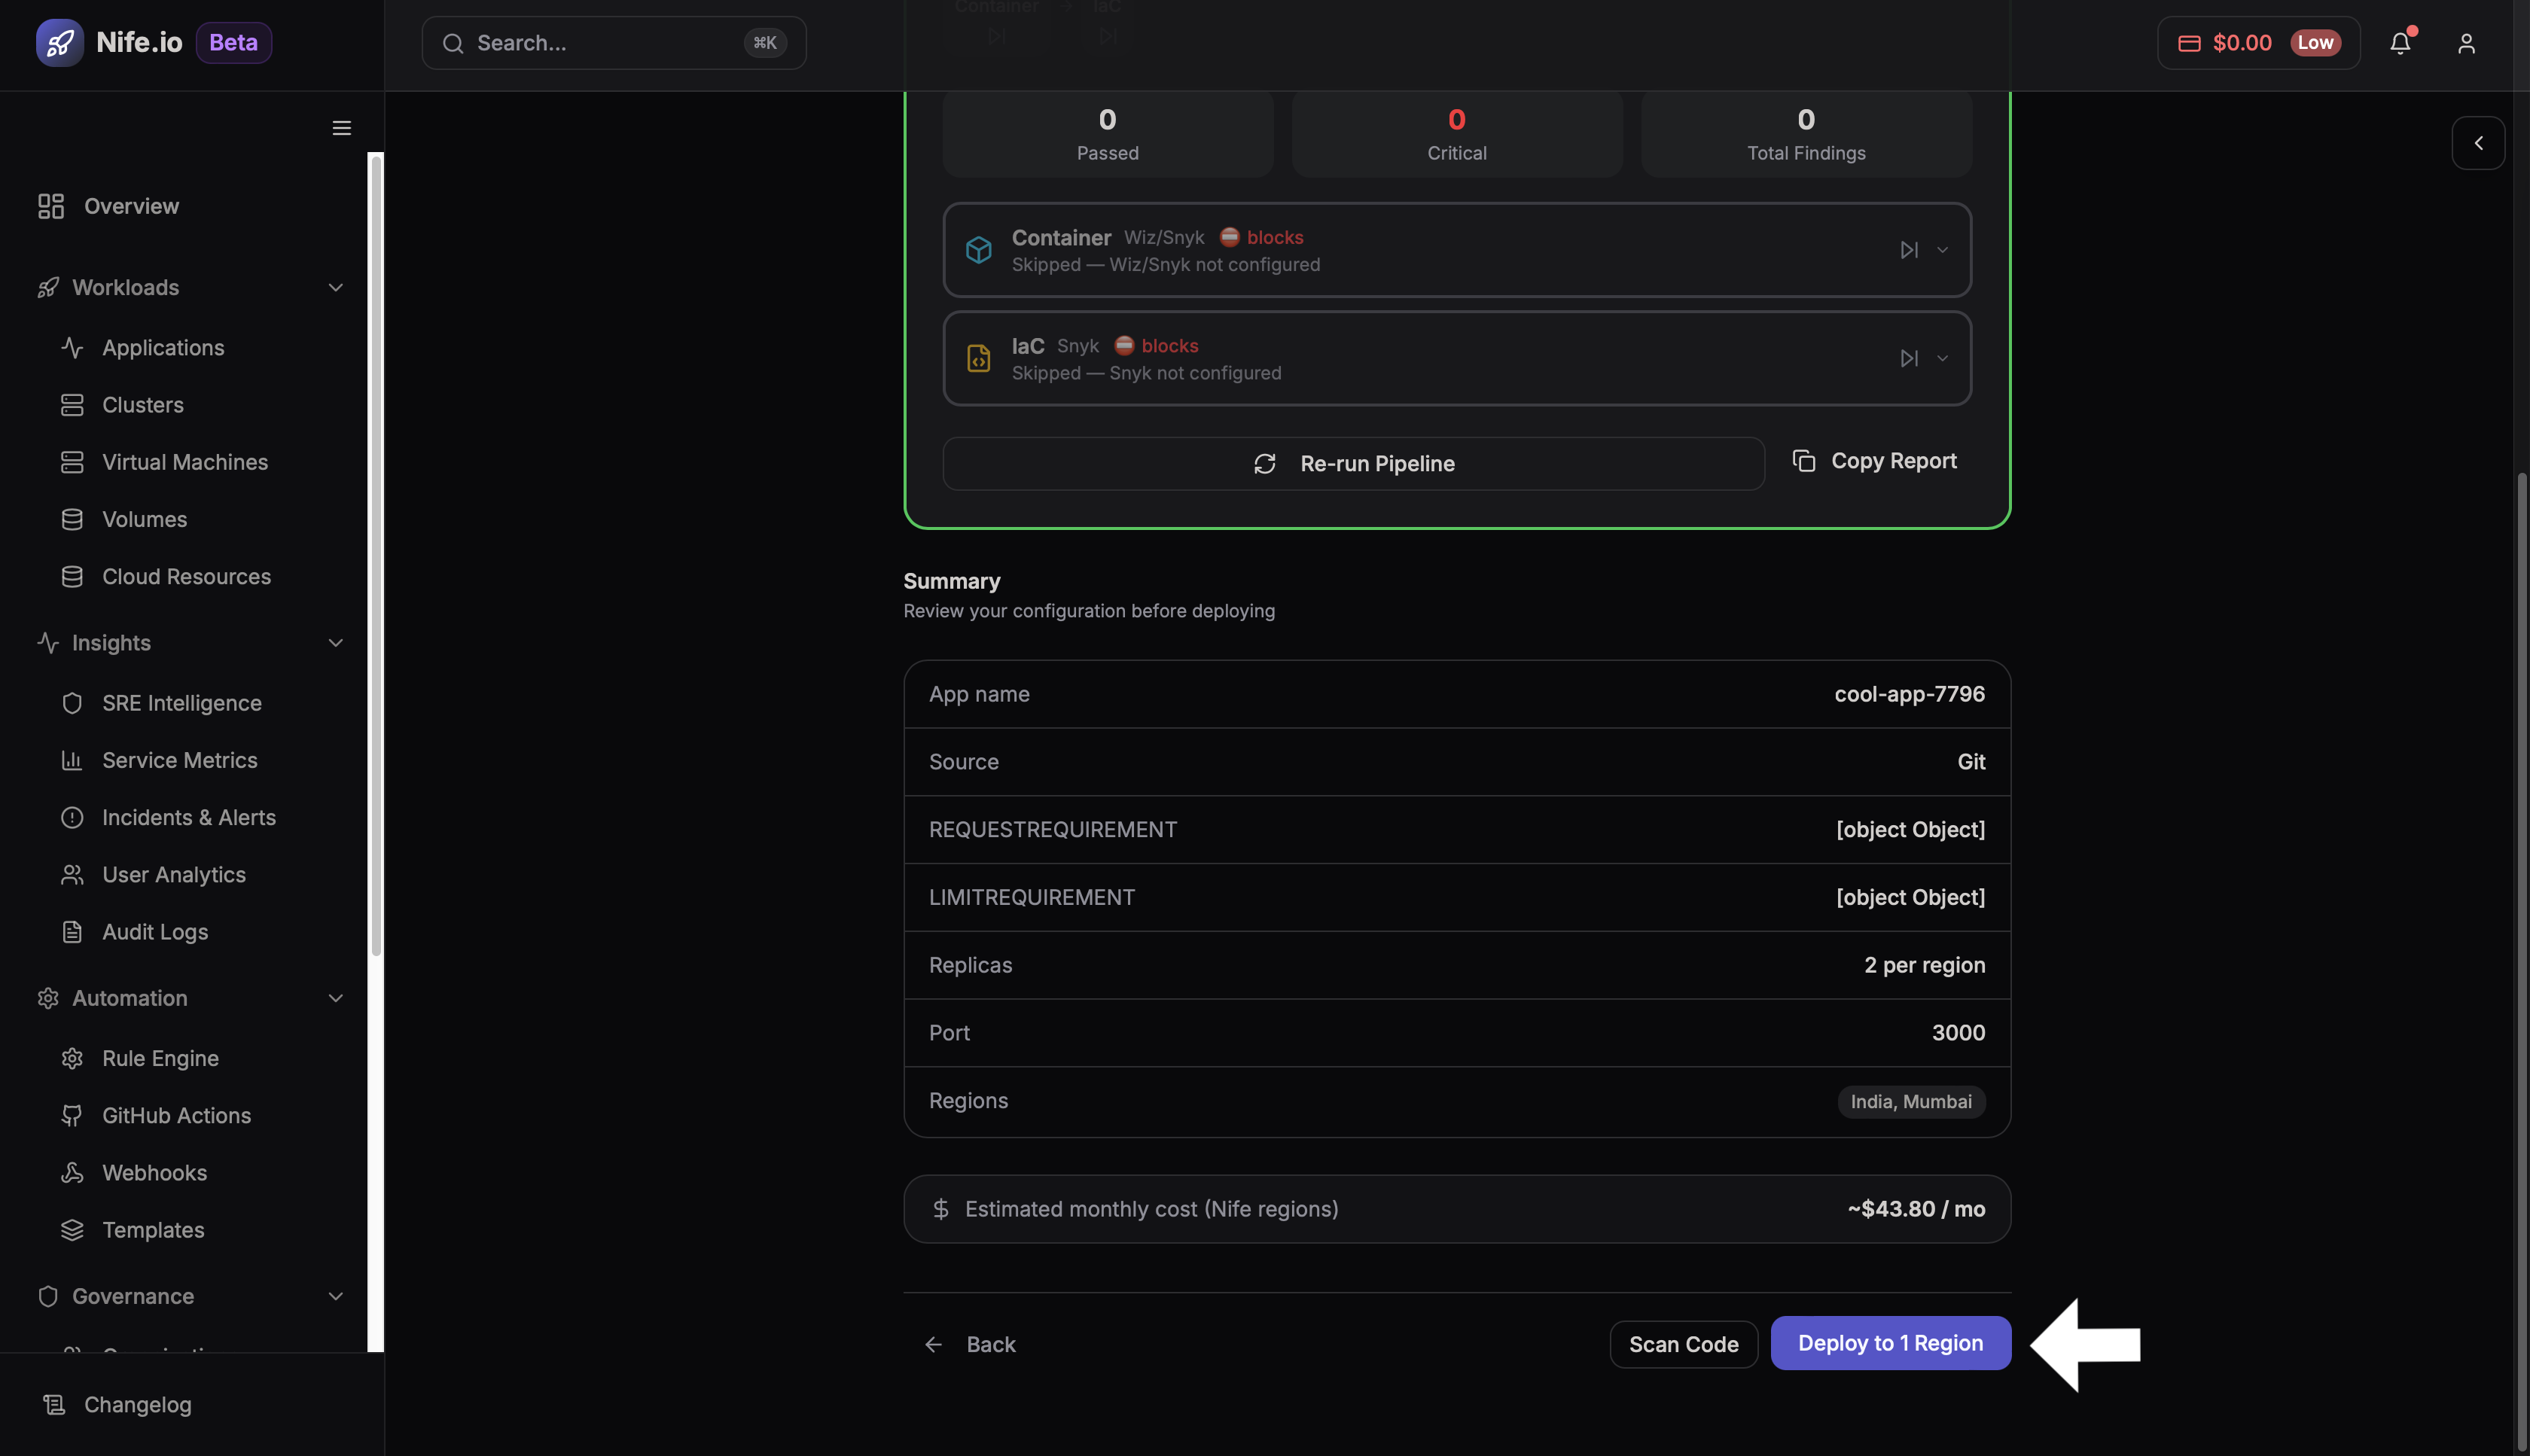
Step 10: Review Deployment Configuration
Before deployment, the platform displays a ** Pre-Deploy Security Checks** for security checks we can click on Run Security Pipeline, along with that summary page showing all previously selected options for confirmation.