Managing Kubernetes Clusters
The Clusters section allows you to connect and manage external Kubernetes clusters using the BYOC (Bring Your Own Cluster) approach.
You can connect cloud-managed clusters or standalone environments and monitor them directly from the platform.
Steps to Connect a Cluster
Step 1: Navigate to Clusters
Open the dashboard and navigate to Clusters from the sidebar.
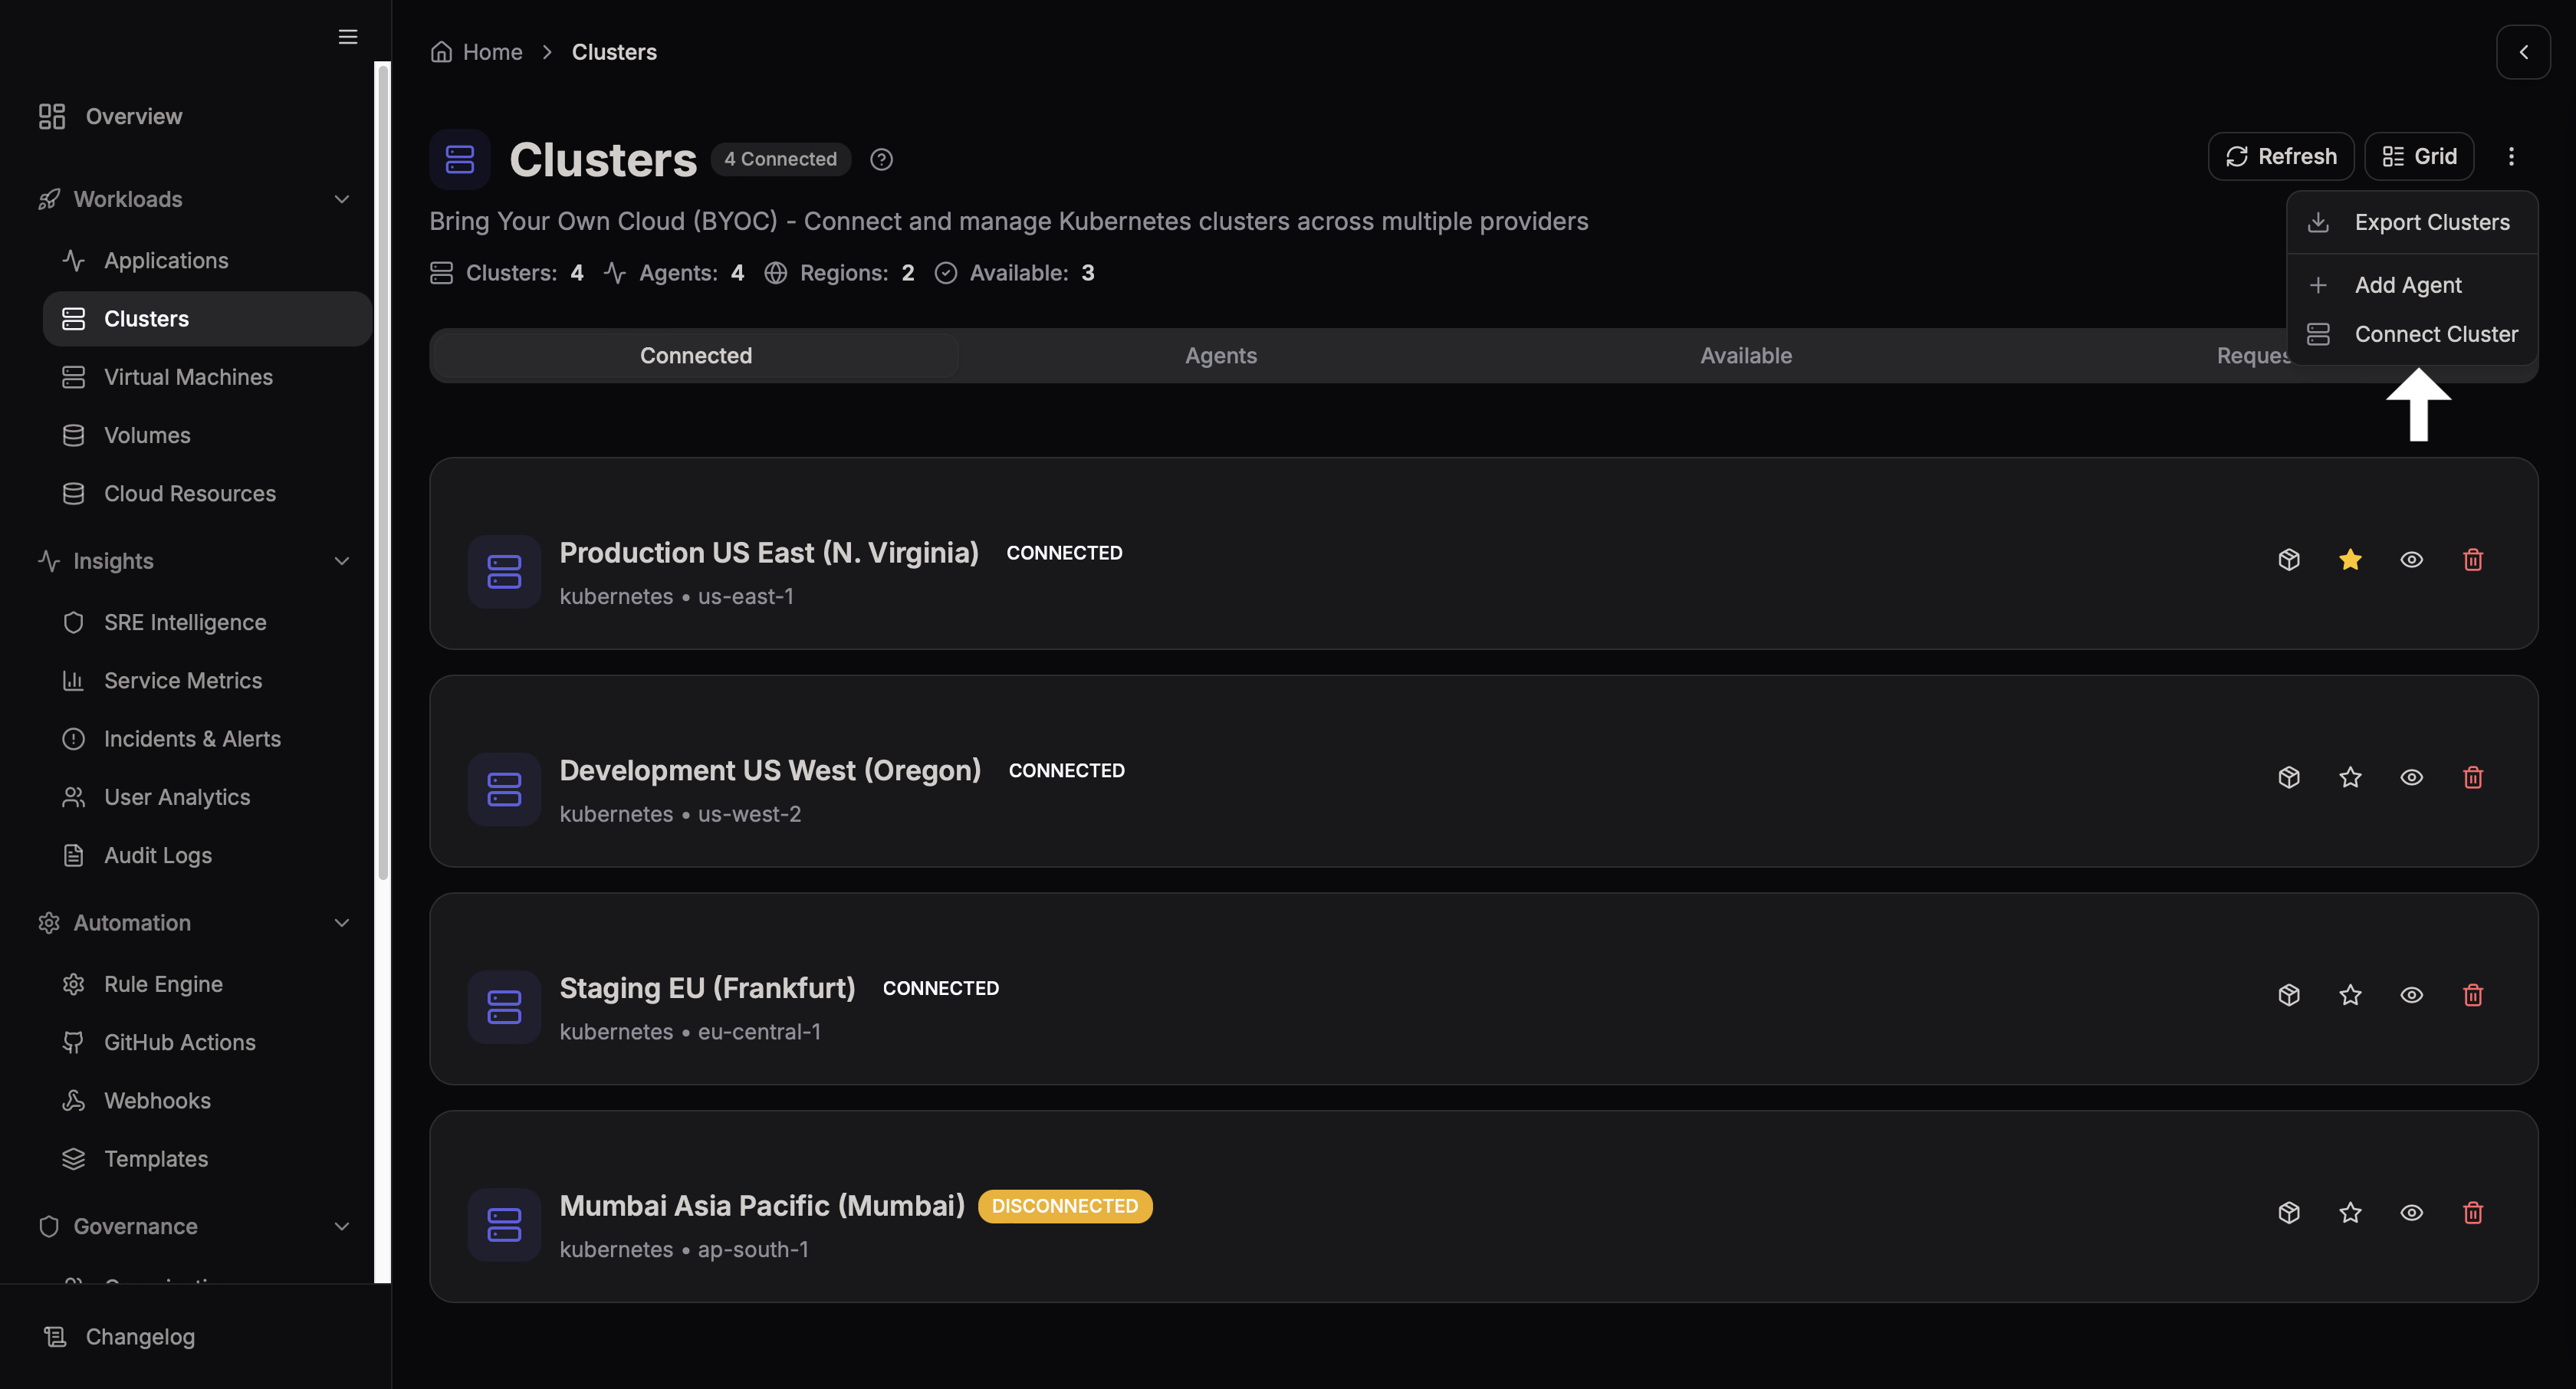
This page displays all connected clusters and provides the option to add a new one.
Step 2: Click Connect Cluster
Click the Connect Cluster button.
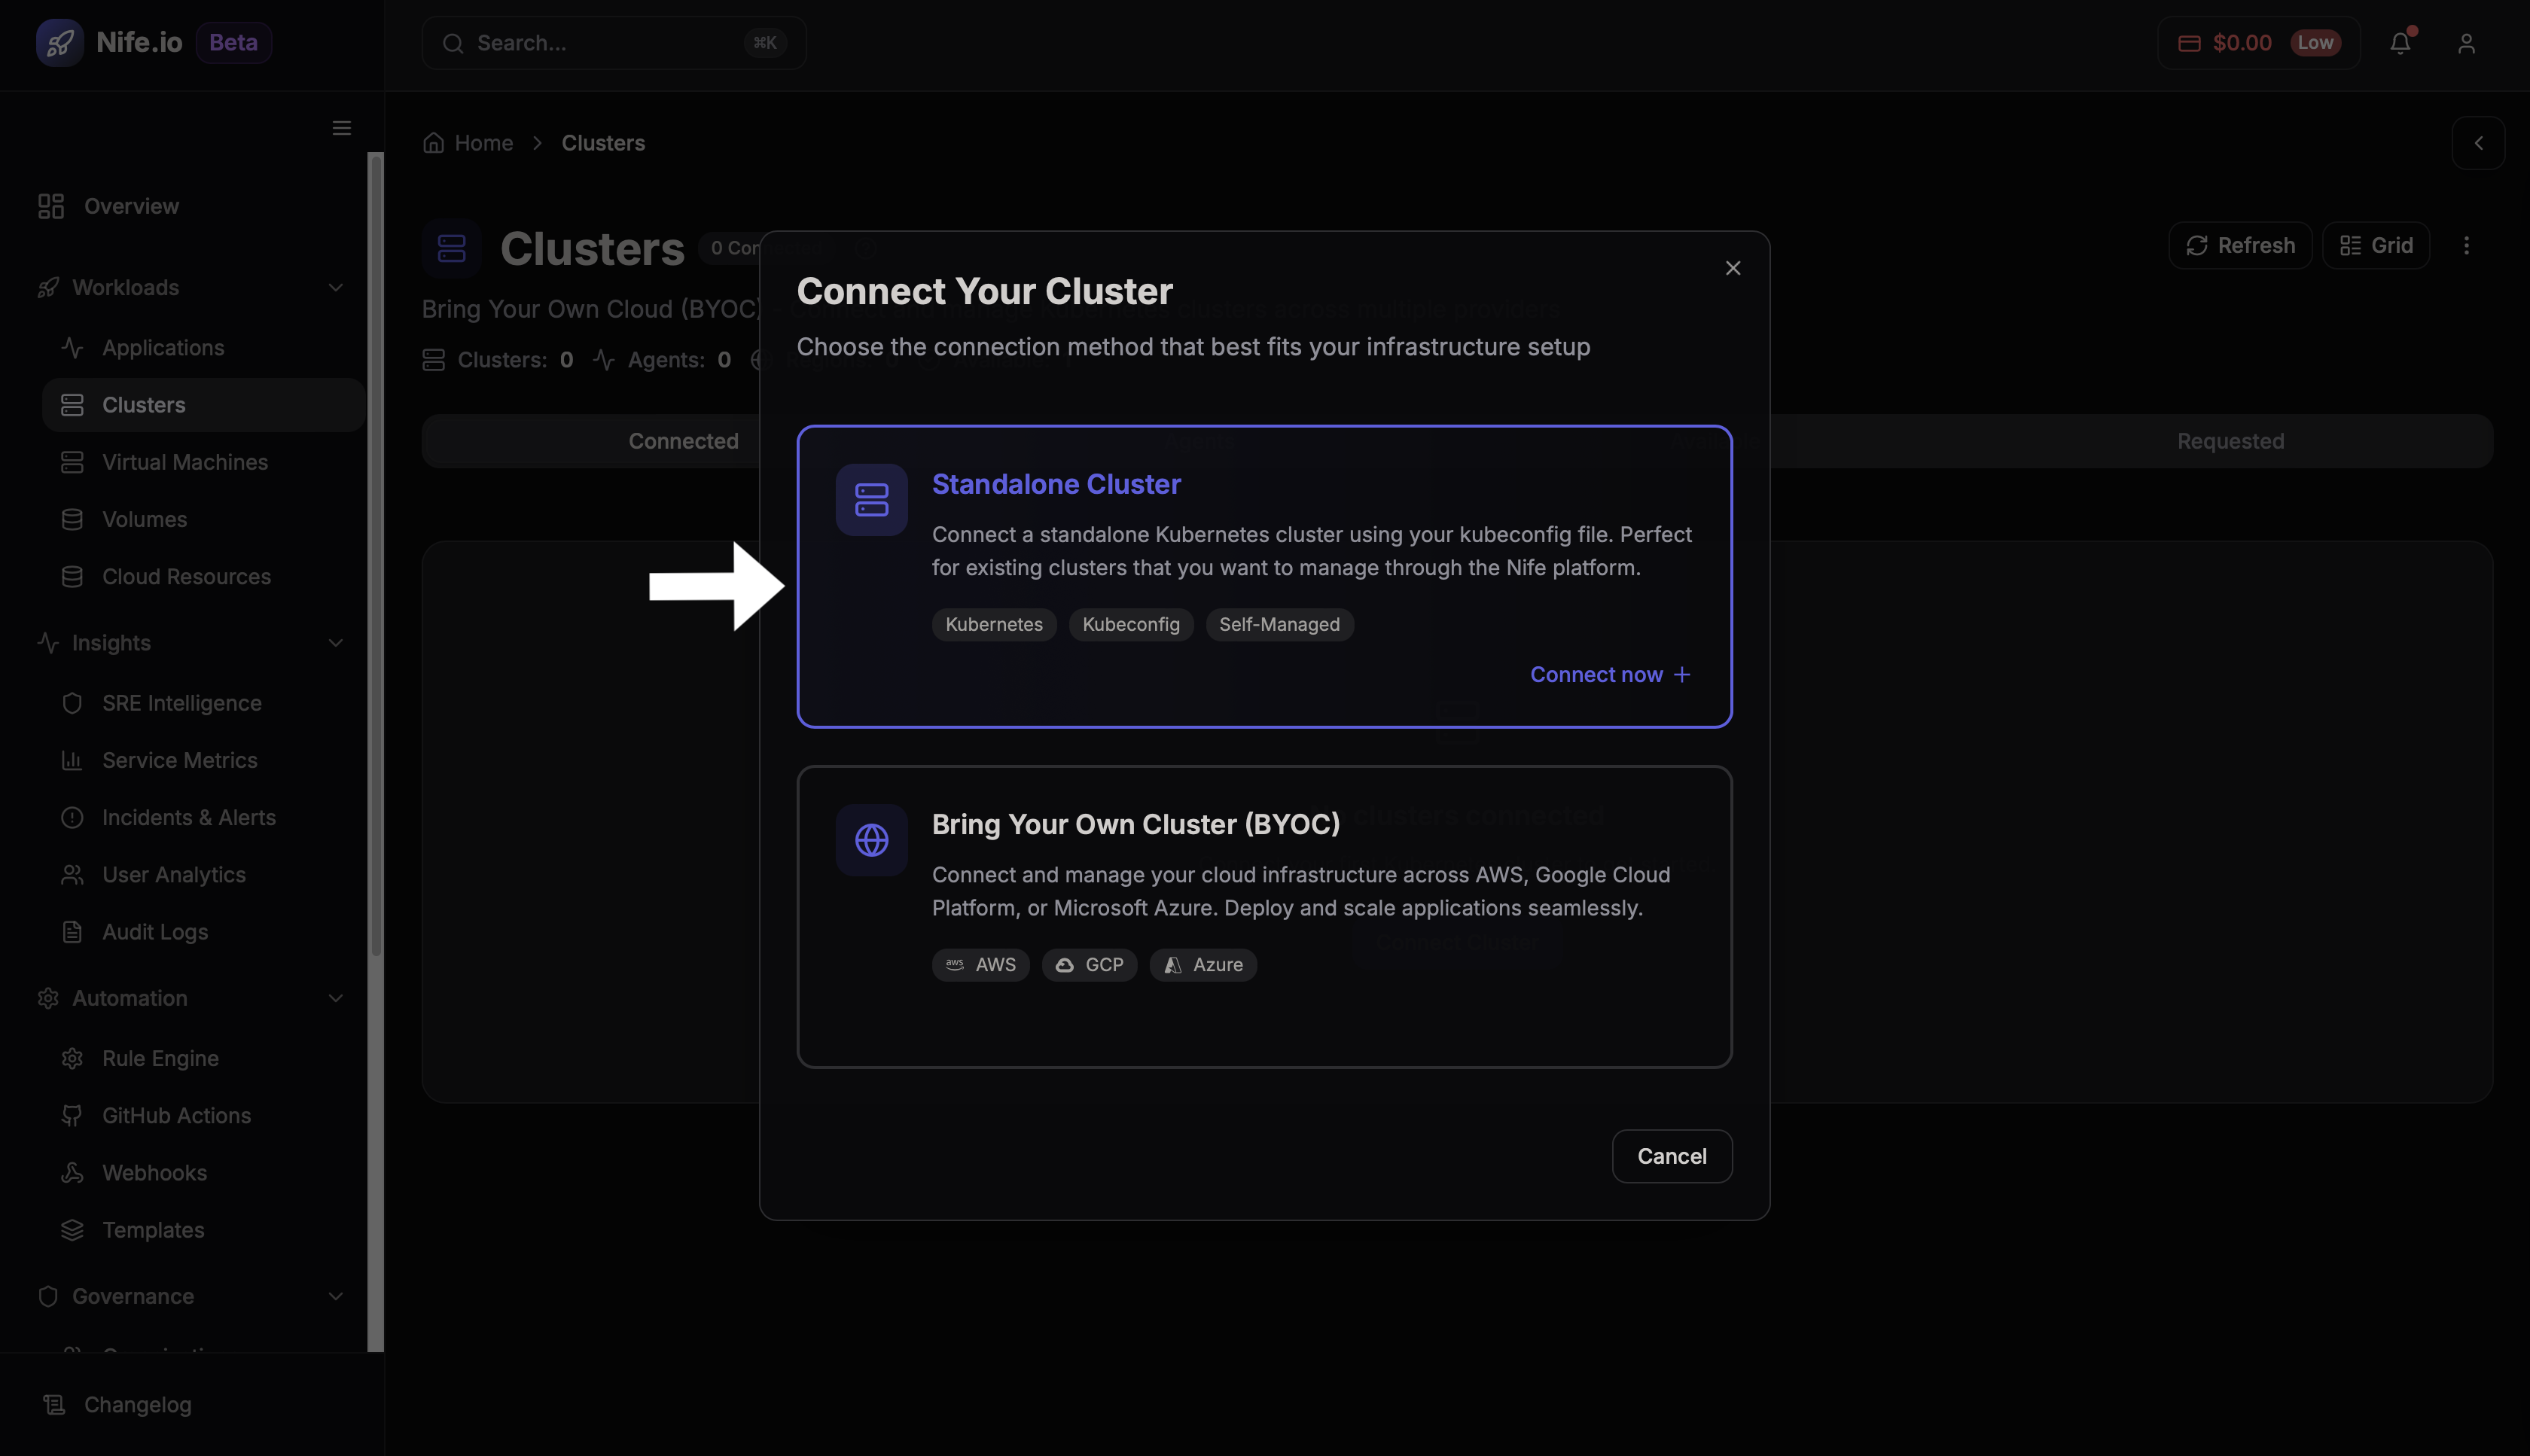
This opens the cluster connection options.
Step 3: Select Connection Method
You can choose one of the following methods:
- Cloud Providers (AWS, GCP, Azure)
- Standalone Server
Each option redirects to a different setup workflow.
Cluster Connection via AWS (Cloud Provider)
Step 4: Select AWS Provider
Choose AWS from the available options.
This redirects to the AWS cluster configuration flow.
Step 5: Enter Cluster Configuration
Provide the required details such as:
- Cluster Name
- Region
- Credentials
These details define how the cluster will be identified and accessed.
Step 6: Setup Integration
Configure permissions and integration settings.
This step ensures secure communication between the platform and your AWS cluster.
Step 7: Configure Advanced Settings
Adjust optional advanced configurations if required.
This may include networking or scaling-related settings.
Step 8: Review Configuration
Review all the provided details before final submission.
Step 9: Connect Cluster
Click Connect / Create to complete the process.
The cluster will be added to the Clusters dashboard.
Cluster Connection via Standalone Server
Step 4: Select Standalone Server
Choose the Standalone Server option.
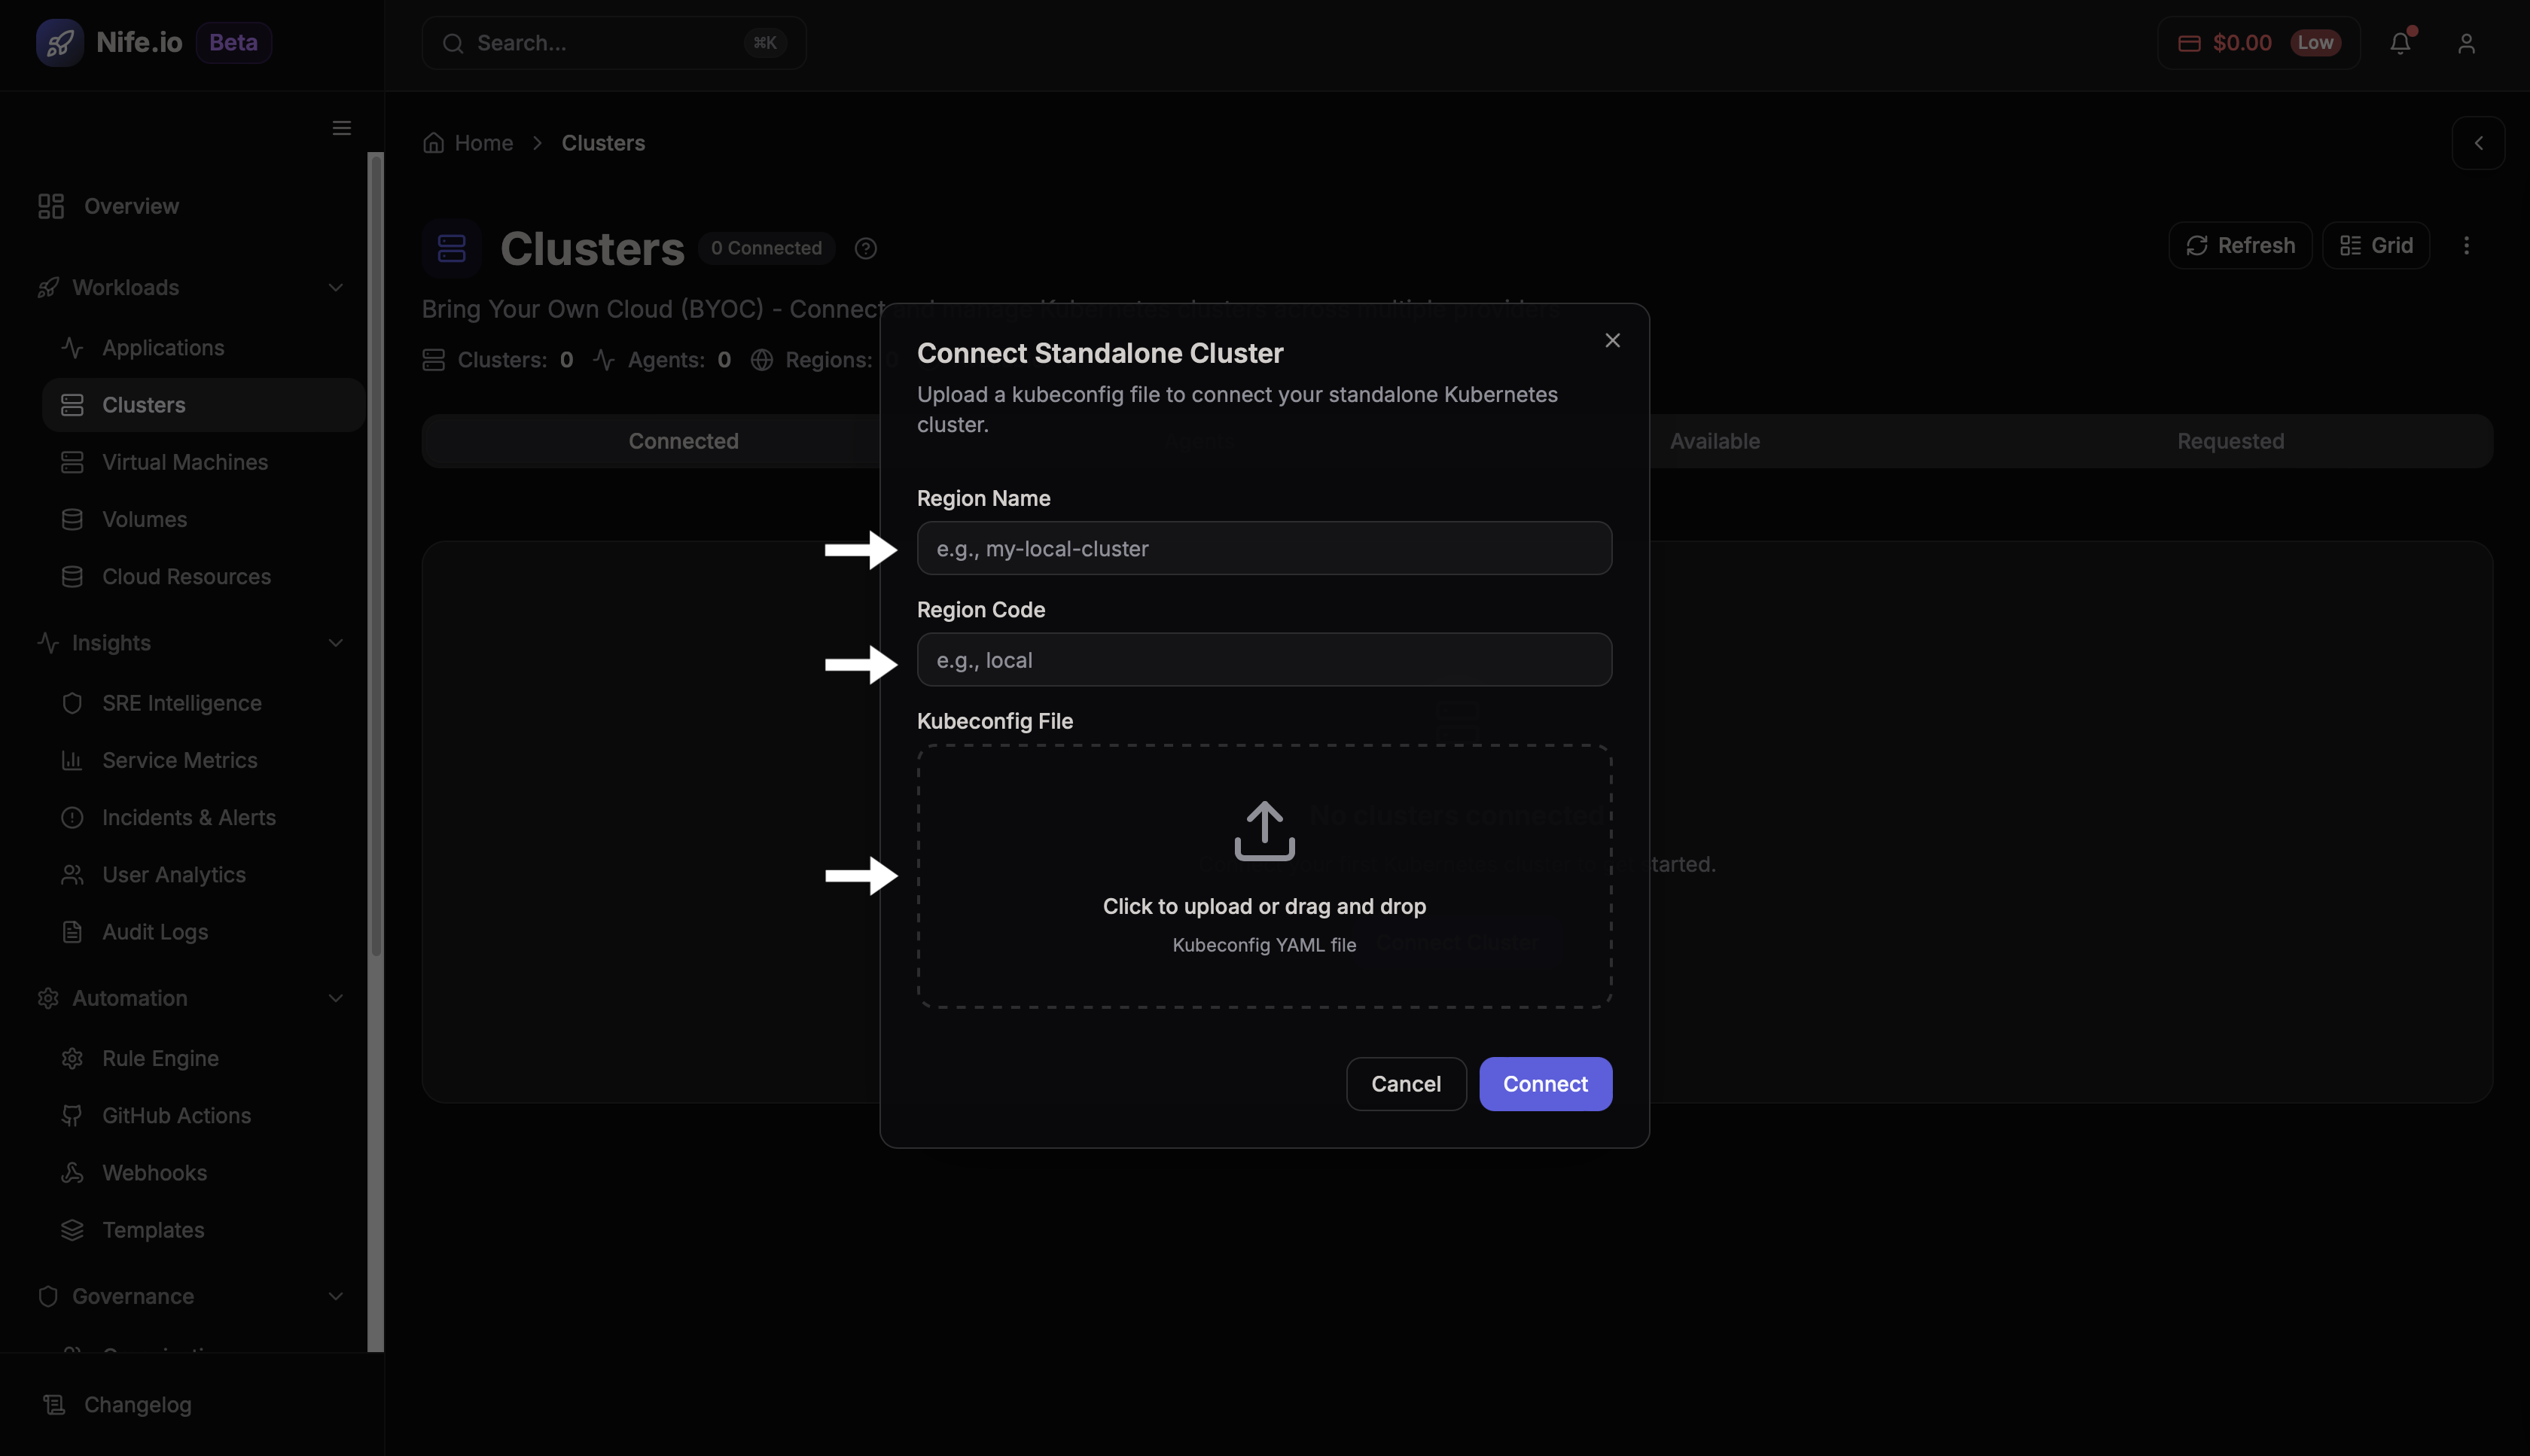
Step 5: Upload Kubeconfig File
Upload your Kubernetes kubeconfig file.
This file contains authentication and access details required to connect the cluster.
Step 6: Follow Setup Instructions
Follow the instructions provided on the screen.
- Execute required commands (if any)
- Ensure cluster accessibility
After completion, the cluster will be connected and listed in the dashboard.
Steps to View Cluster Details
Step 1: Open Cluster
From the Clusters page, select a connected cluster.
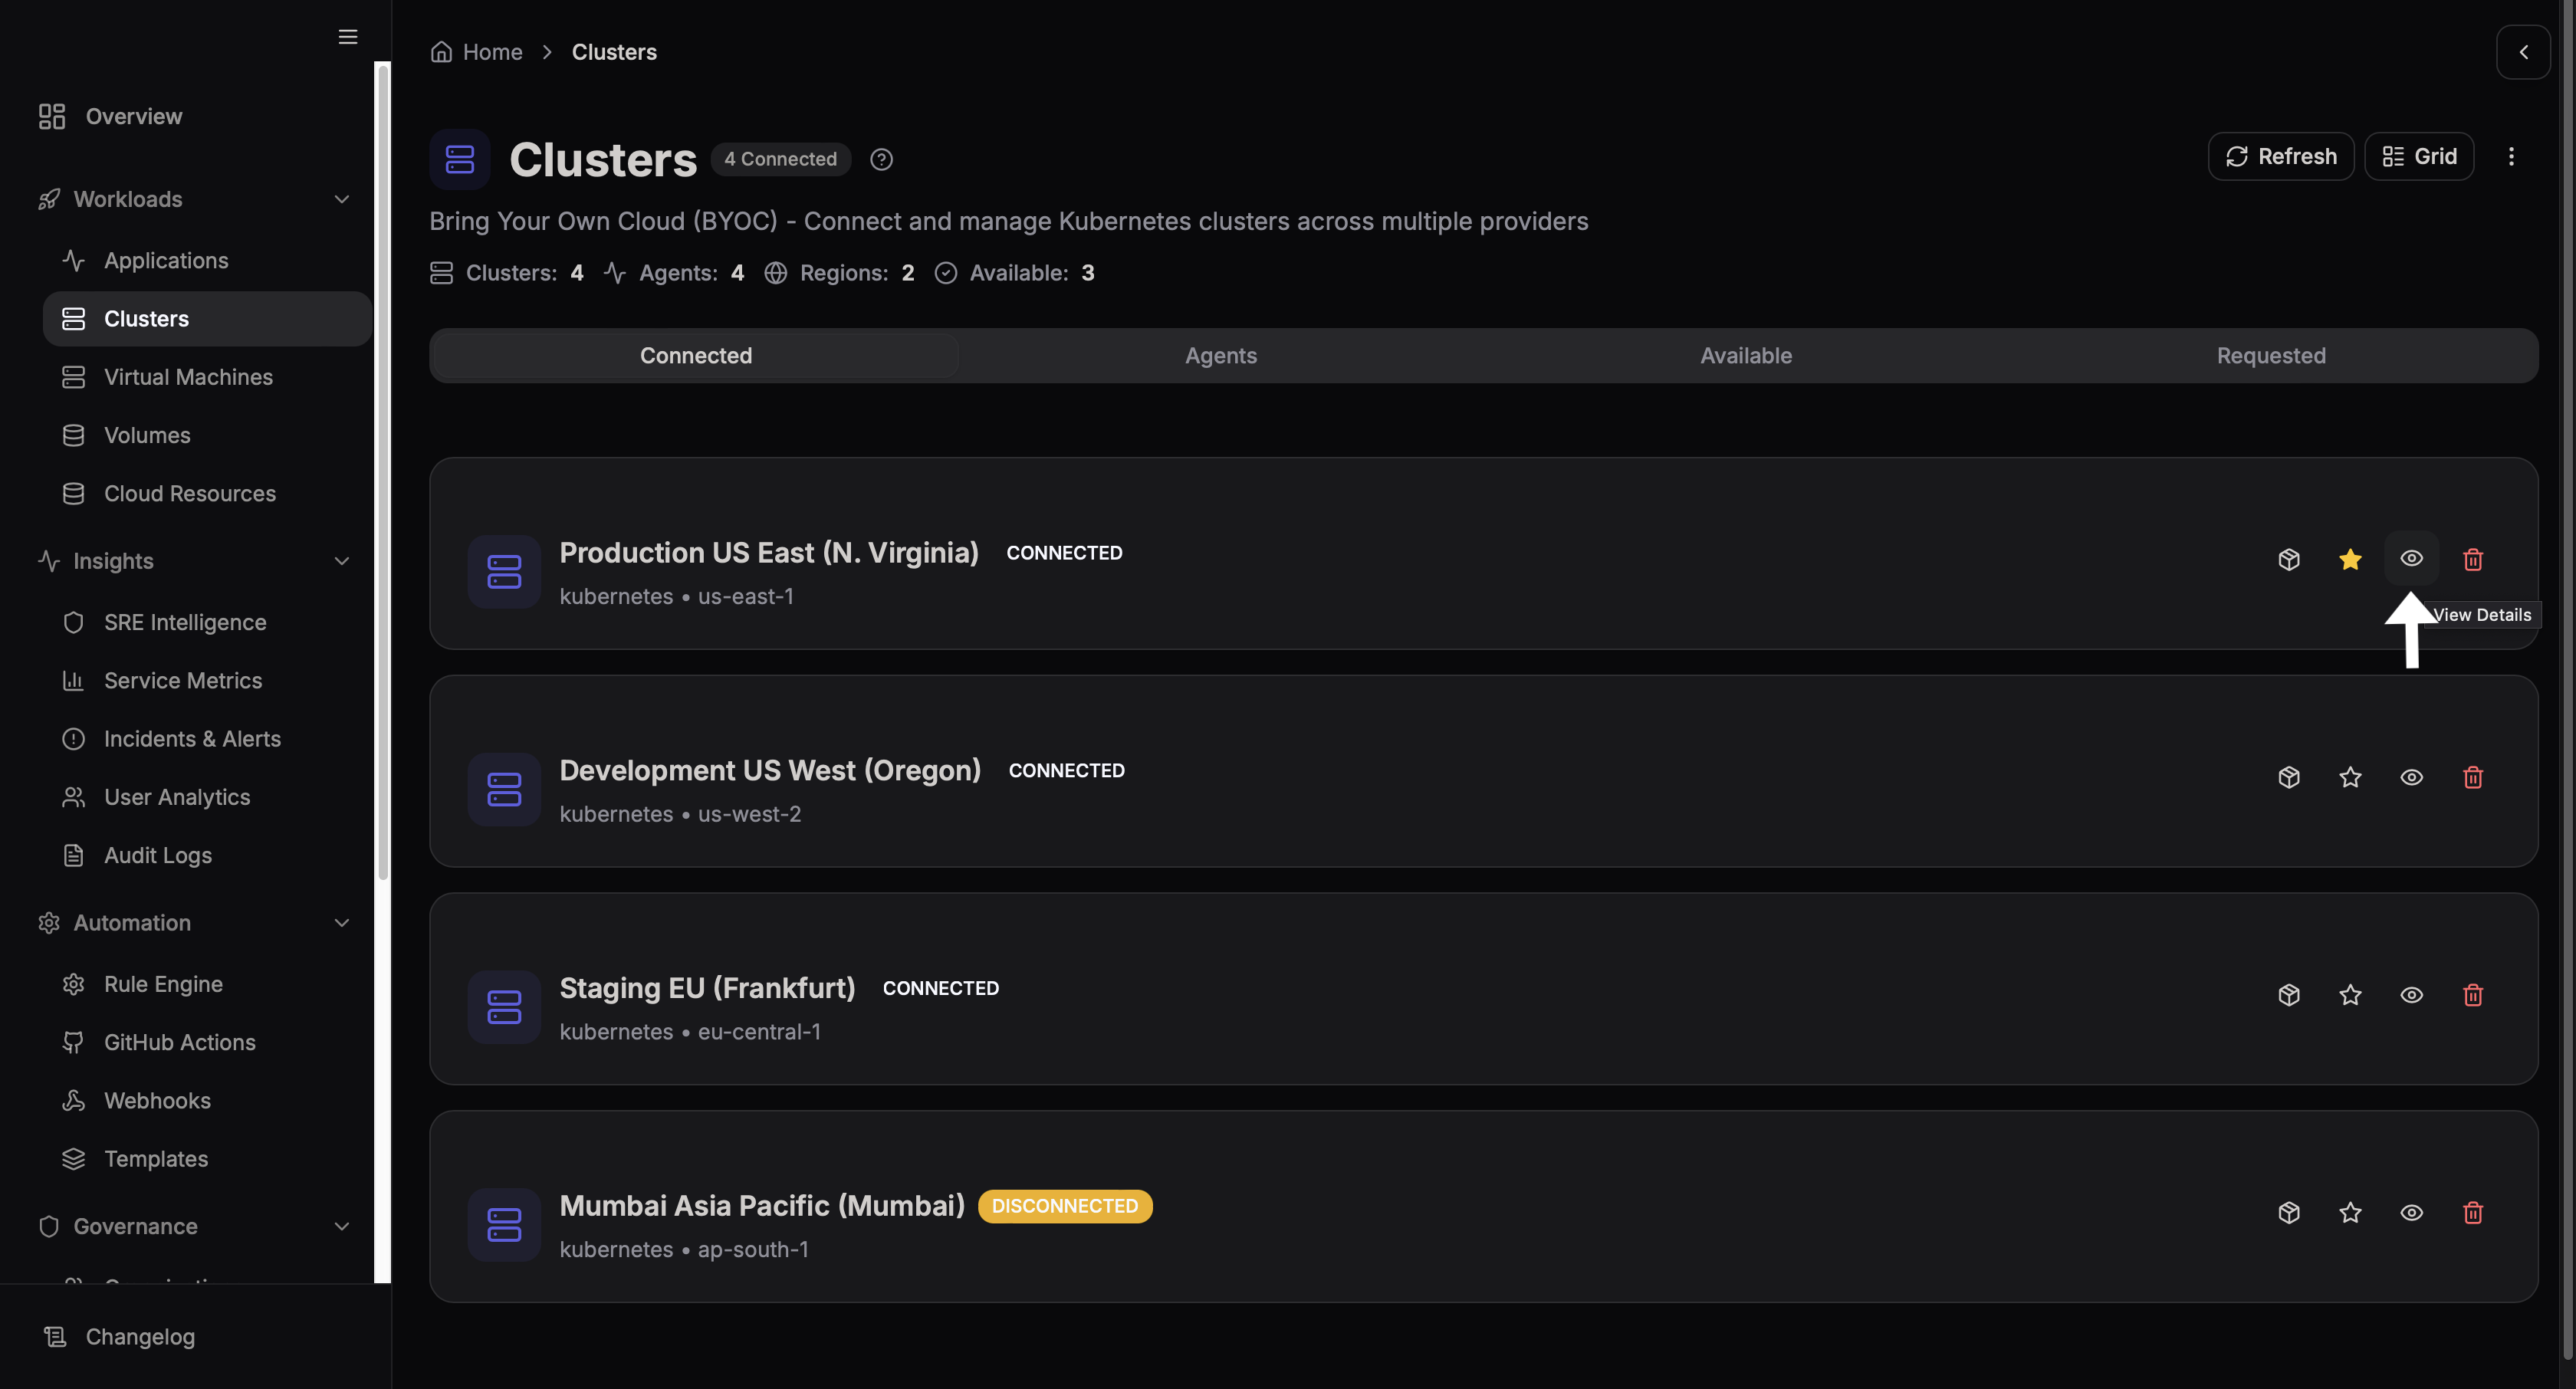
This opens the cluster details dashboard.
Cluster Dashboards Overview
The cluster details page contains multiple sections for monitoring and management.
Node Dashboard
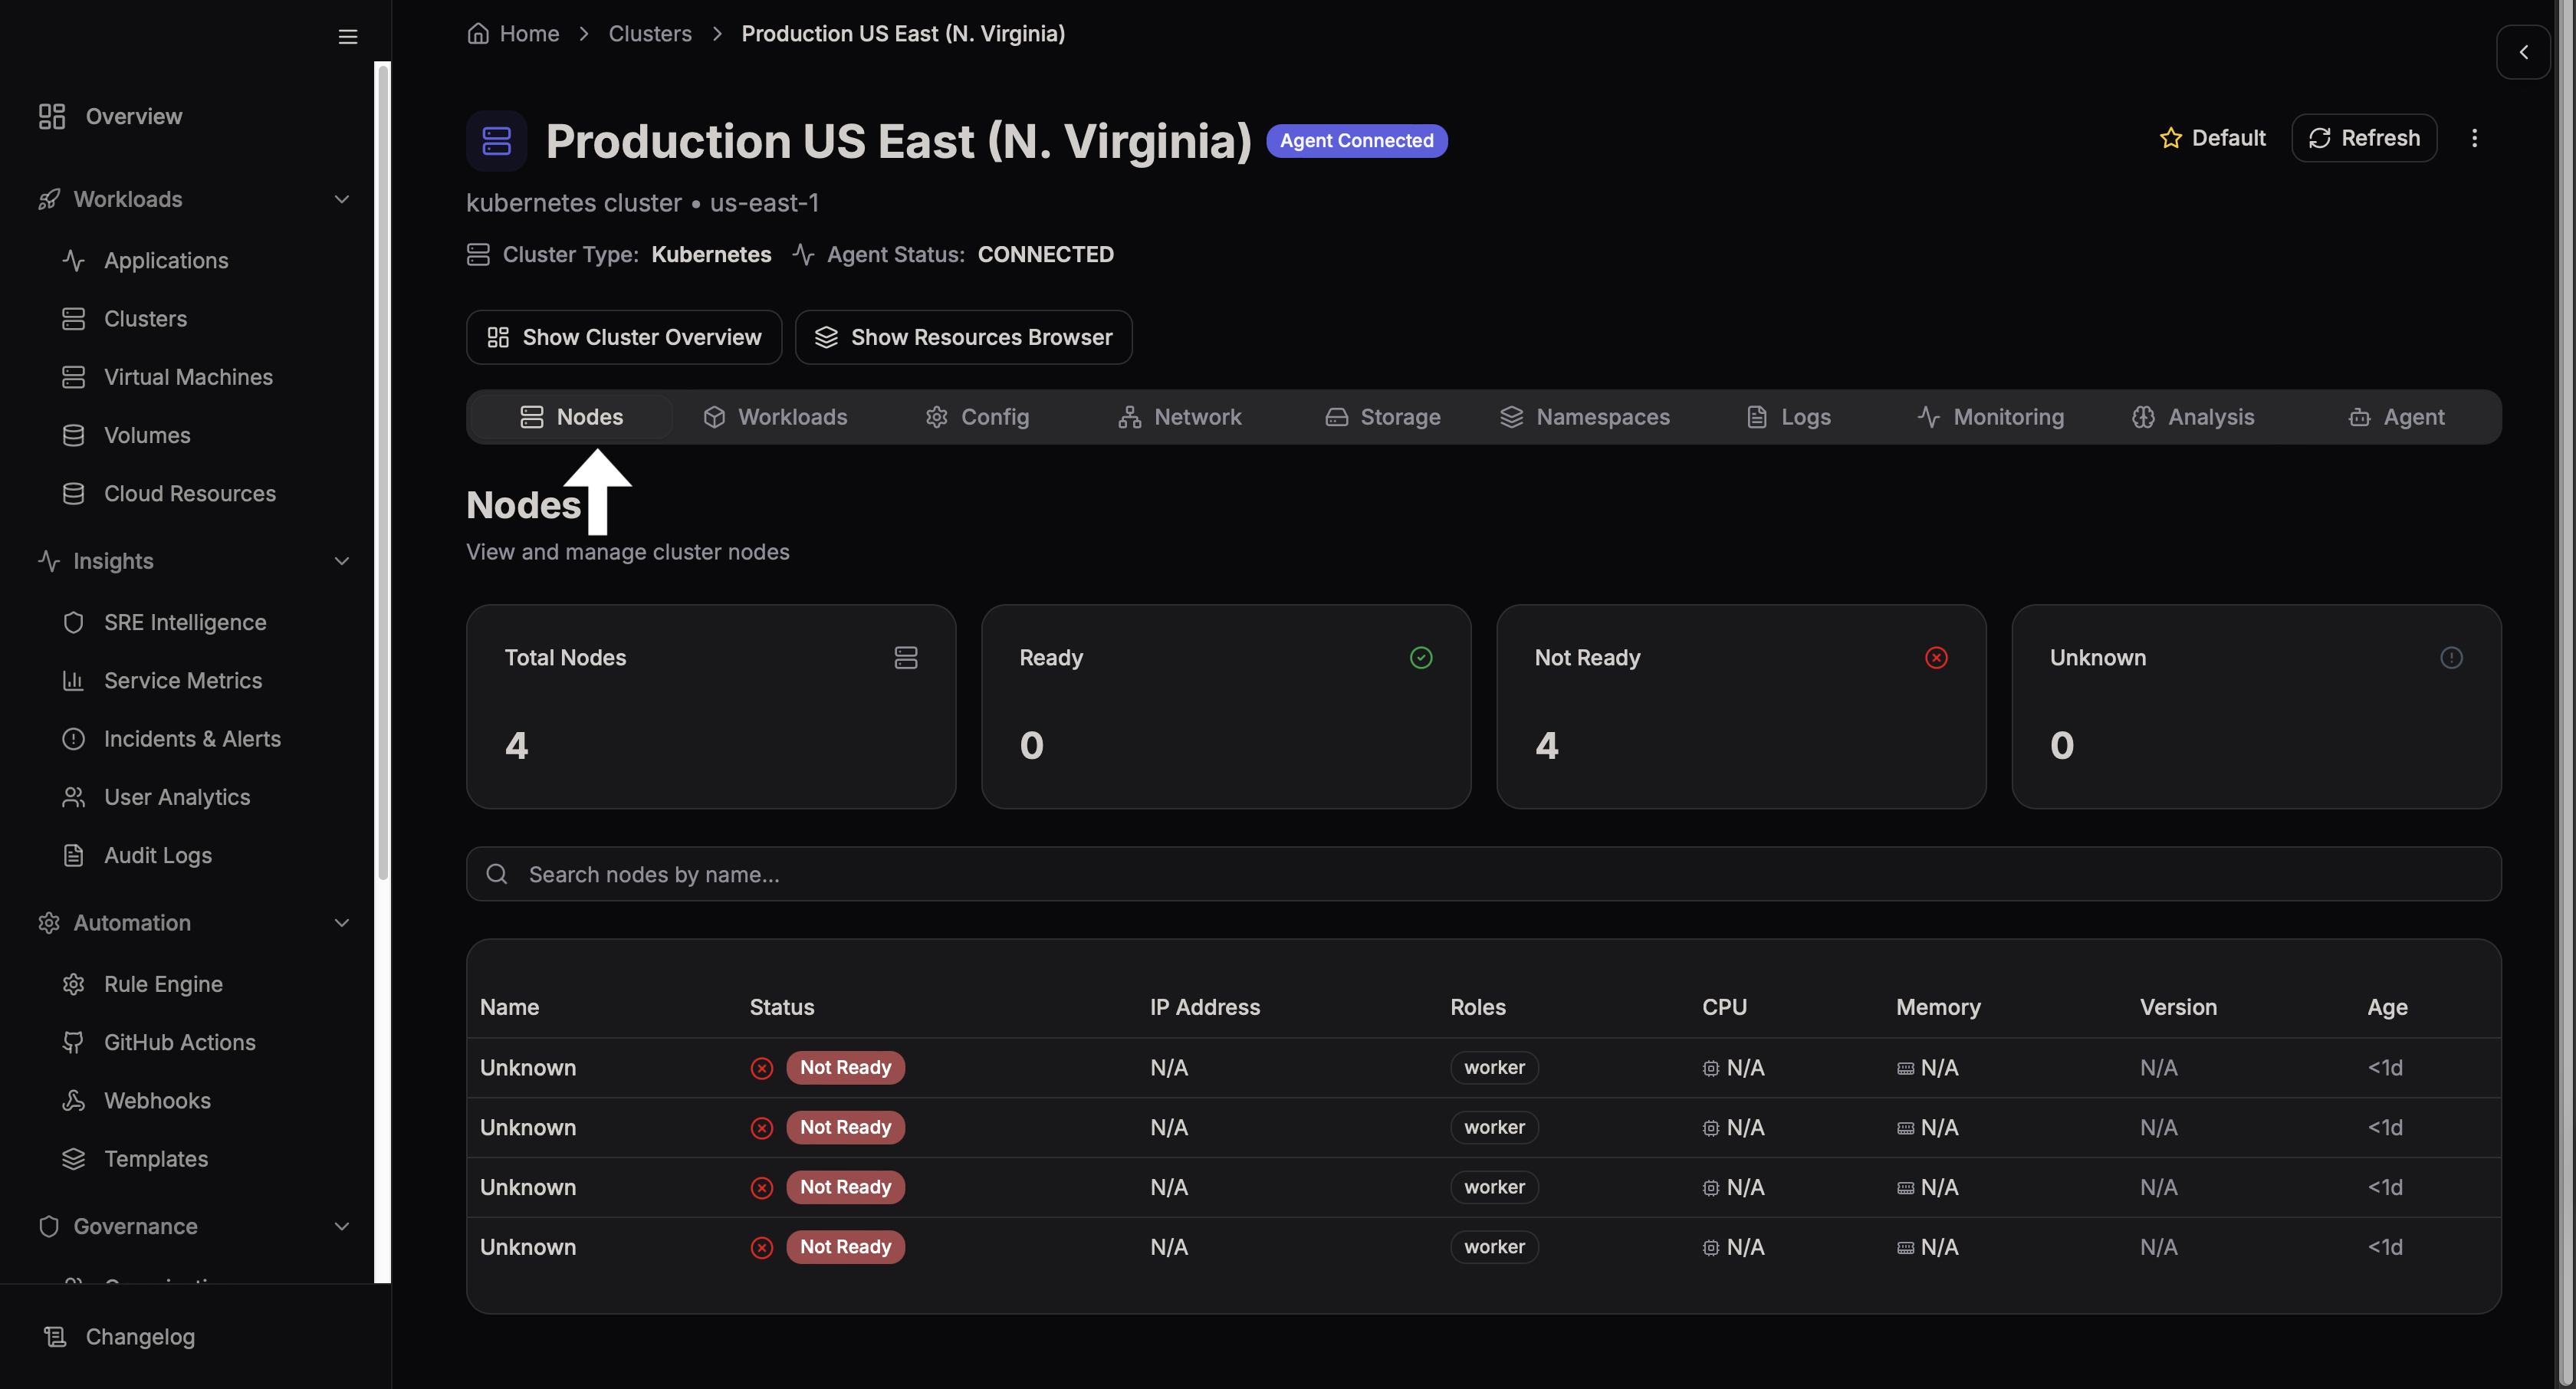
Displays all nodes along with their status and resource usage.
Workload Dashboard
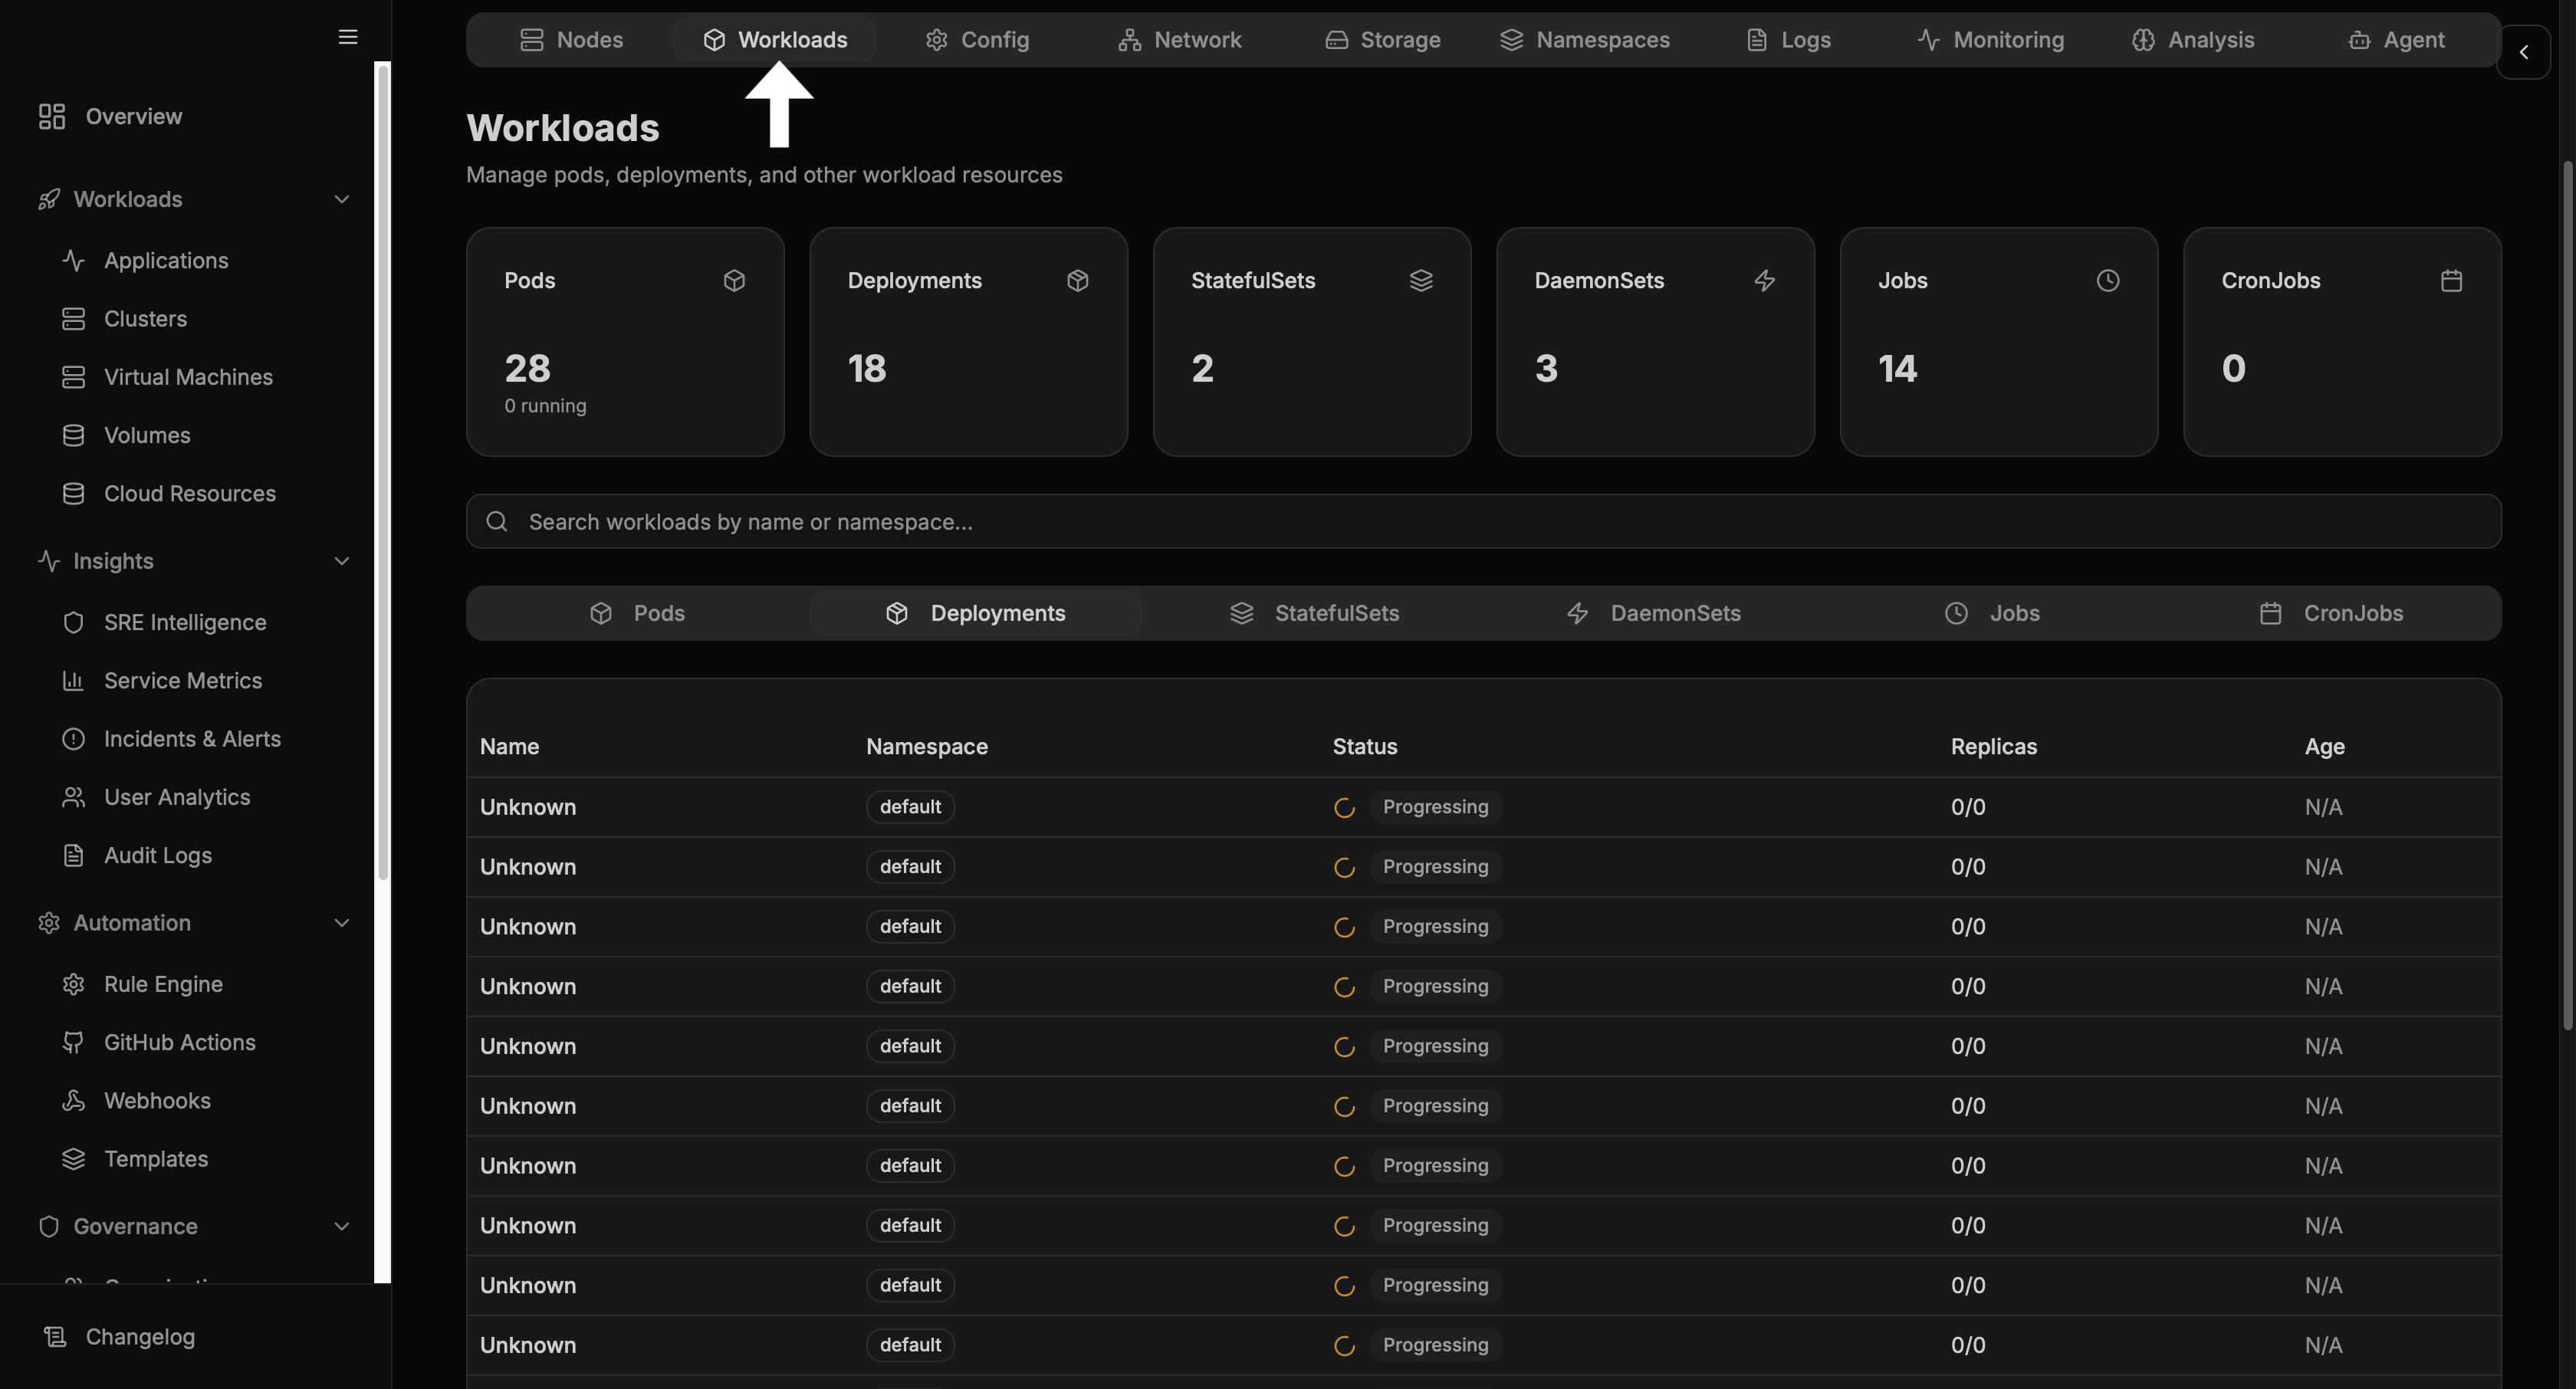
Shows deployed applications and running workloads.
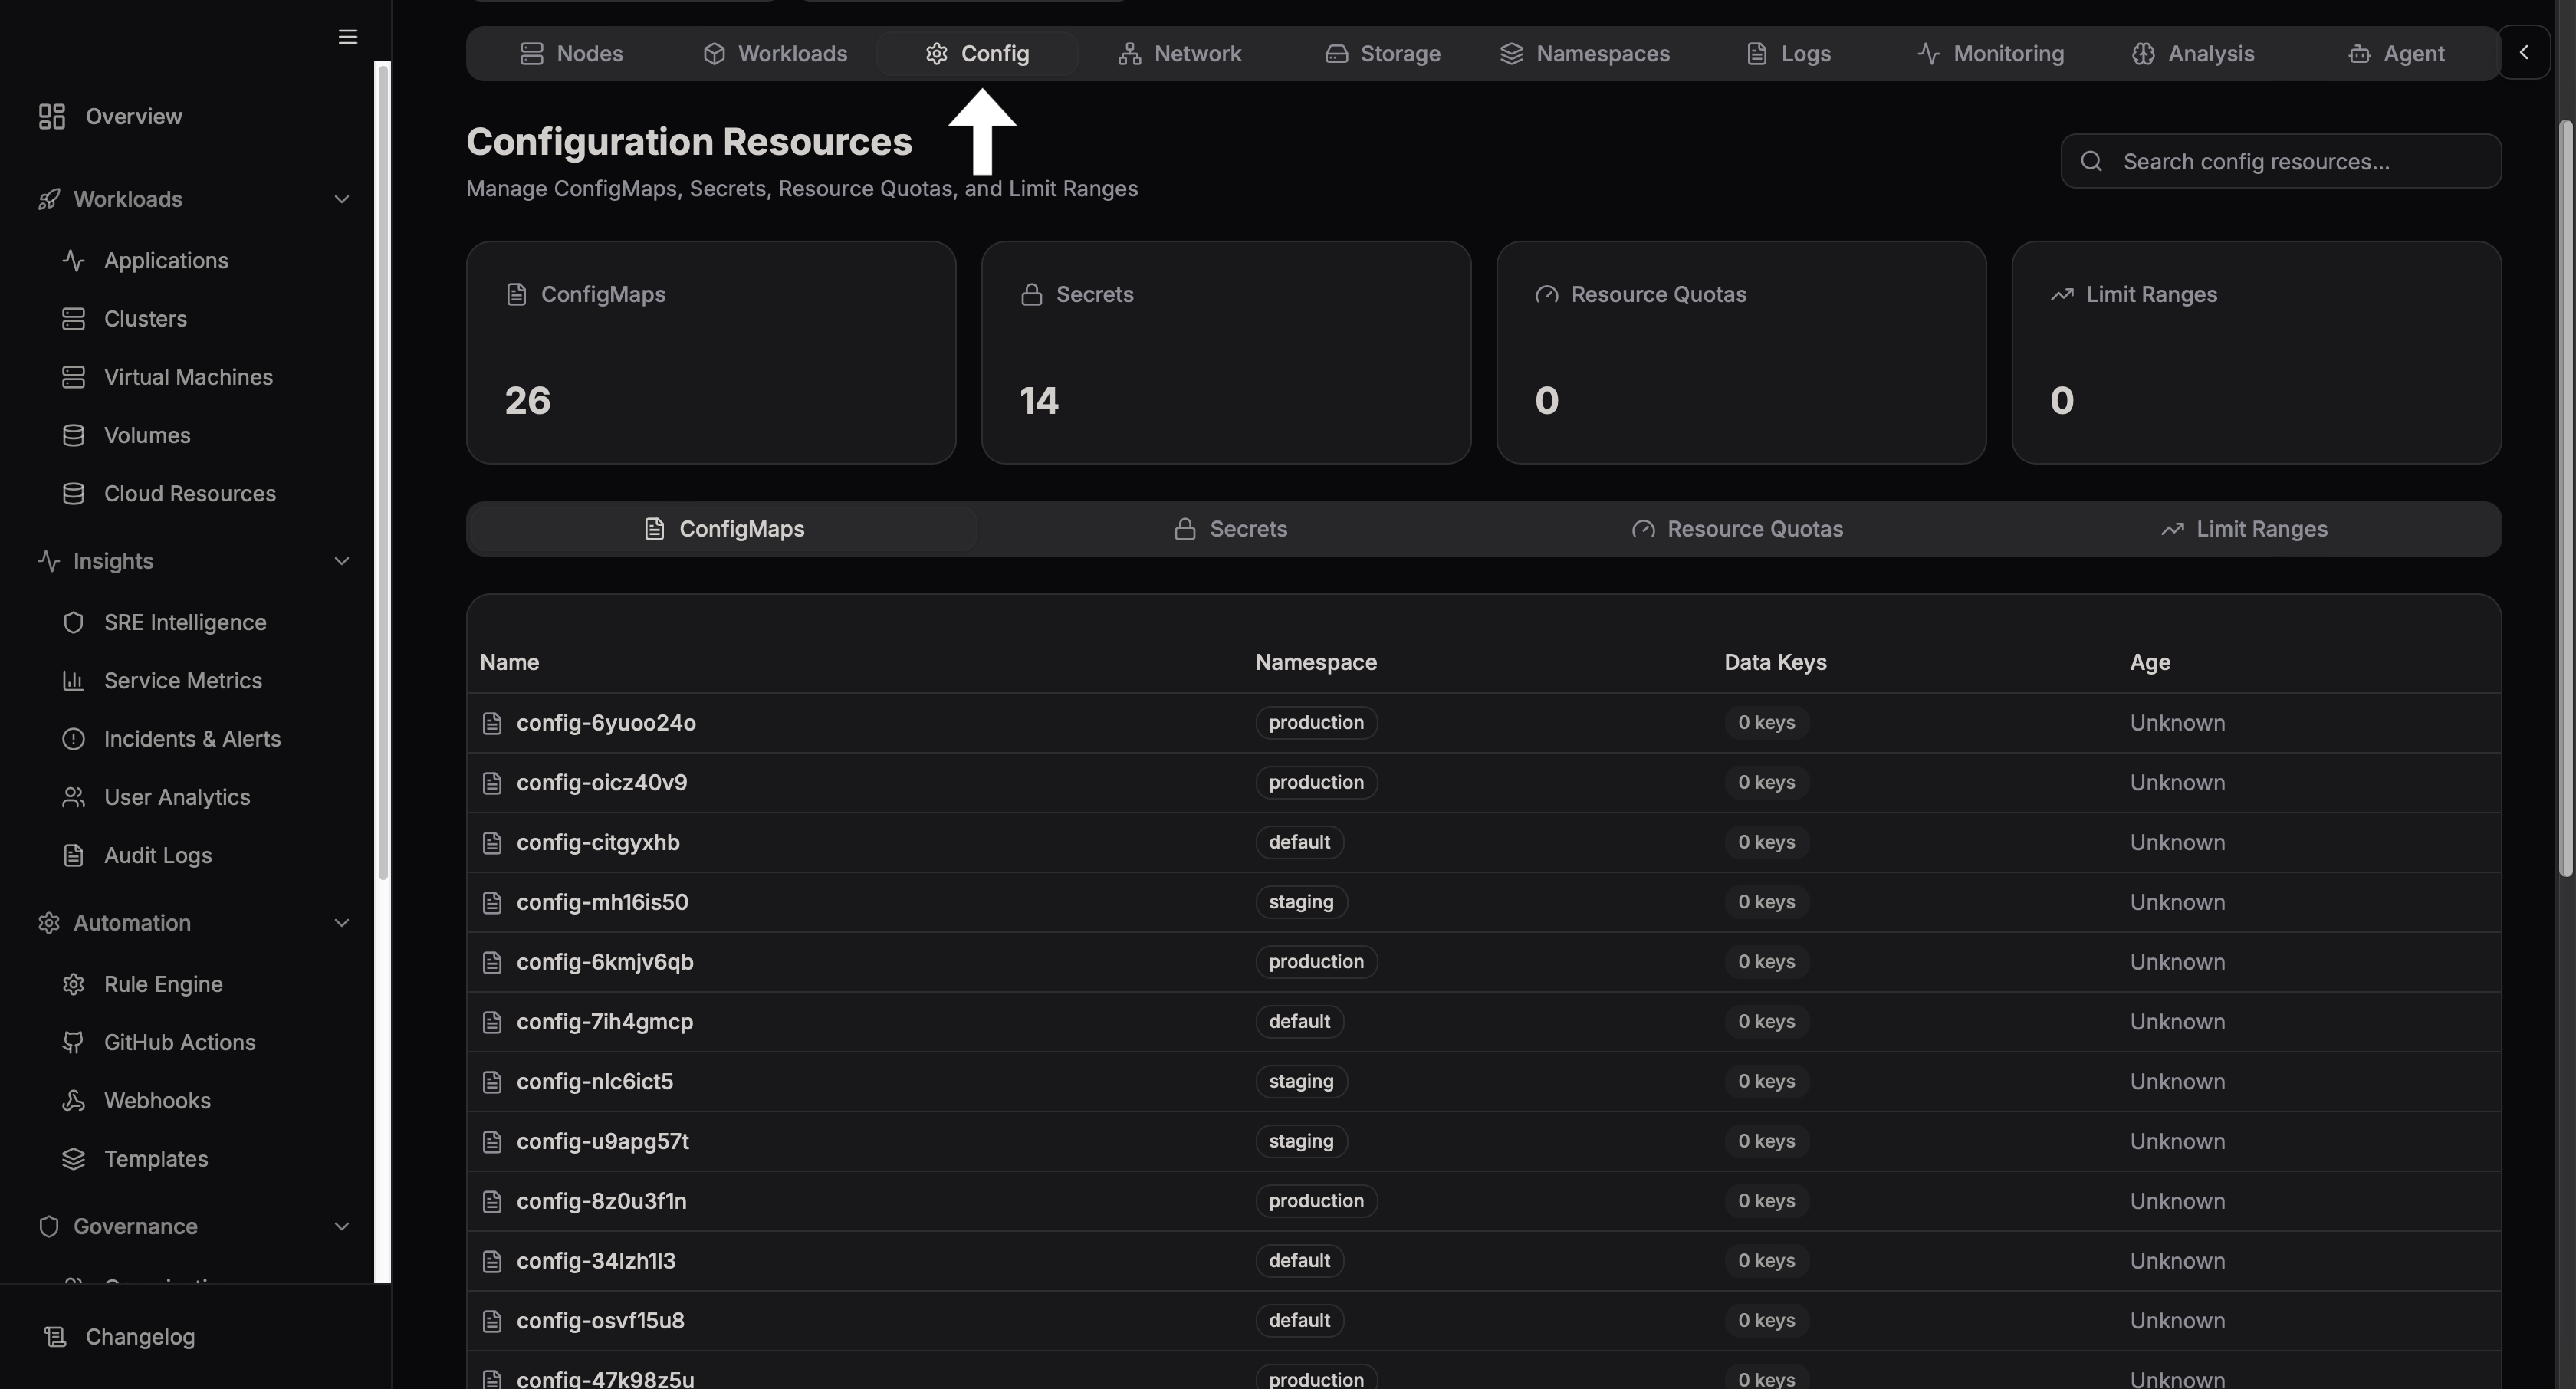
Config Dashboard
Network Dashboard
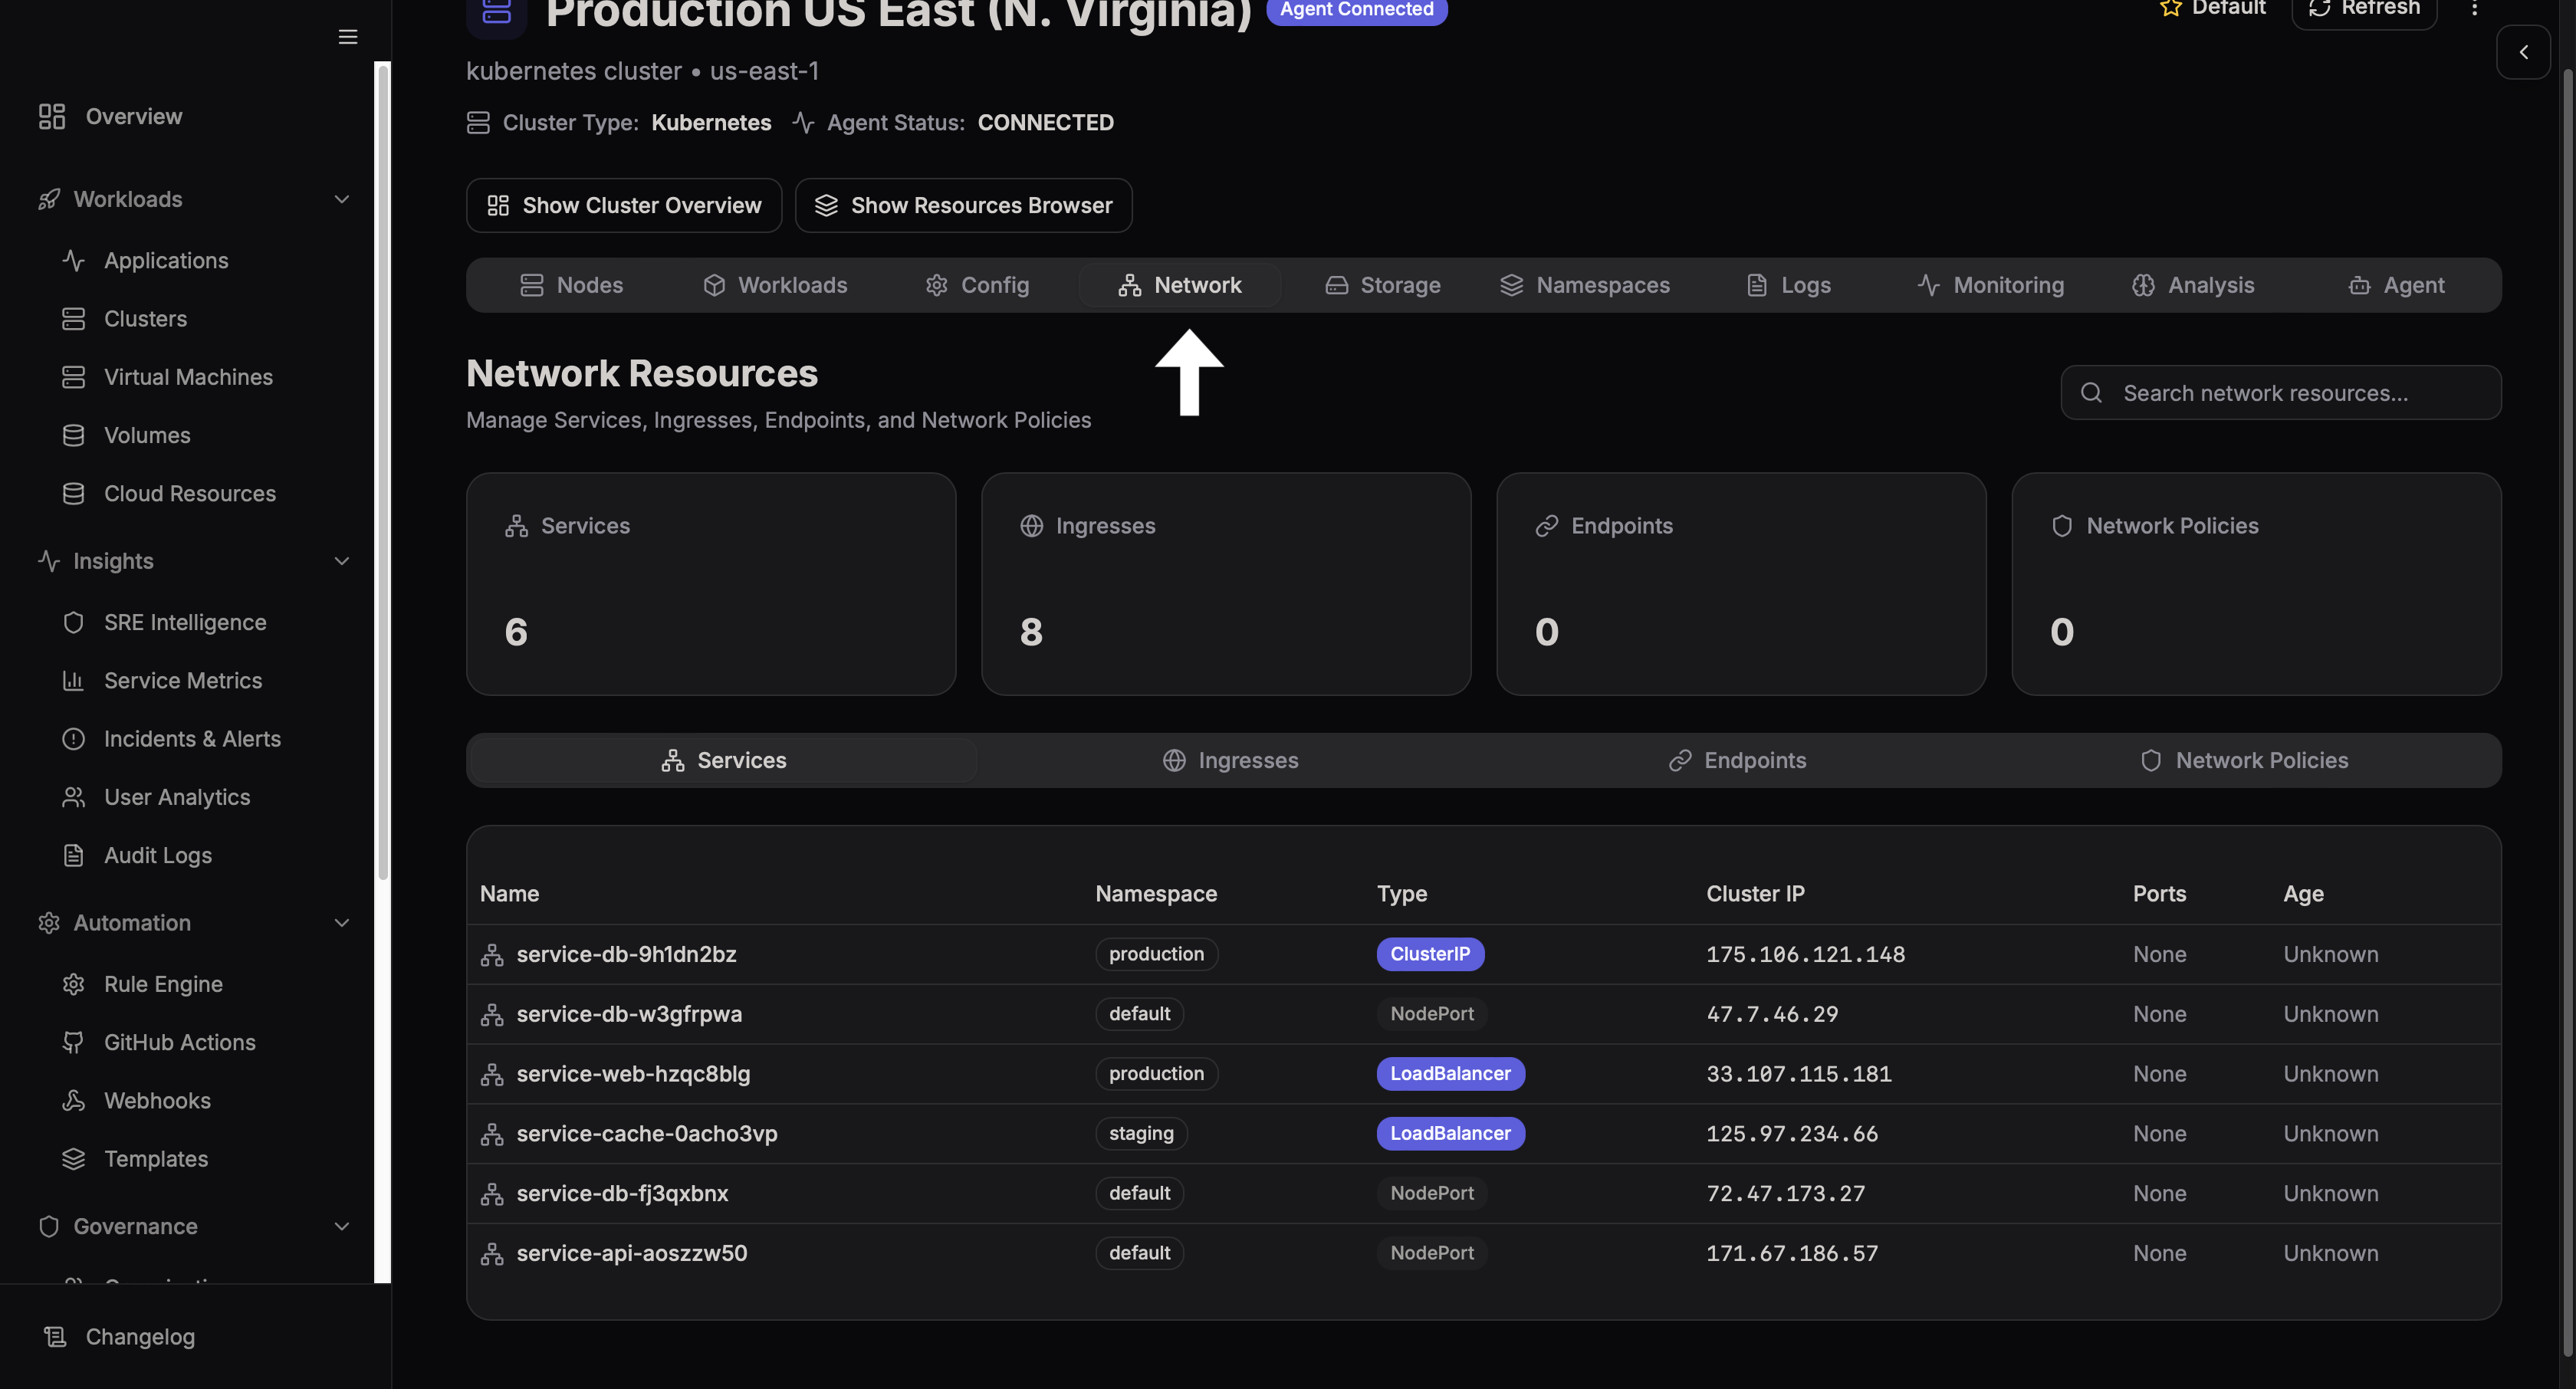
Displays services and networking configurations.
Storage Dashboard
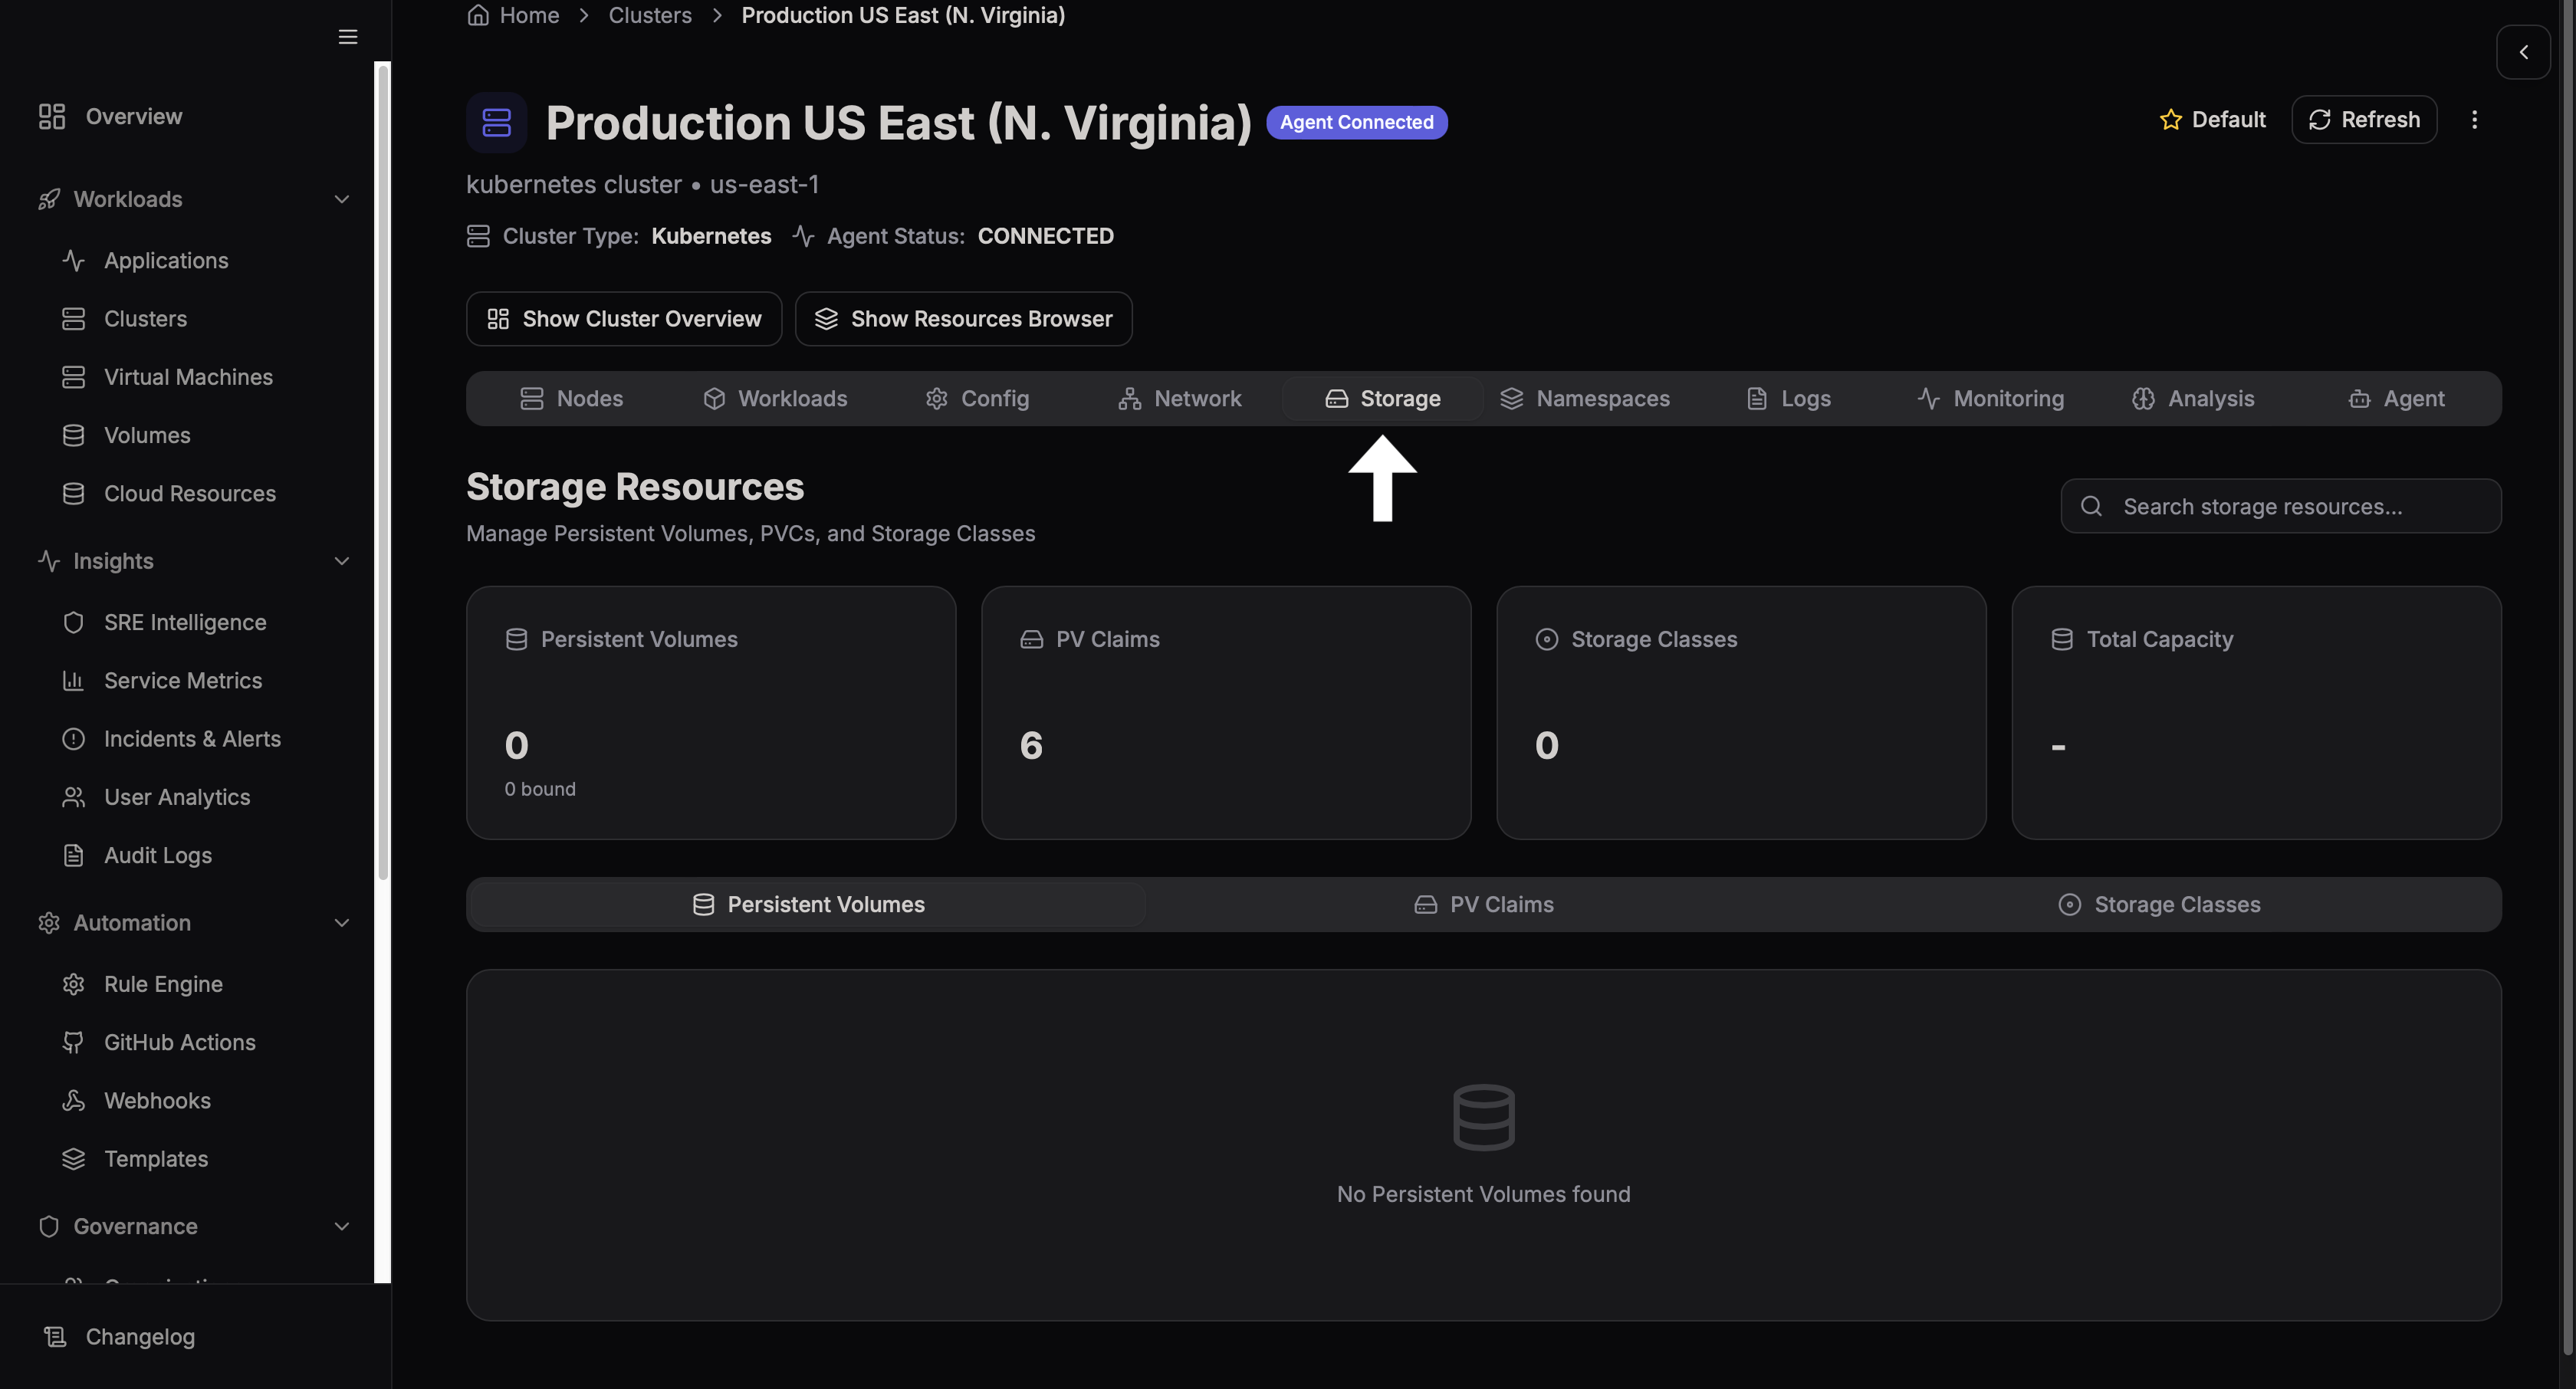
Shows volumes and persistent storage details.
Namespace Dashboard
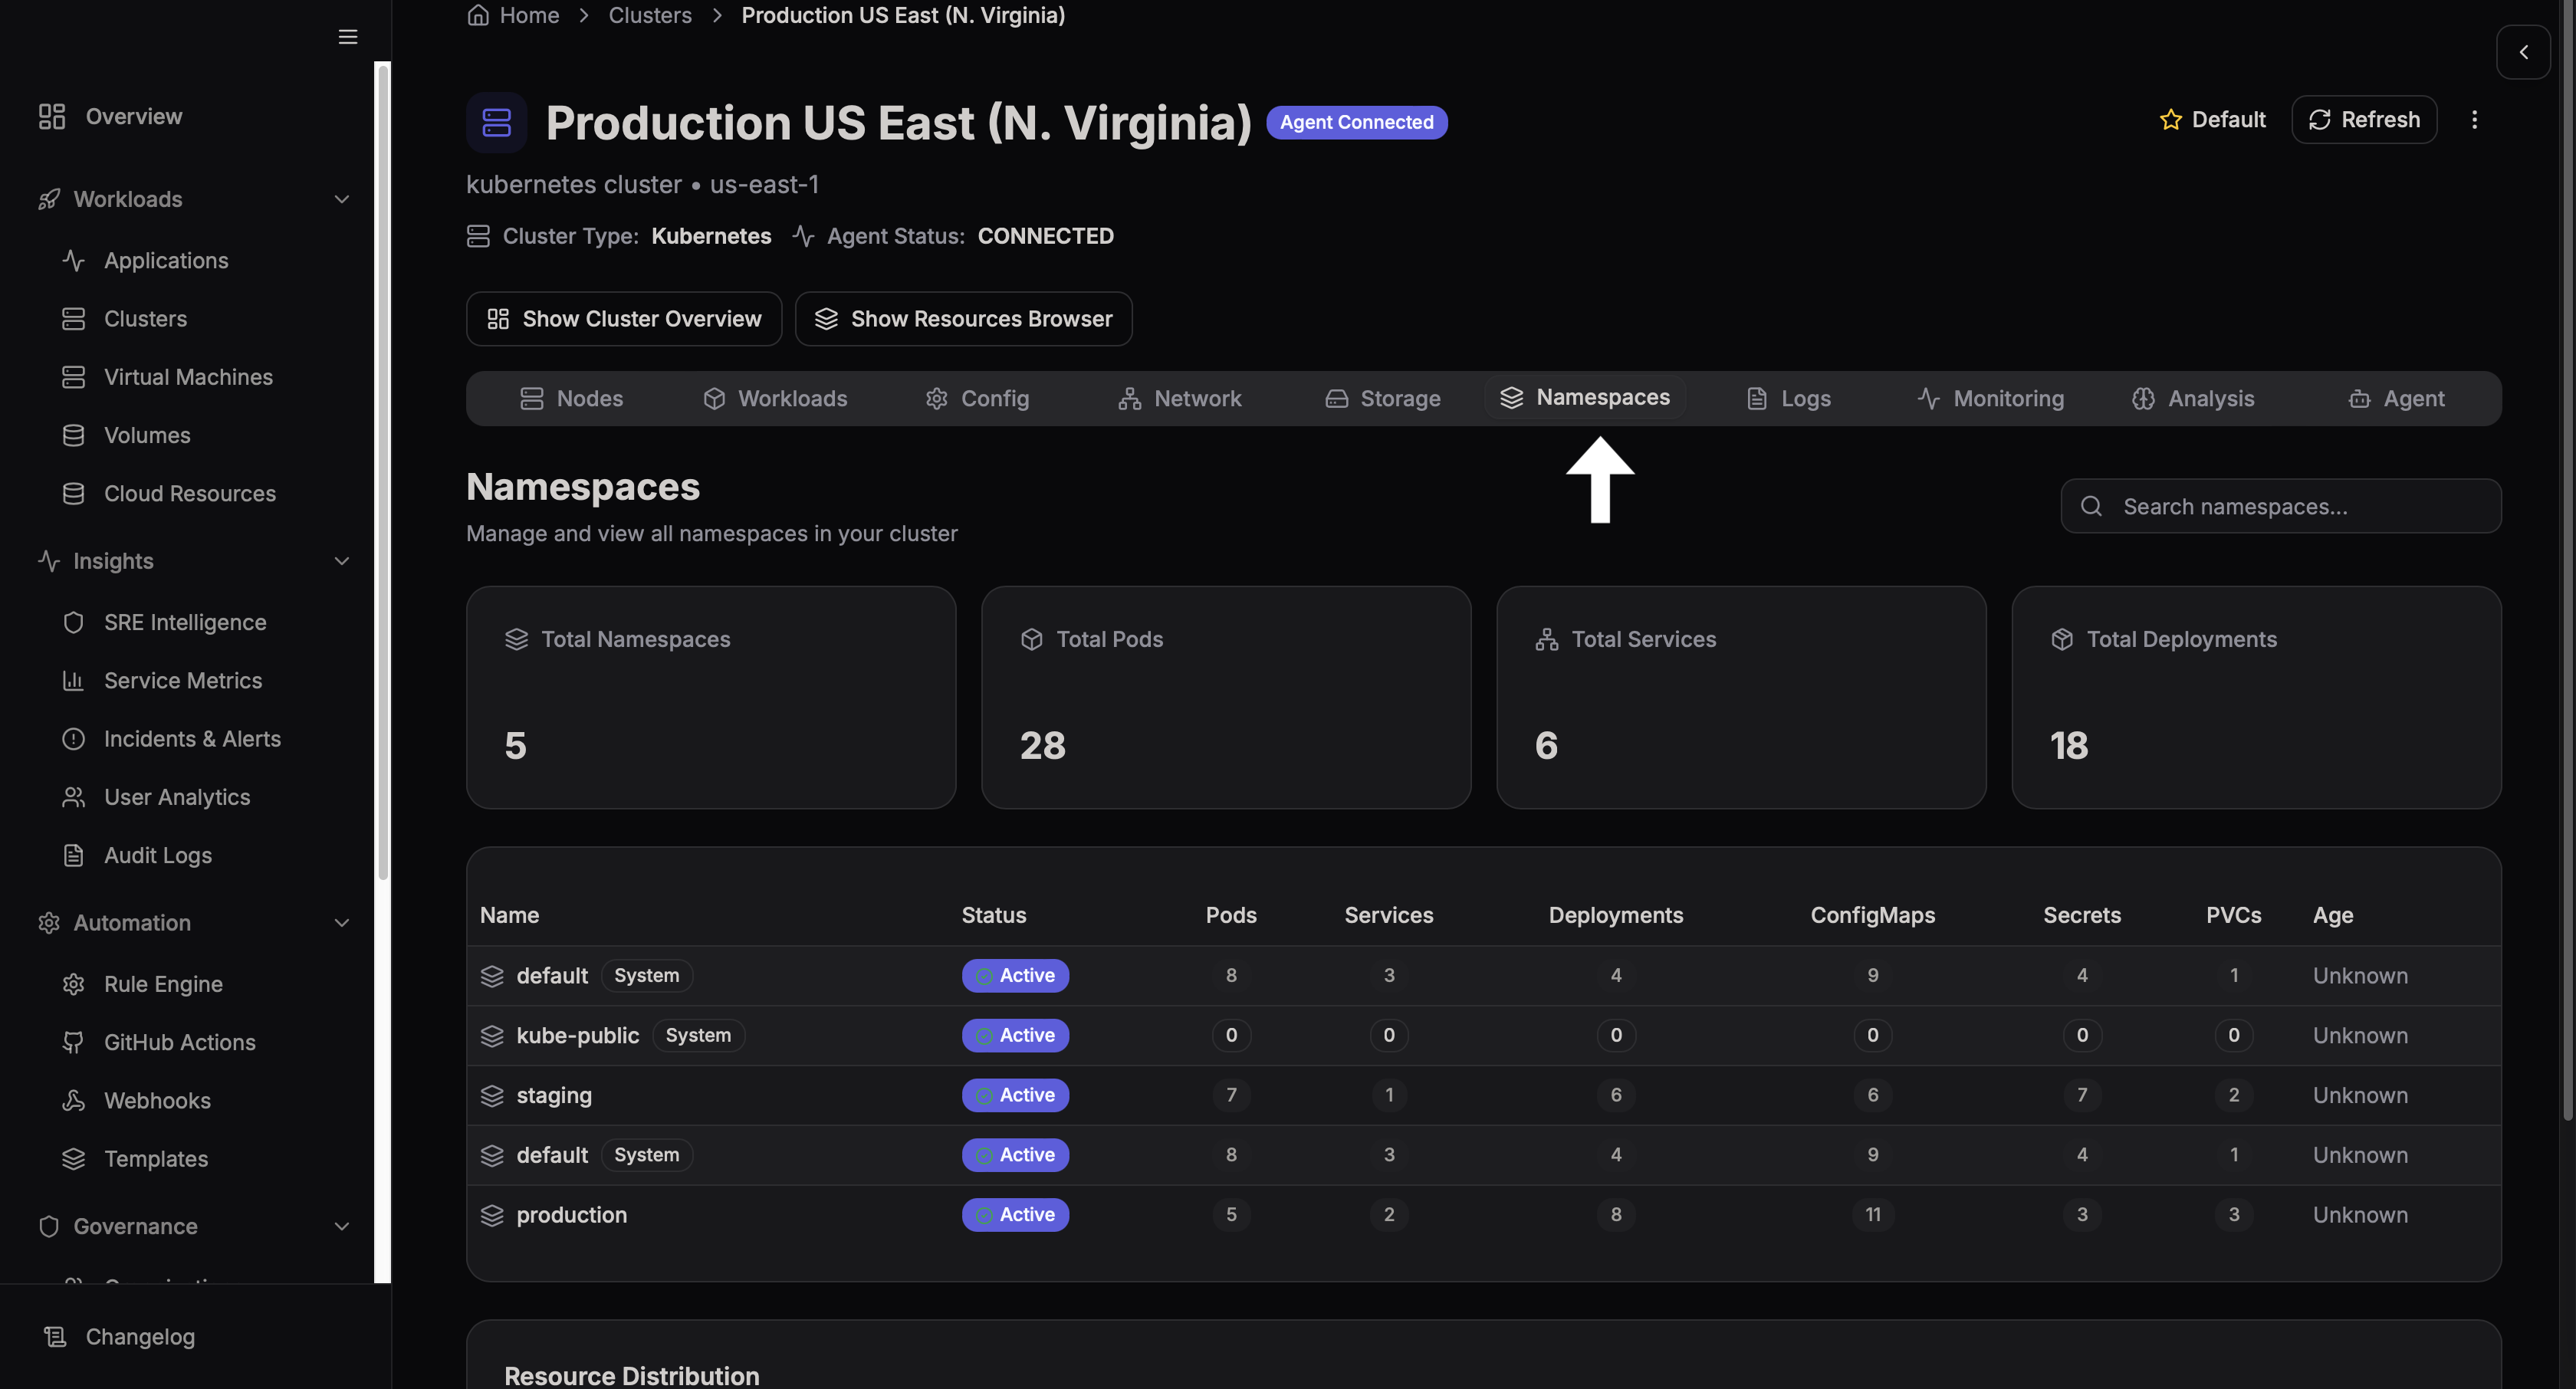
Lists Kubernetes namespaces used to organize resources.
Logs Dashboard
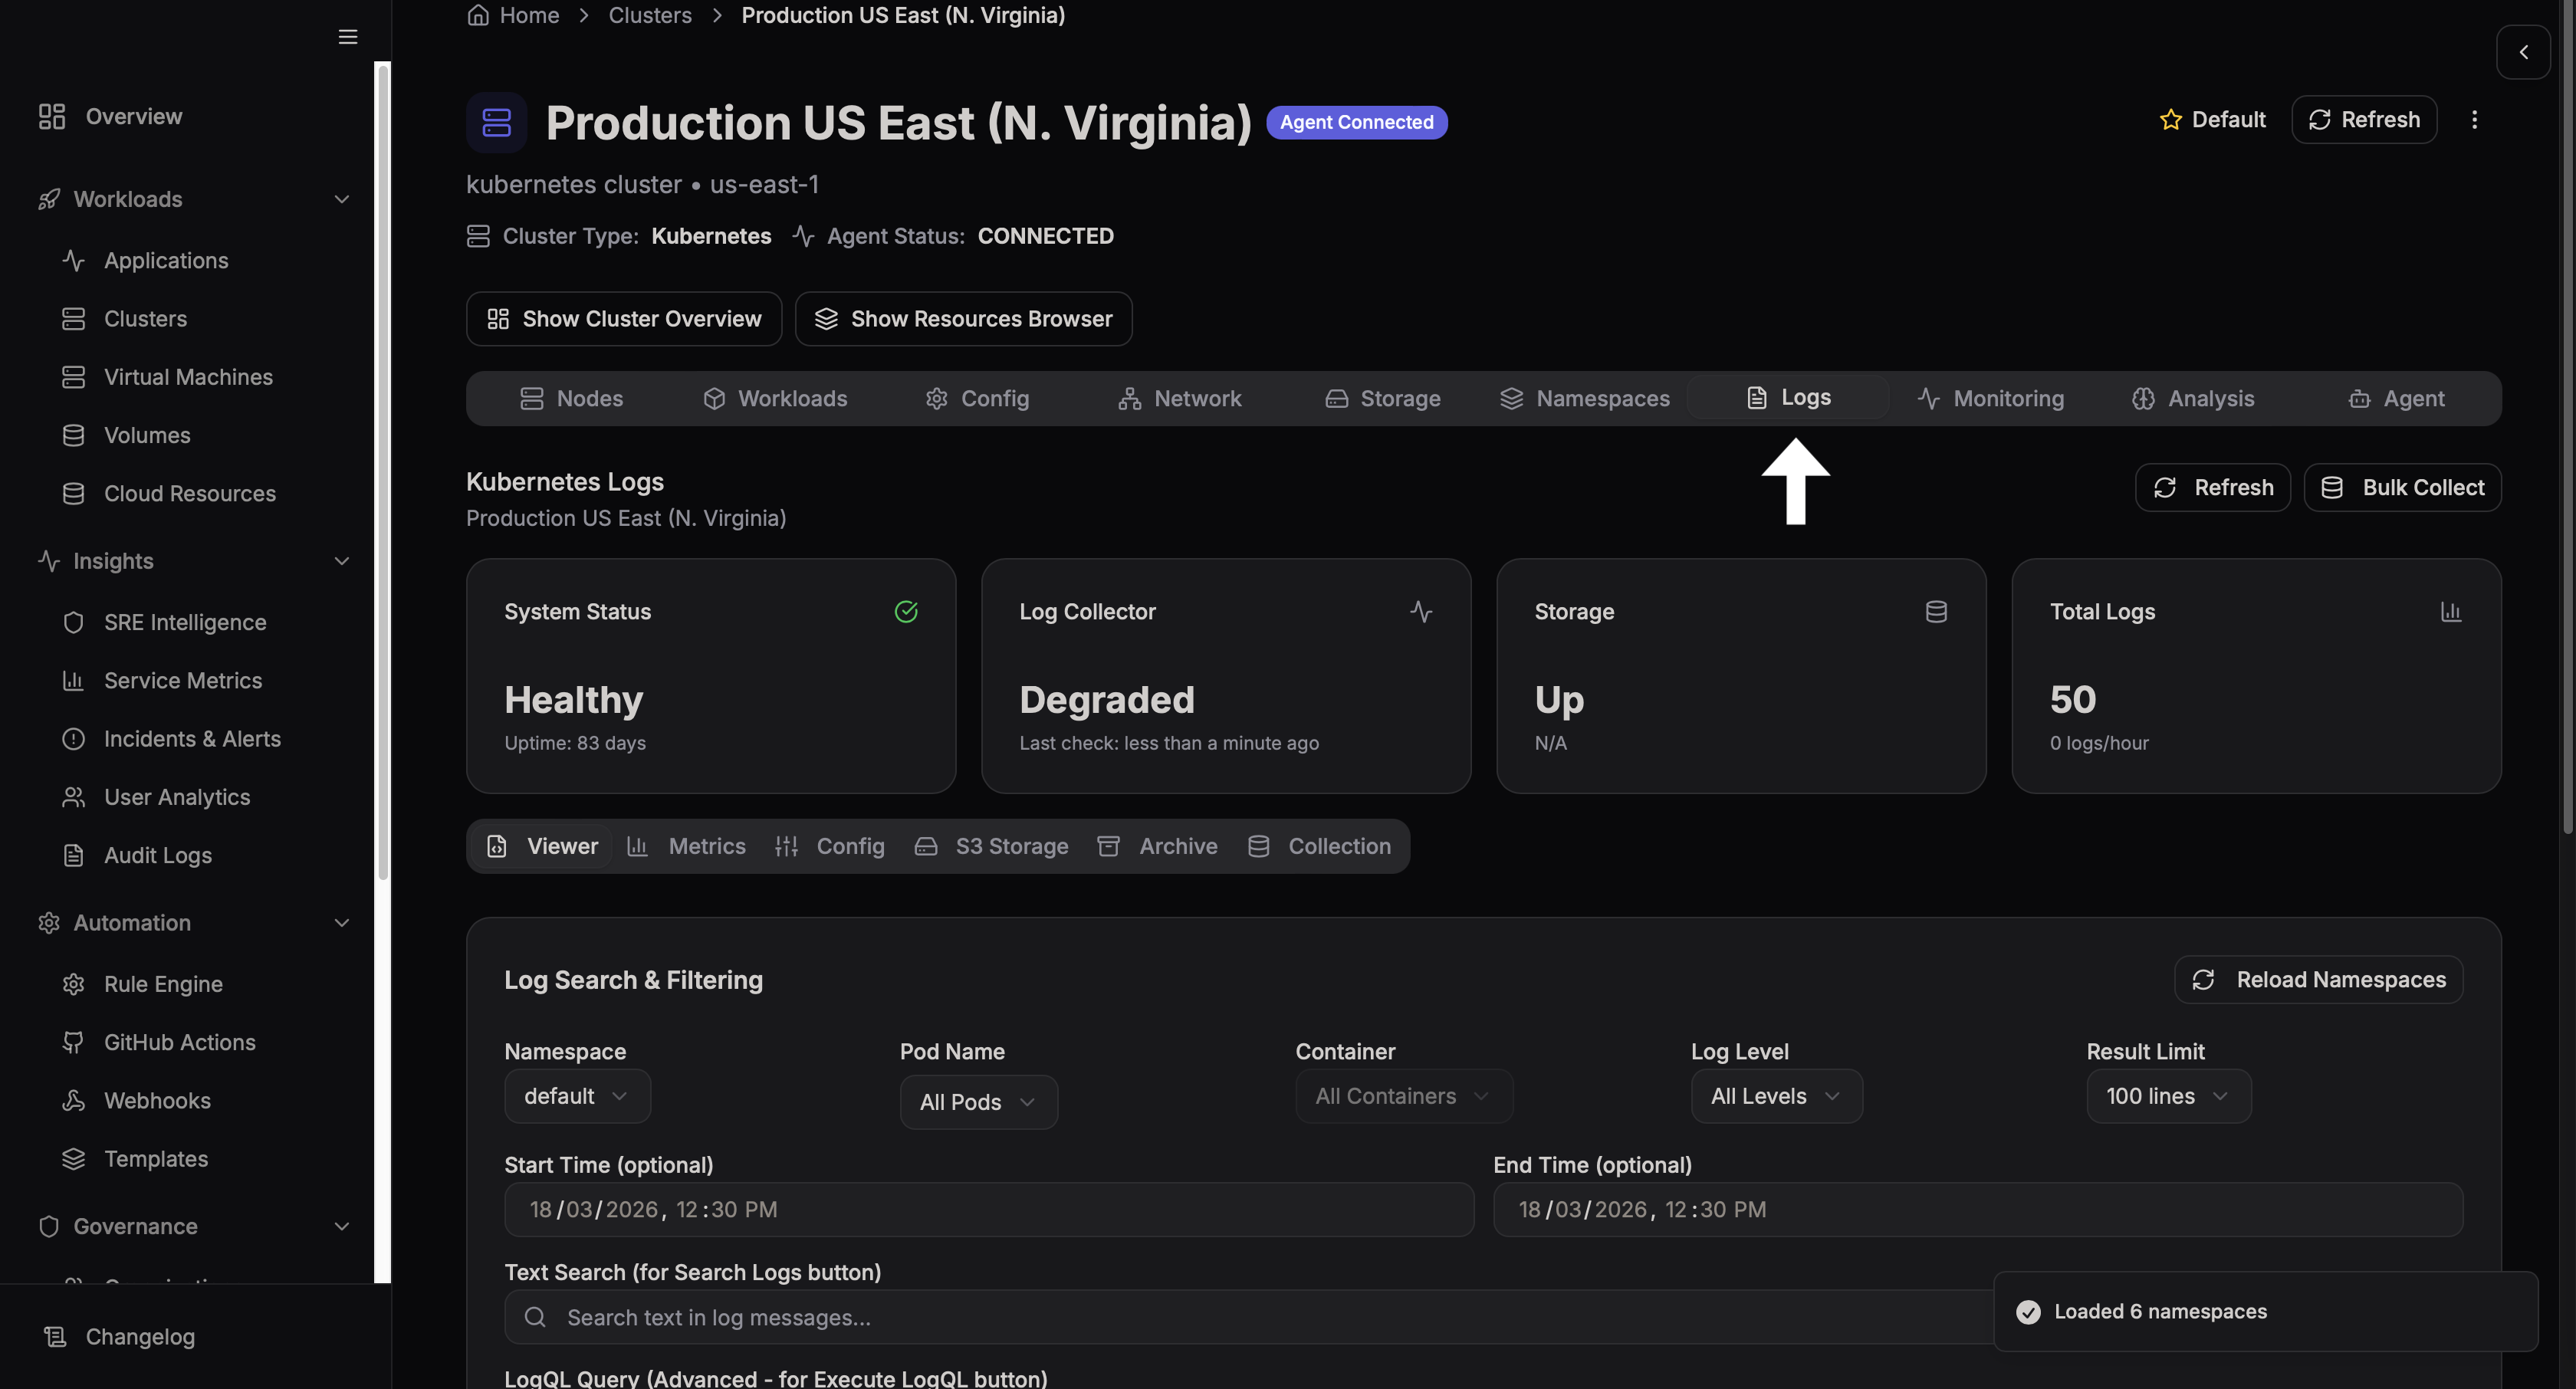
Provides logs for debugging and monitoring.
Displays configuration settings and environment variables.
Analysis Dashboard
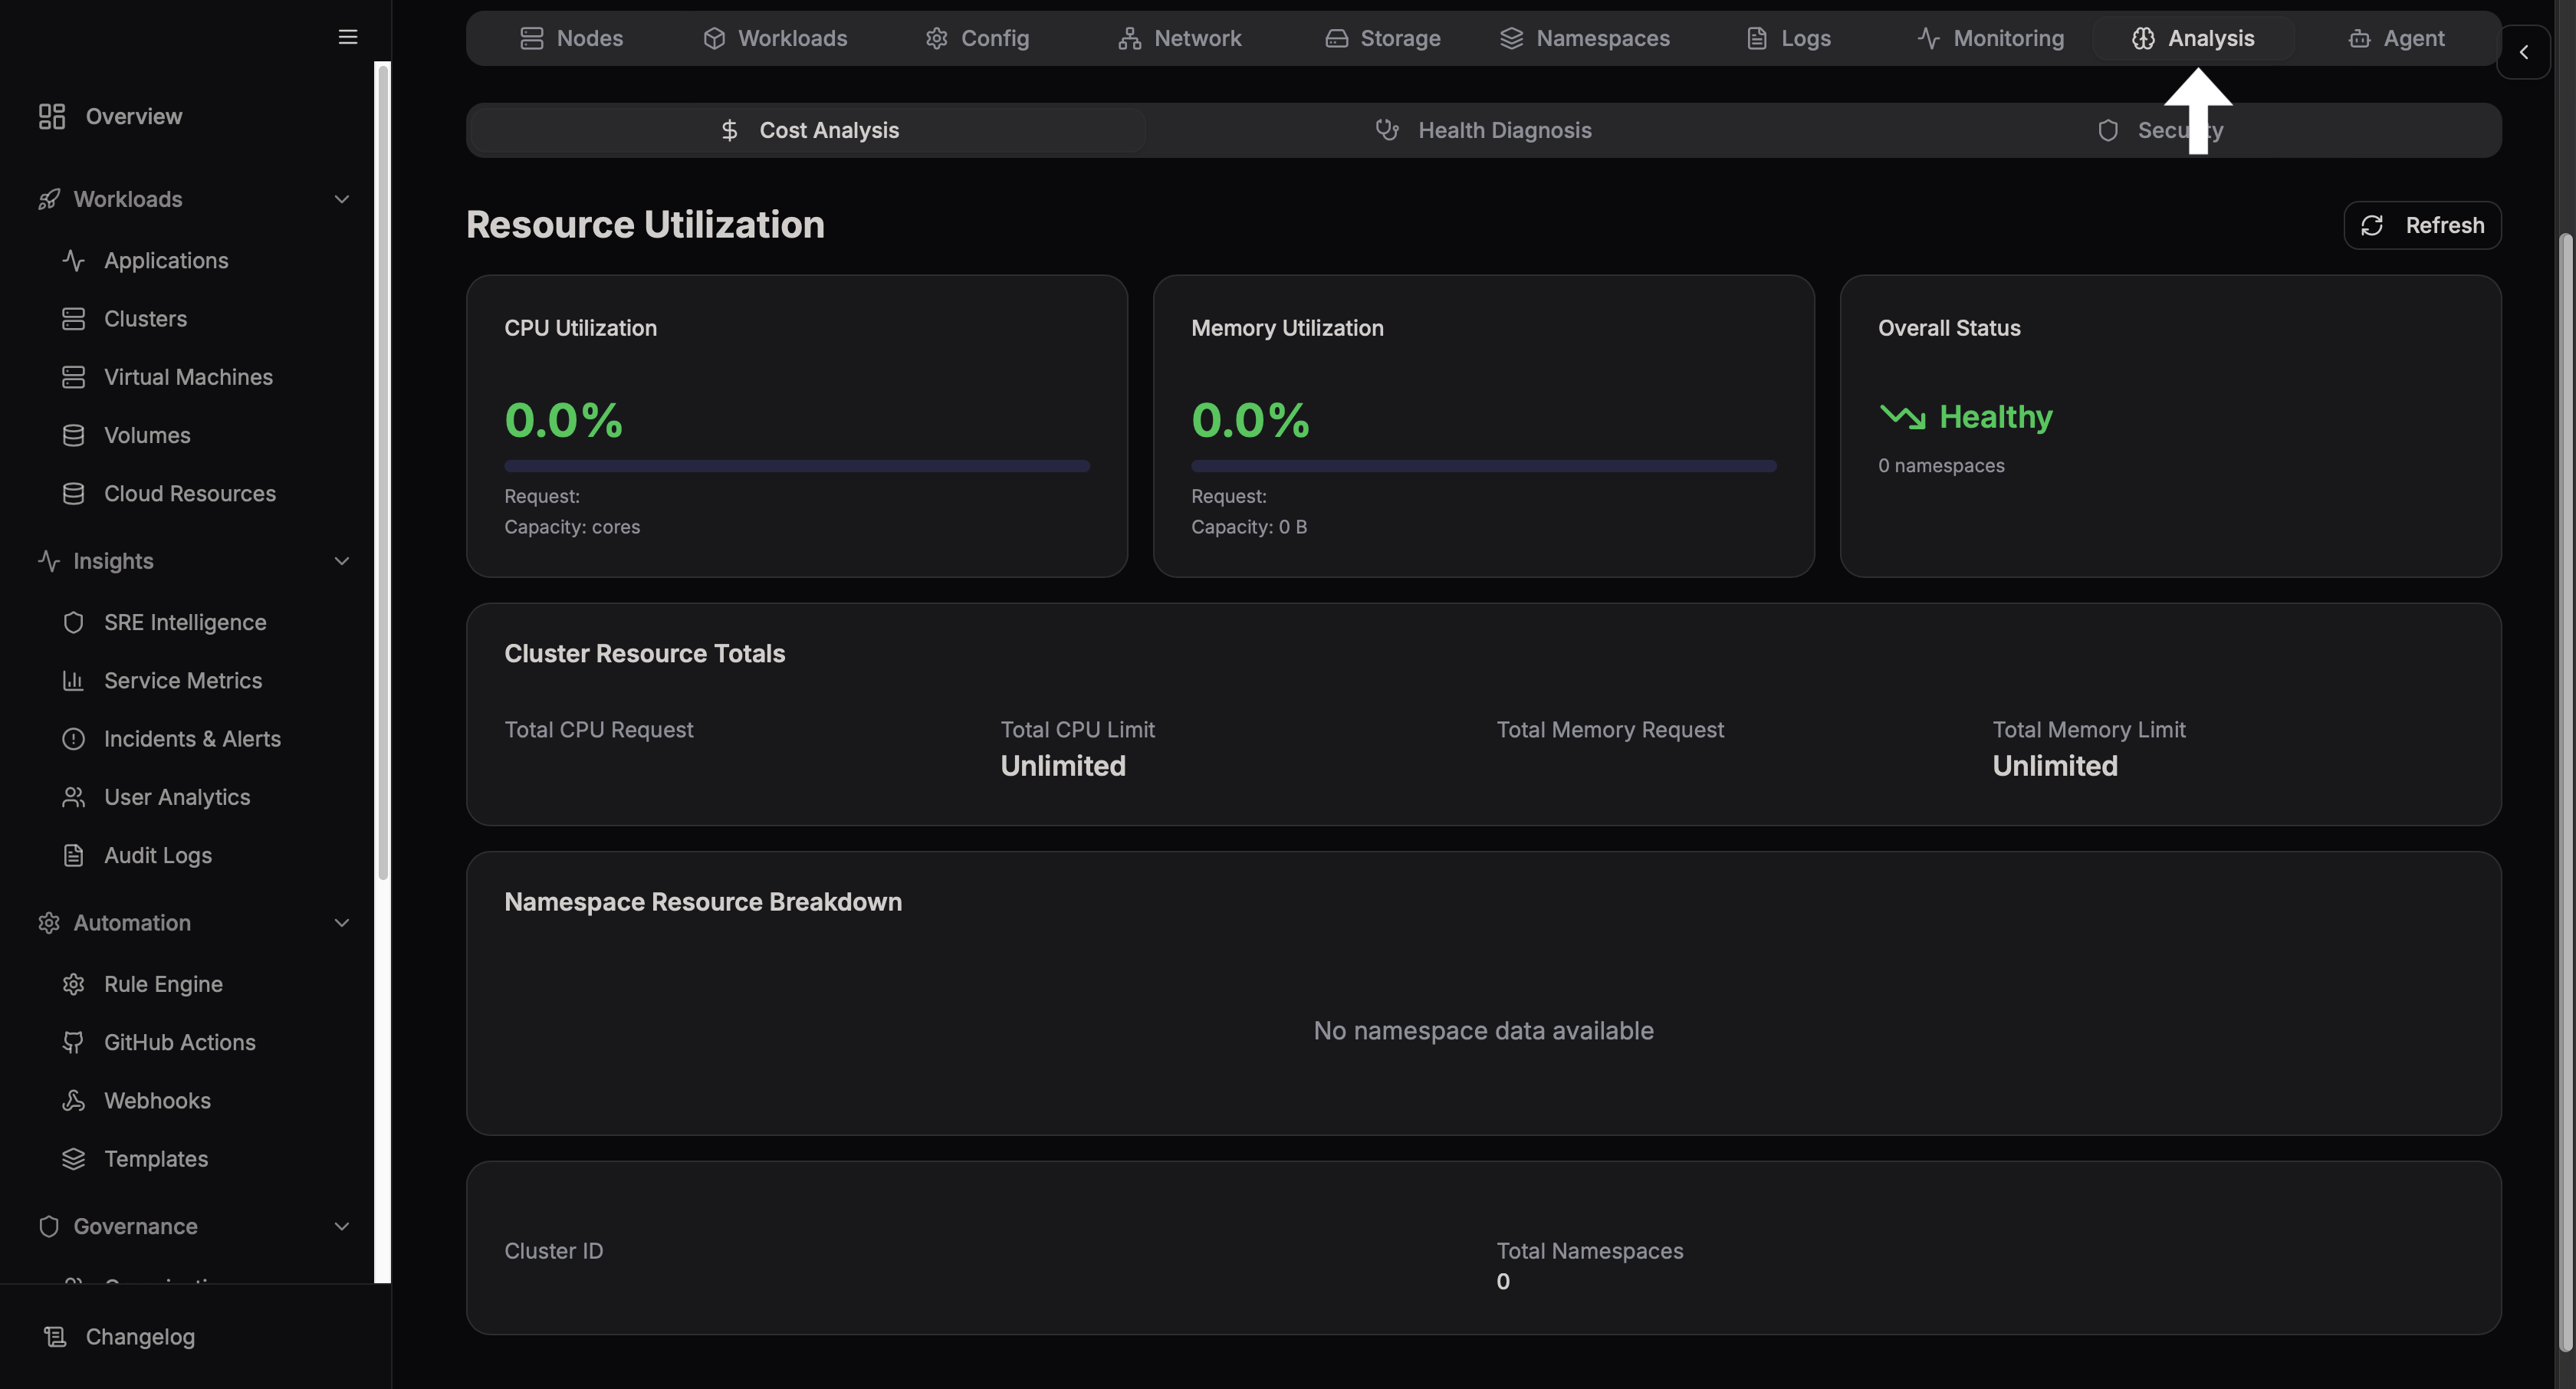
Provides performance insights and usage analysis.
Agent Dashboard
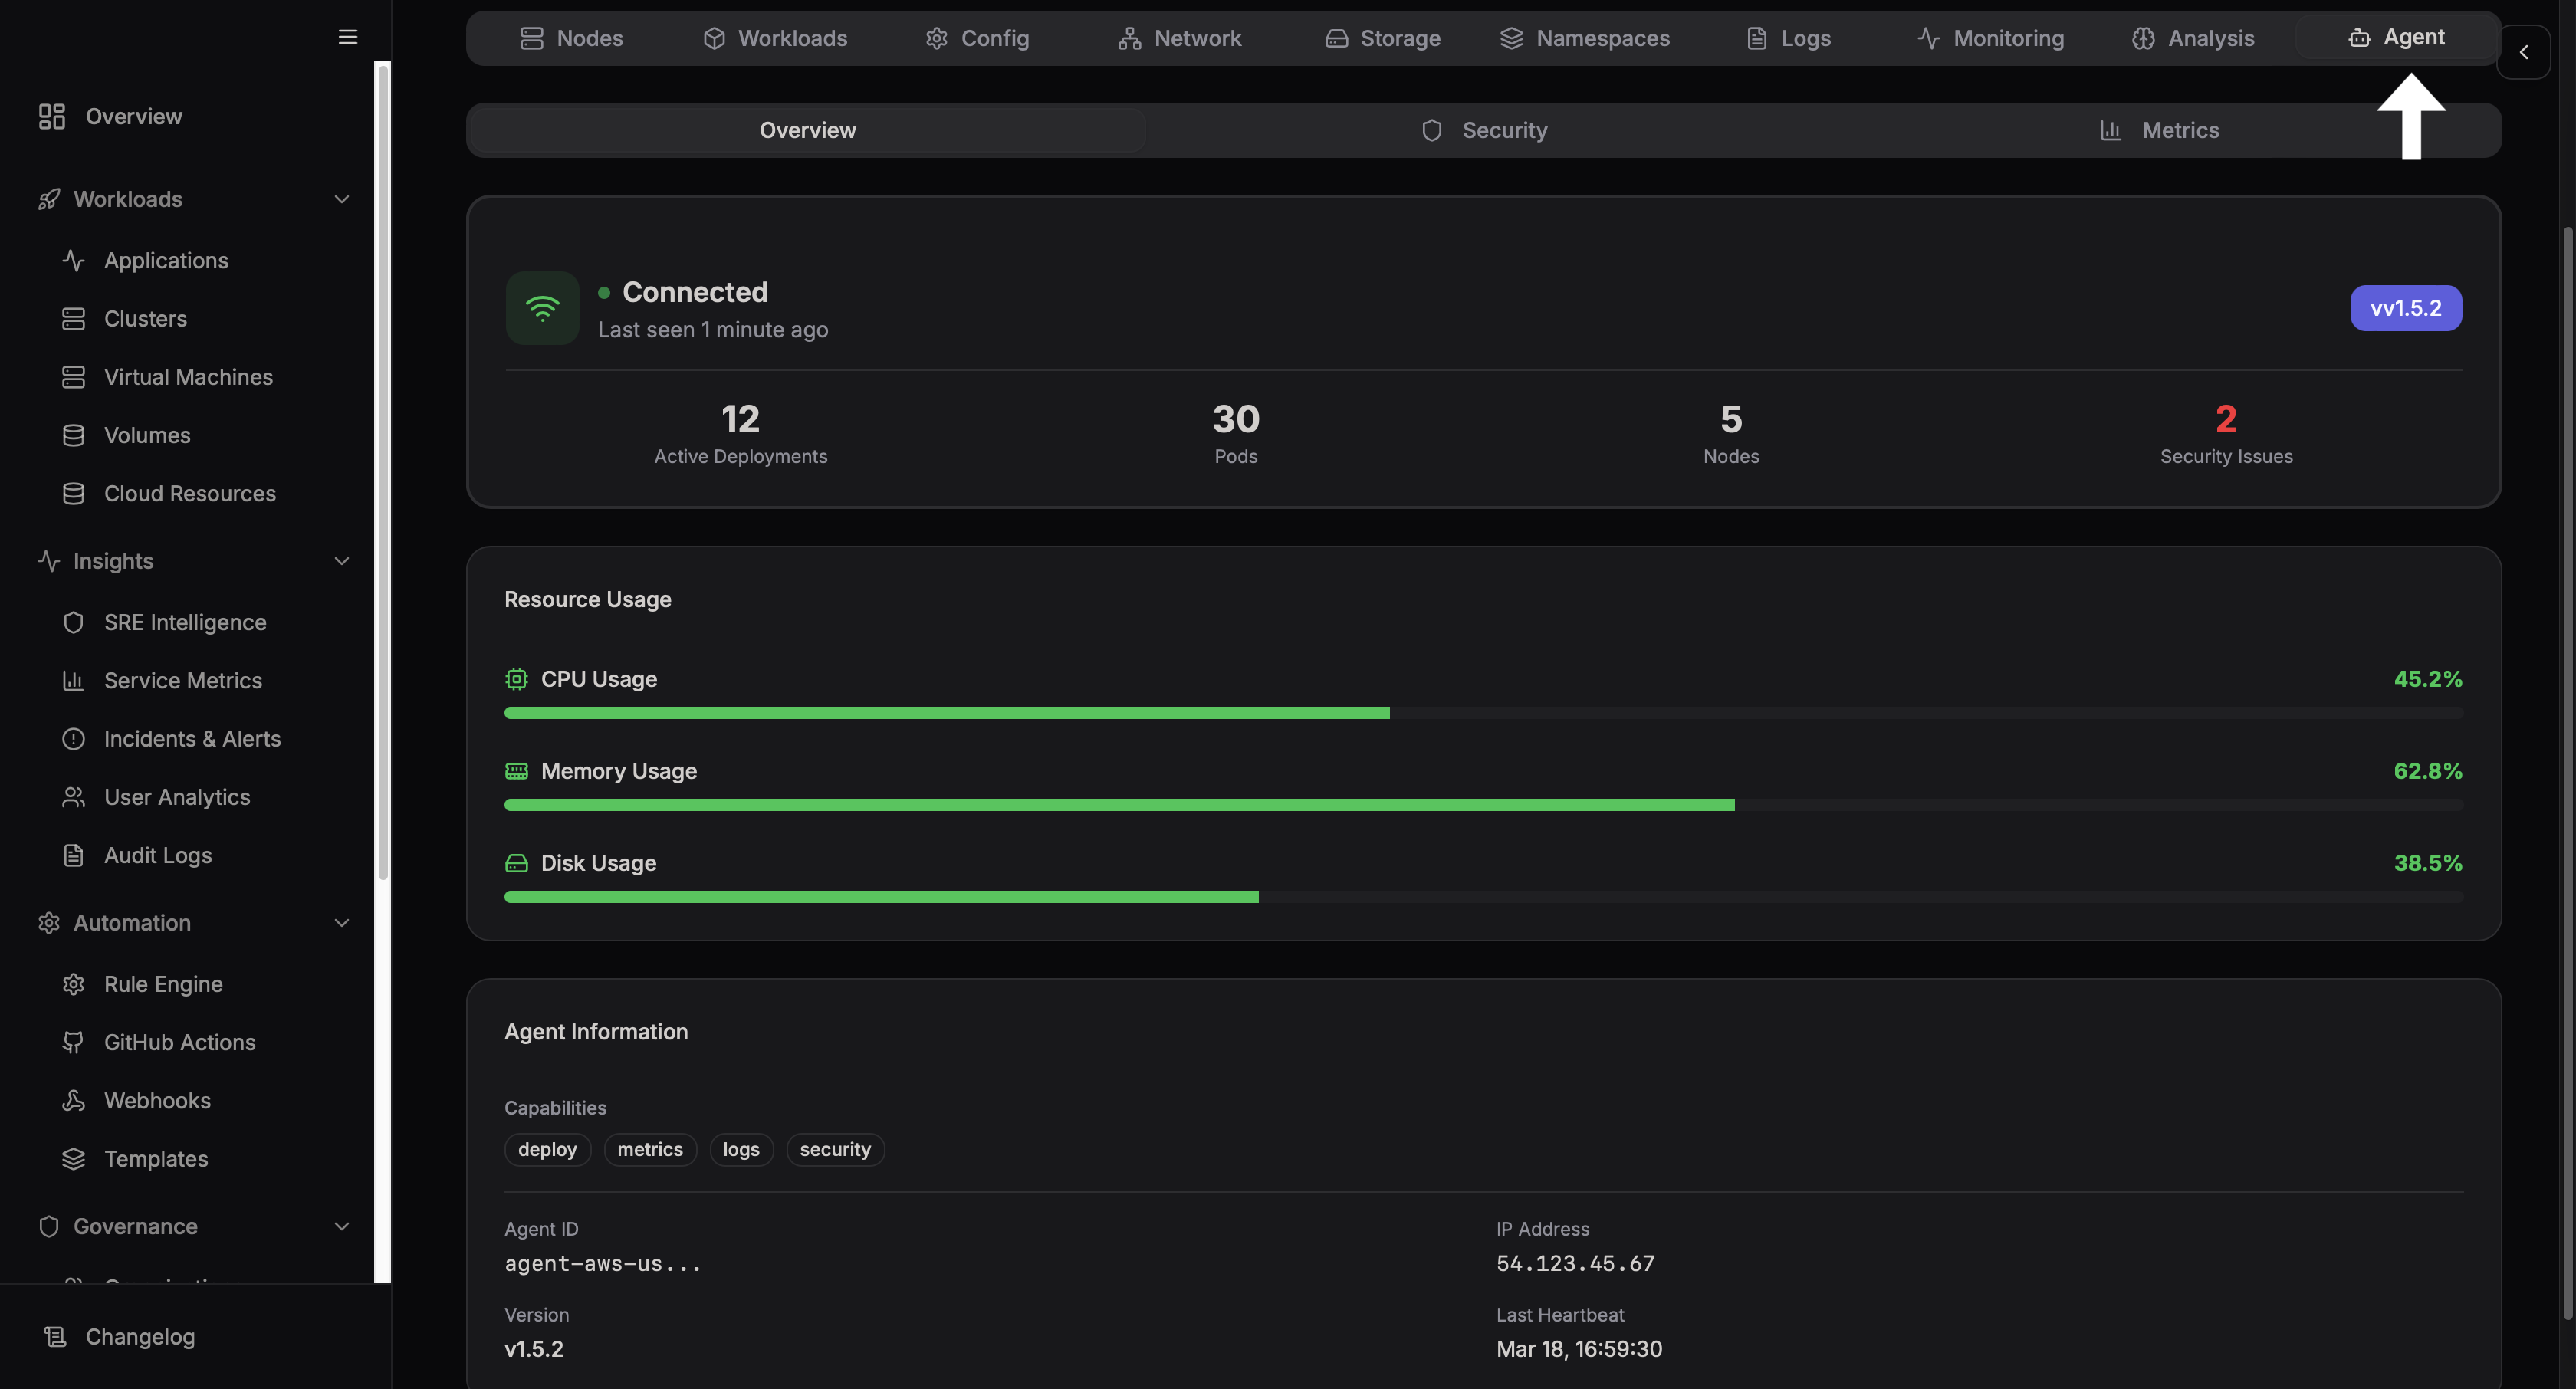
Shows the status of the cluster agent responsible for communication.
Nifex
You can deploy a Nifex tunnel to any connected cluster directly from the Clusters page, giving you secure access to databases deployed in that cluster's region.
See Nifex for the full walkthrough.
Related Resources
- 🛠️ Kubernetes YAML Generator — generate manifests for Deployments, Services, ConfigMaps, and Ingress
- 🛠️ YAML Formatter & Validator — validate kubeconfig and manifest syntax before uploading