Stand Alone Server
The Stand Alone Server deployment option allows you to deploy applications directly to a dedicated server instance.
This approach is useful when you want full control over the server environment and want to run containerized workloads without relying on a distributed cluster.
Using this wizard, you can:
- Register and deploy to a new server
- Deploy workloads on an existing server
- Deploy containers using Docker Services
- Deploy multi-container applications using Docker Compose
Step 1: Open the Stand Alone Server Deploy
To begin deploying an application using a standalone server:
- Open the Deploy App from the Nife dashboard.
- Select Stand Alone Server.
This section of the platform is used for deploying workloads directly onto a single machine instead of a cluster or distributed infrastructure.
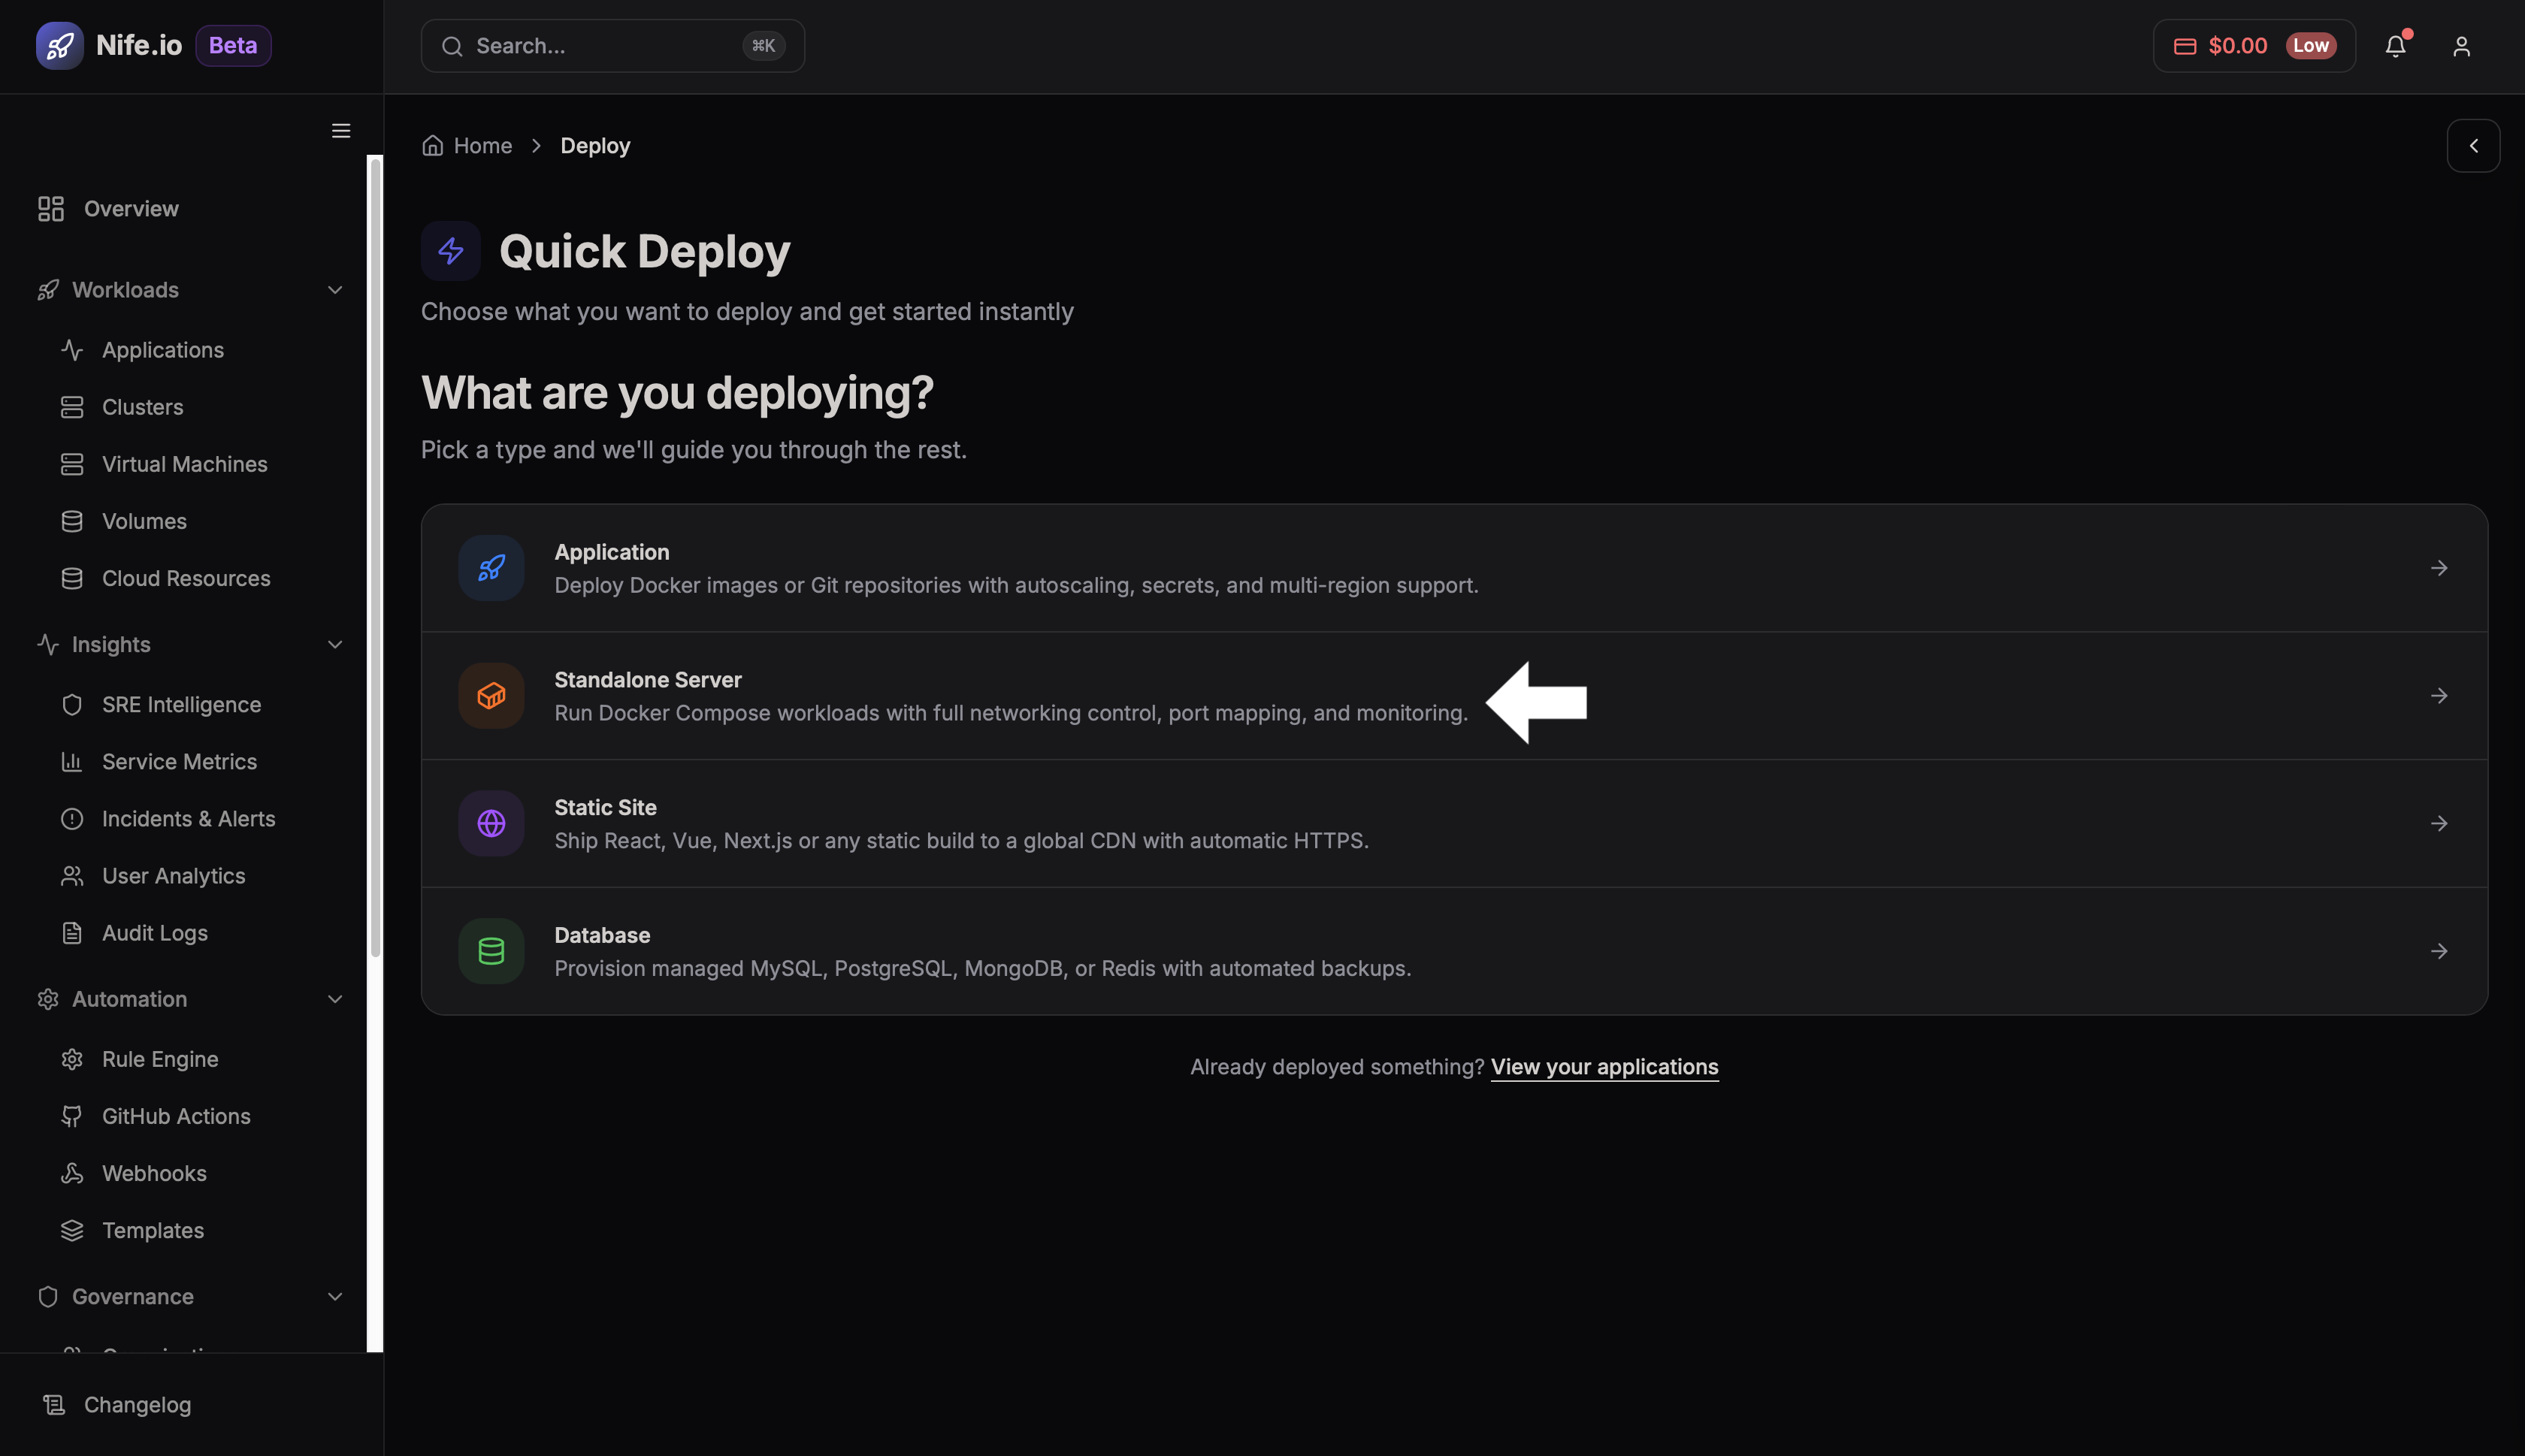
Once selected, the wizard will guide you through configuring the server and deployment method.
Step 2: Choose the Target Server
At this stage, you must decide whether to deploy your application to:
- A new server
- An existing registered server
This step determines where the application will run.
Option 1: Deploy to a New Server
Use this option if you do not yet have a registered standalone server.
Step 1 — Select New Server
Click New Server.
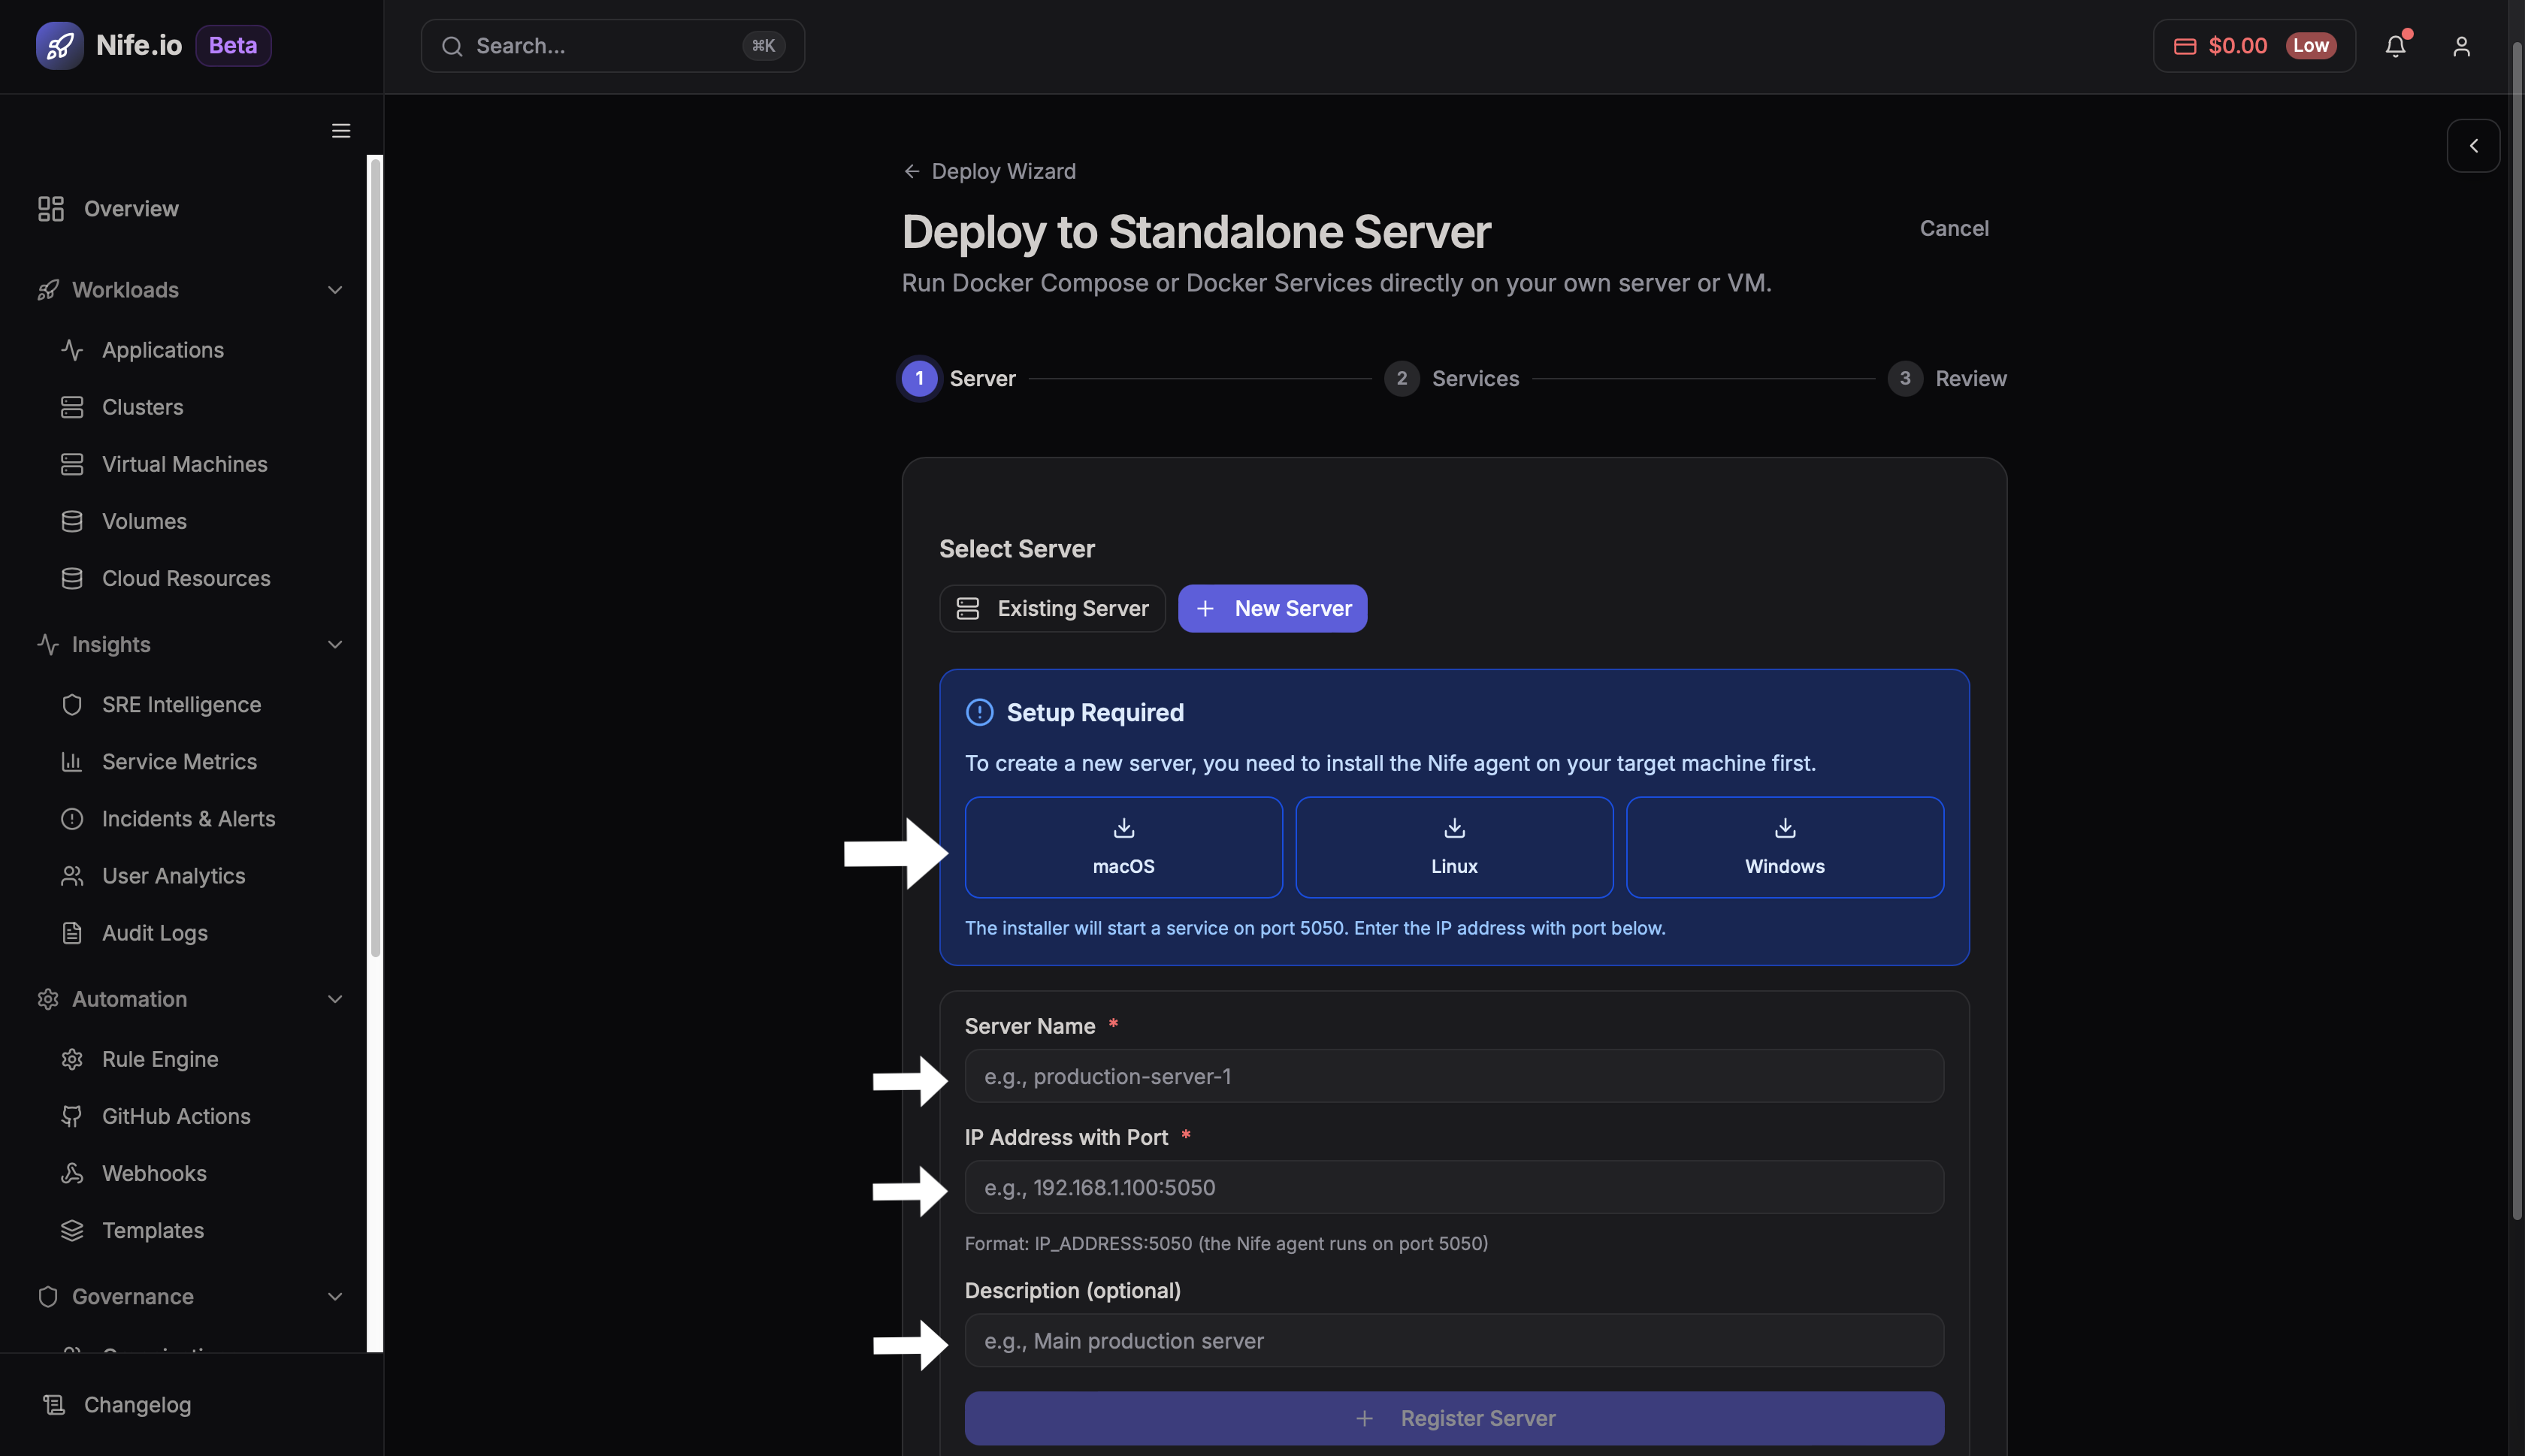
Step 2 — Enter Server Details
Provide the required information to register the server:
-
Server Name
A unique name used to identify the server in the platform. -
Public IP / Host Address
The reachable address of the machine where deployments will run. -
Description (optional)
Additional notes describing the purpose of the server.
Step 3 — Register the Server
Click Register Server.
This action adds the server to the Nife platform so future deployments can target it.
Option 2: Deploy to an Existing Server
If a server has already been registered in the platform, you can deploy directly to it.
Step 1 — Select Existing Server
Choose Existing Server.
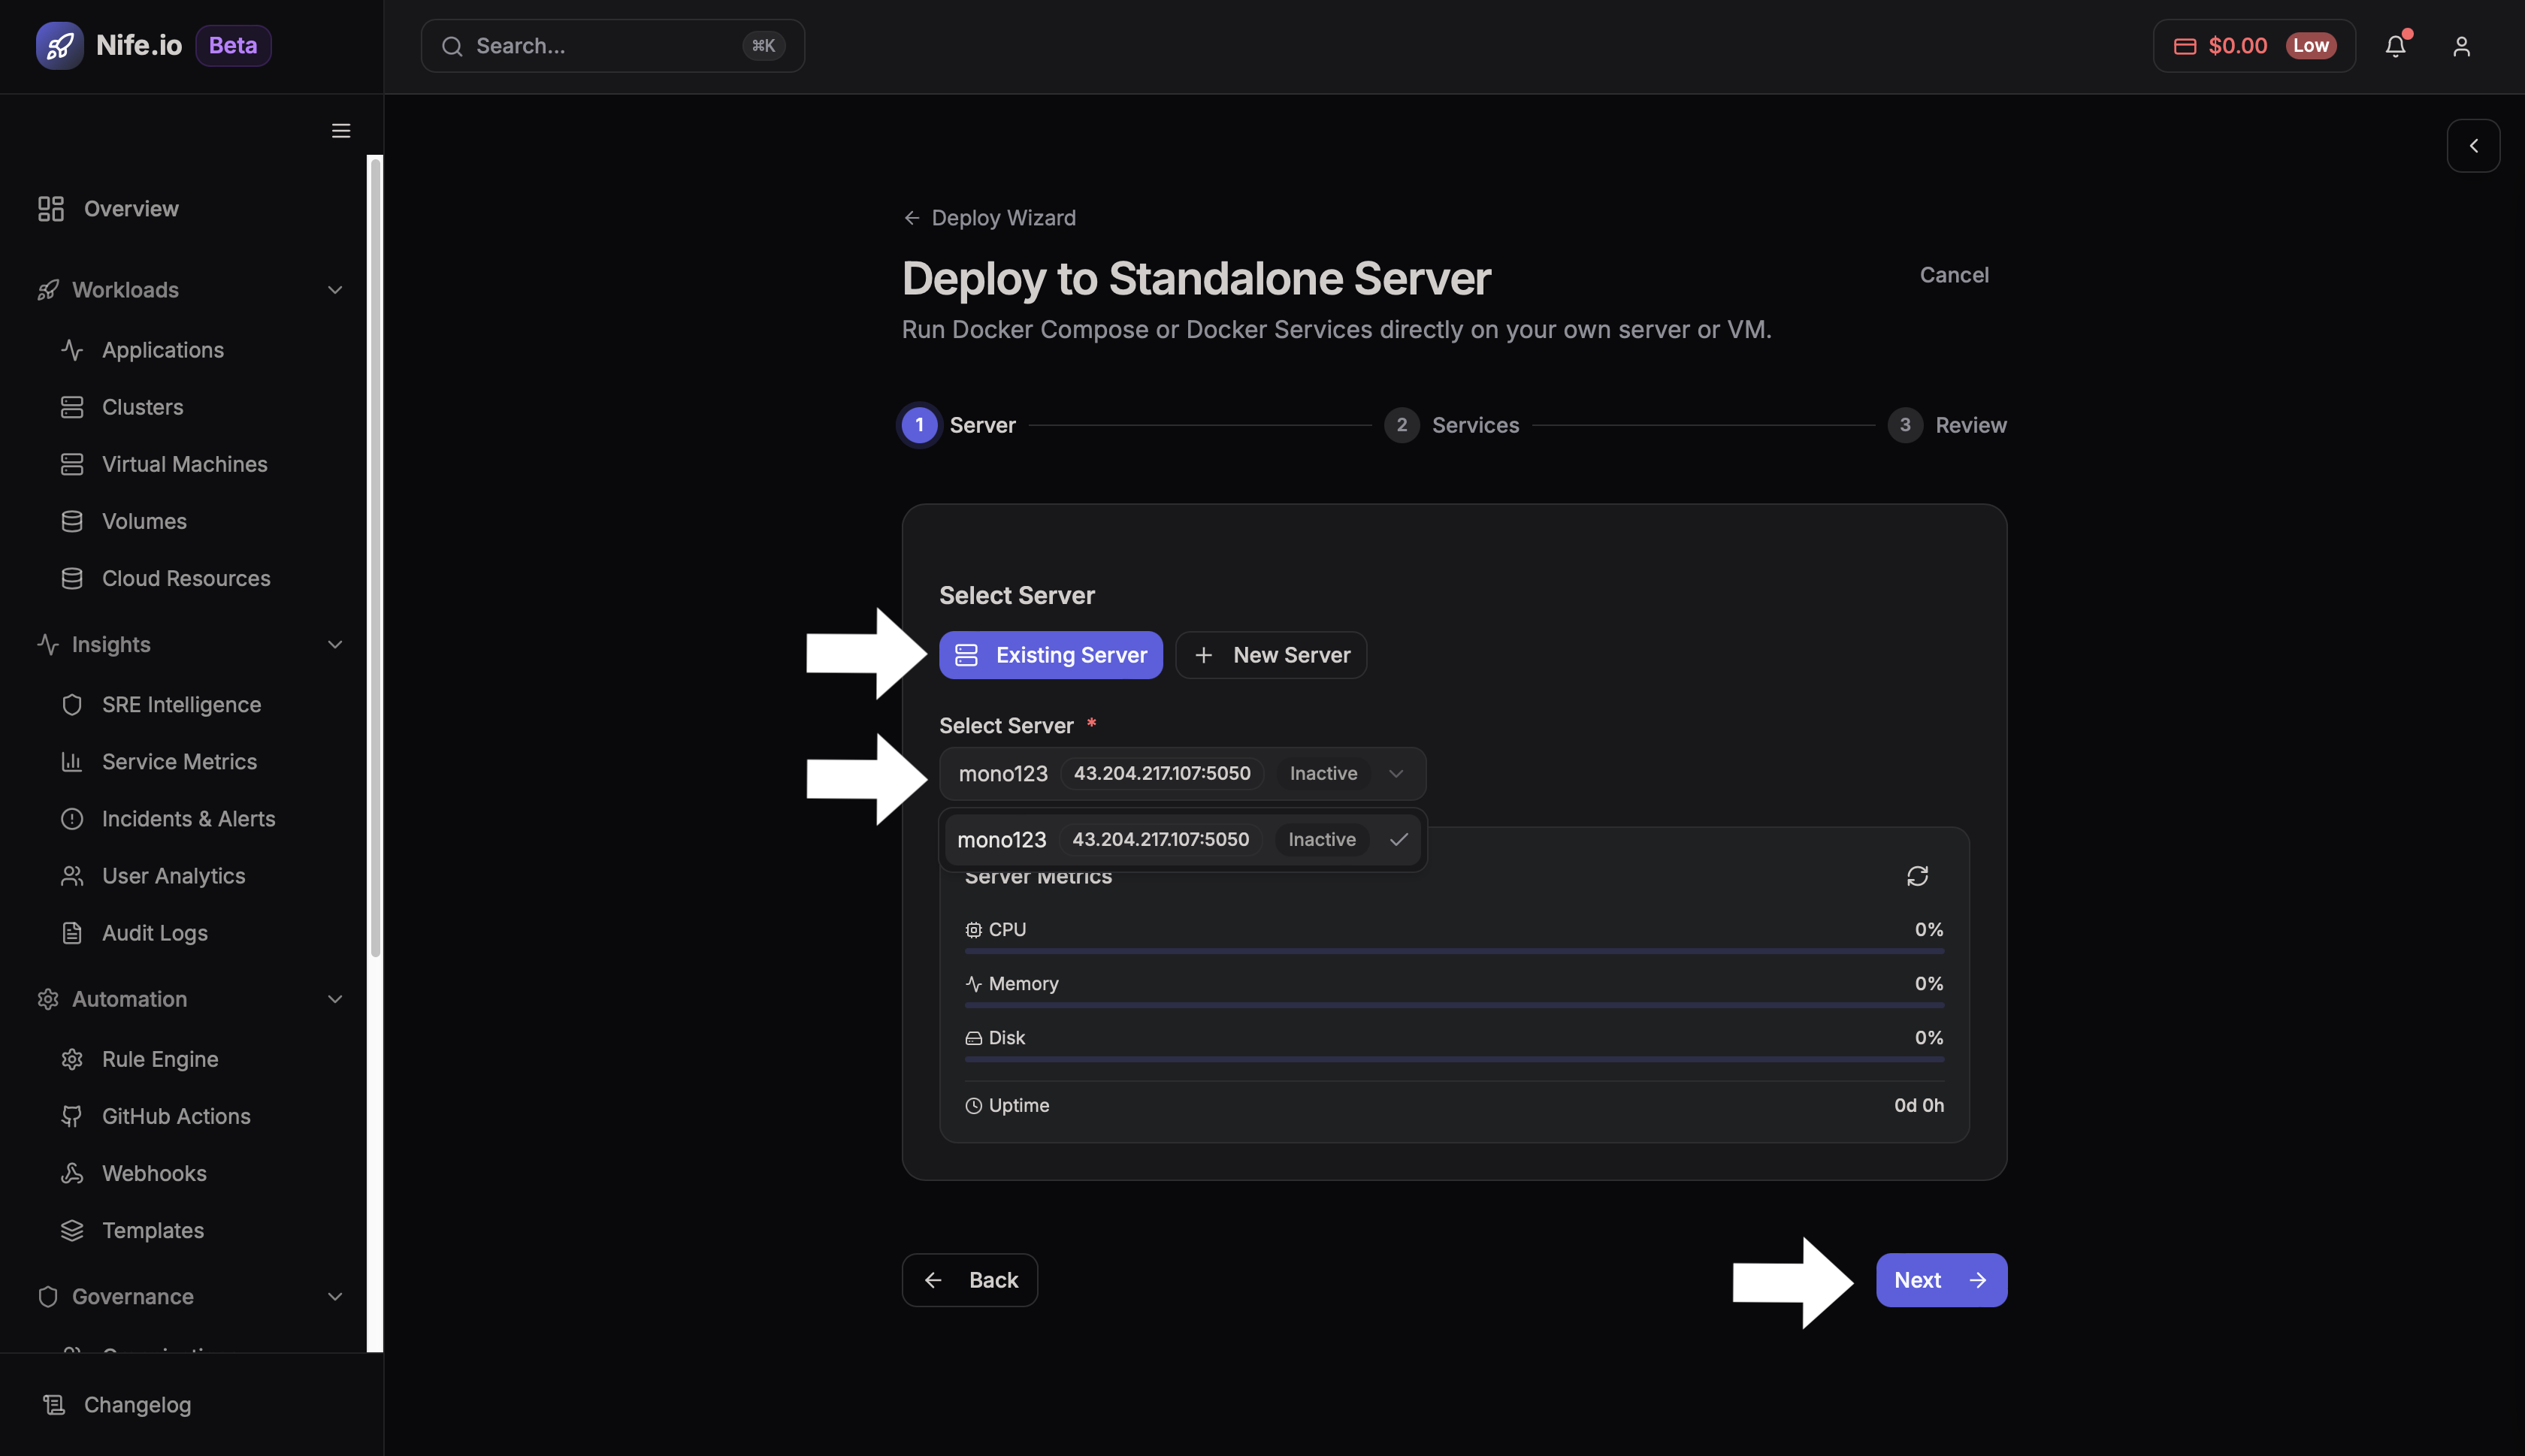
Step 2 — Select the Server
From the list of registered servers:
- Choose the server where the application should run
- Click Next to proceed to deployment configuration
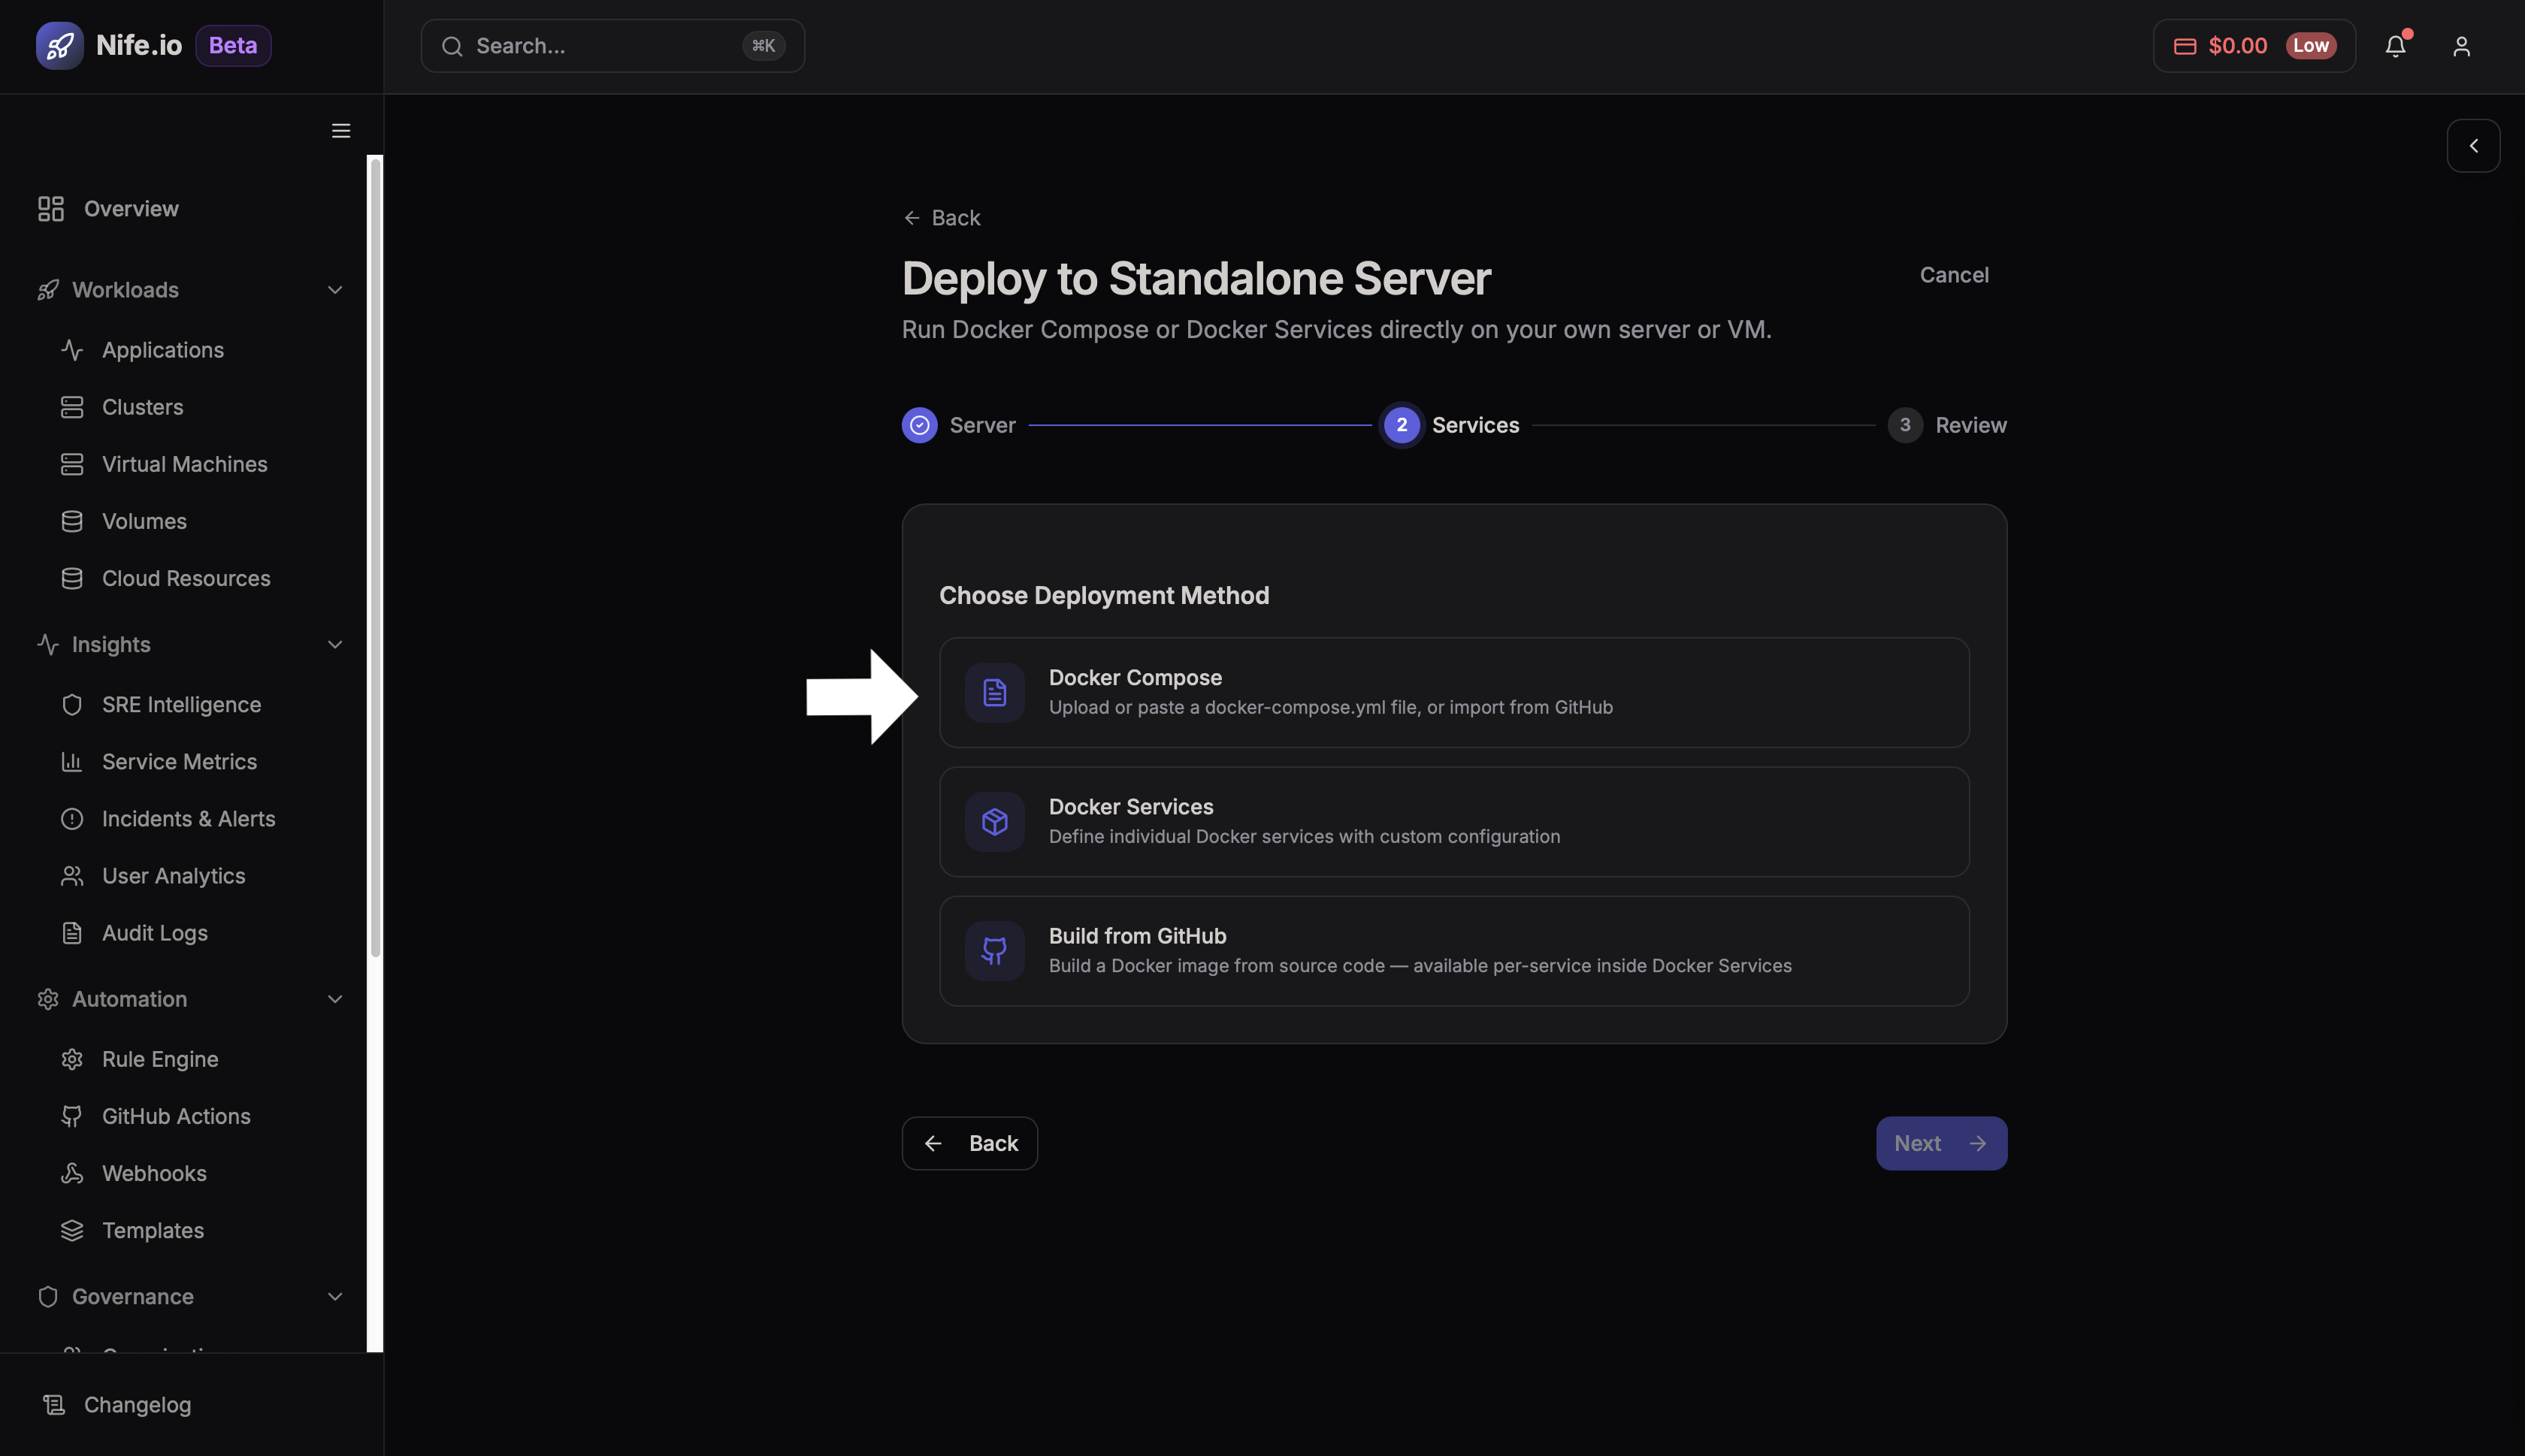
Step 3: Choose the Deployment Method
After selecting the target server, you must choose how the application will be deployed.
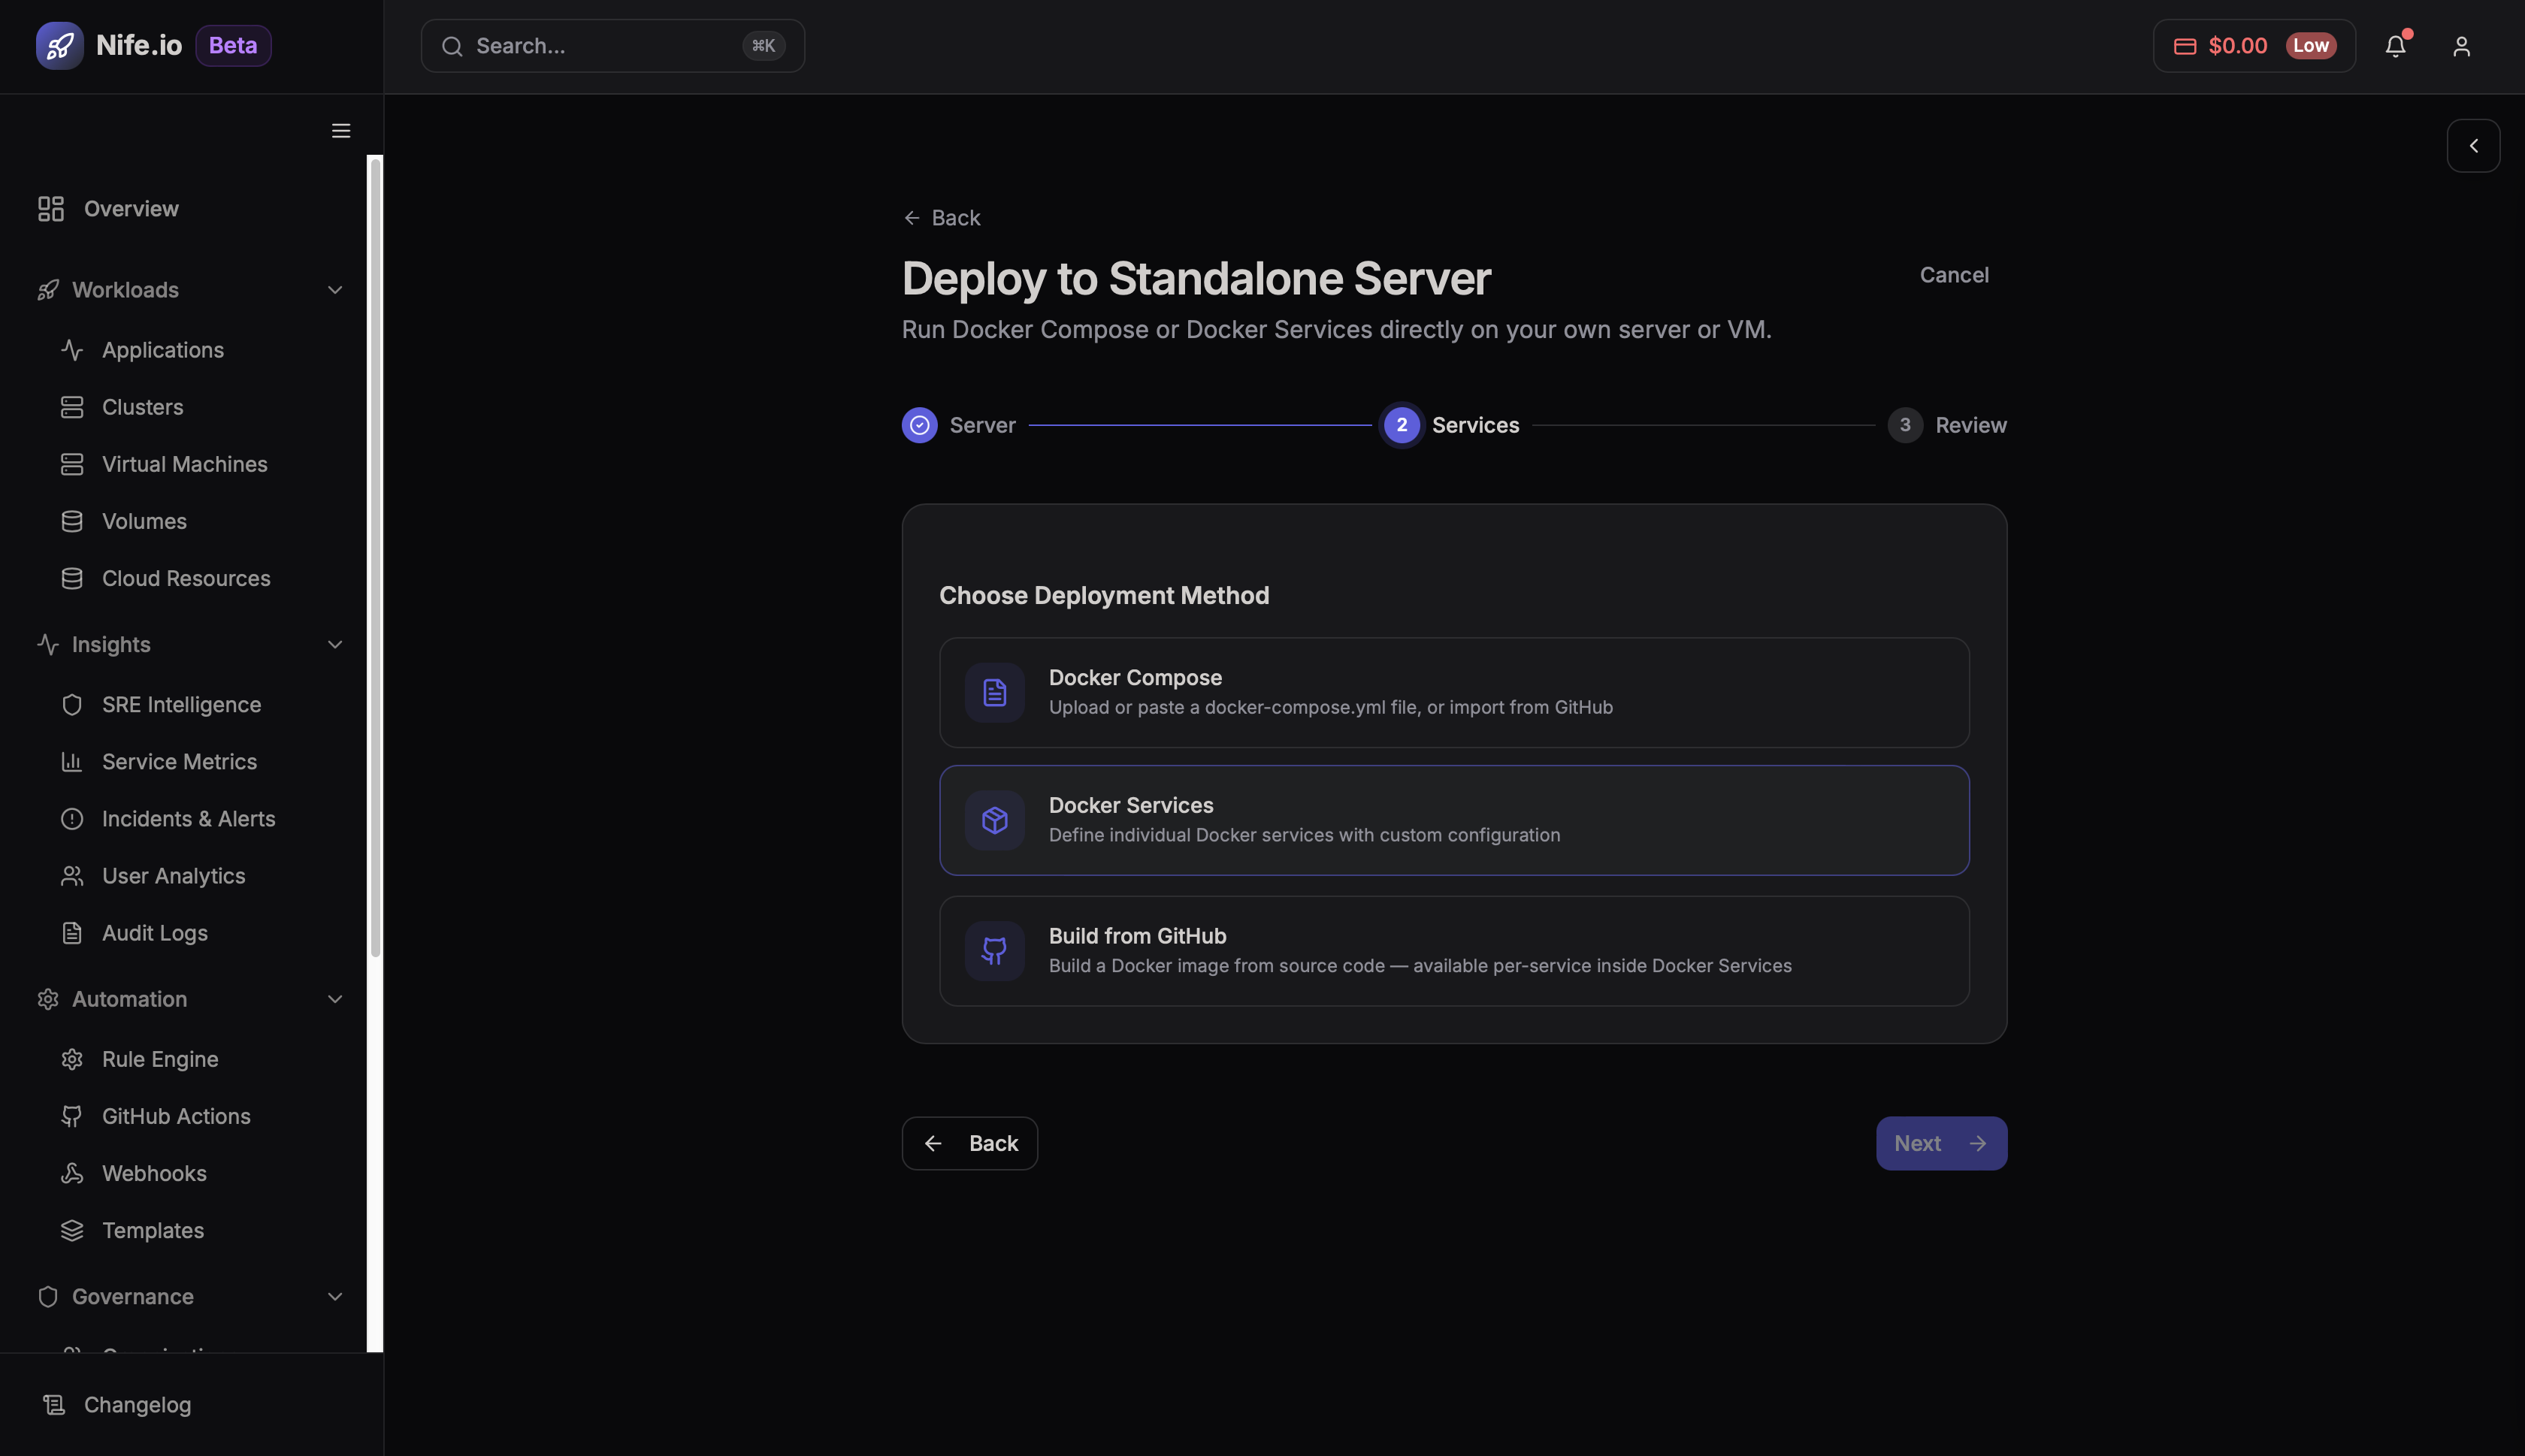
Two deployment methods are available:
Docker Services
Deploy a single container service using a Docker image.
Common use cases:
- Running backend APIs
- Running containerized applications
- Deploying services from a container registry or Git repository
Docker Compose
Deploy multiple containers together using a docker-compose.yml file.
Common use cases:
- Applications with multiple services
- Full stack deployments (database + API + frontend)
Step 4: Deploy Using Docker Services
Docker Services allow you to run a container as a standalone application.
You can deploy the container using three different sources.
Option 1: Build Docker Image from GitHub
Use this option when the Docker image must be built directly from source code stored in a GitHub repository.

Step 1 — Select Build from GitHub
Click Build from GitHub.
Step 2 — Configure Repository Details
Provide the following information:
- Repository URL
- Branch
- Dockerfile Path
- Image Tag
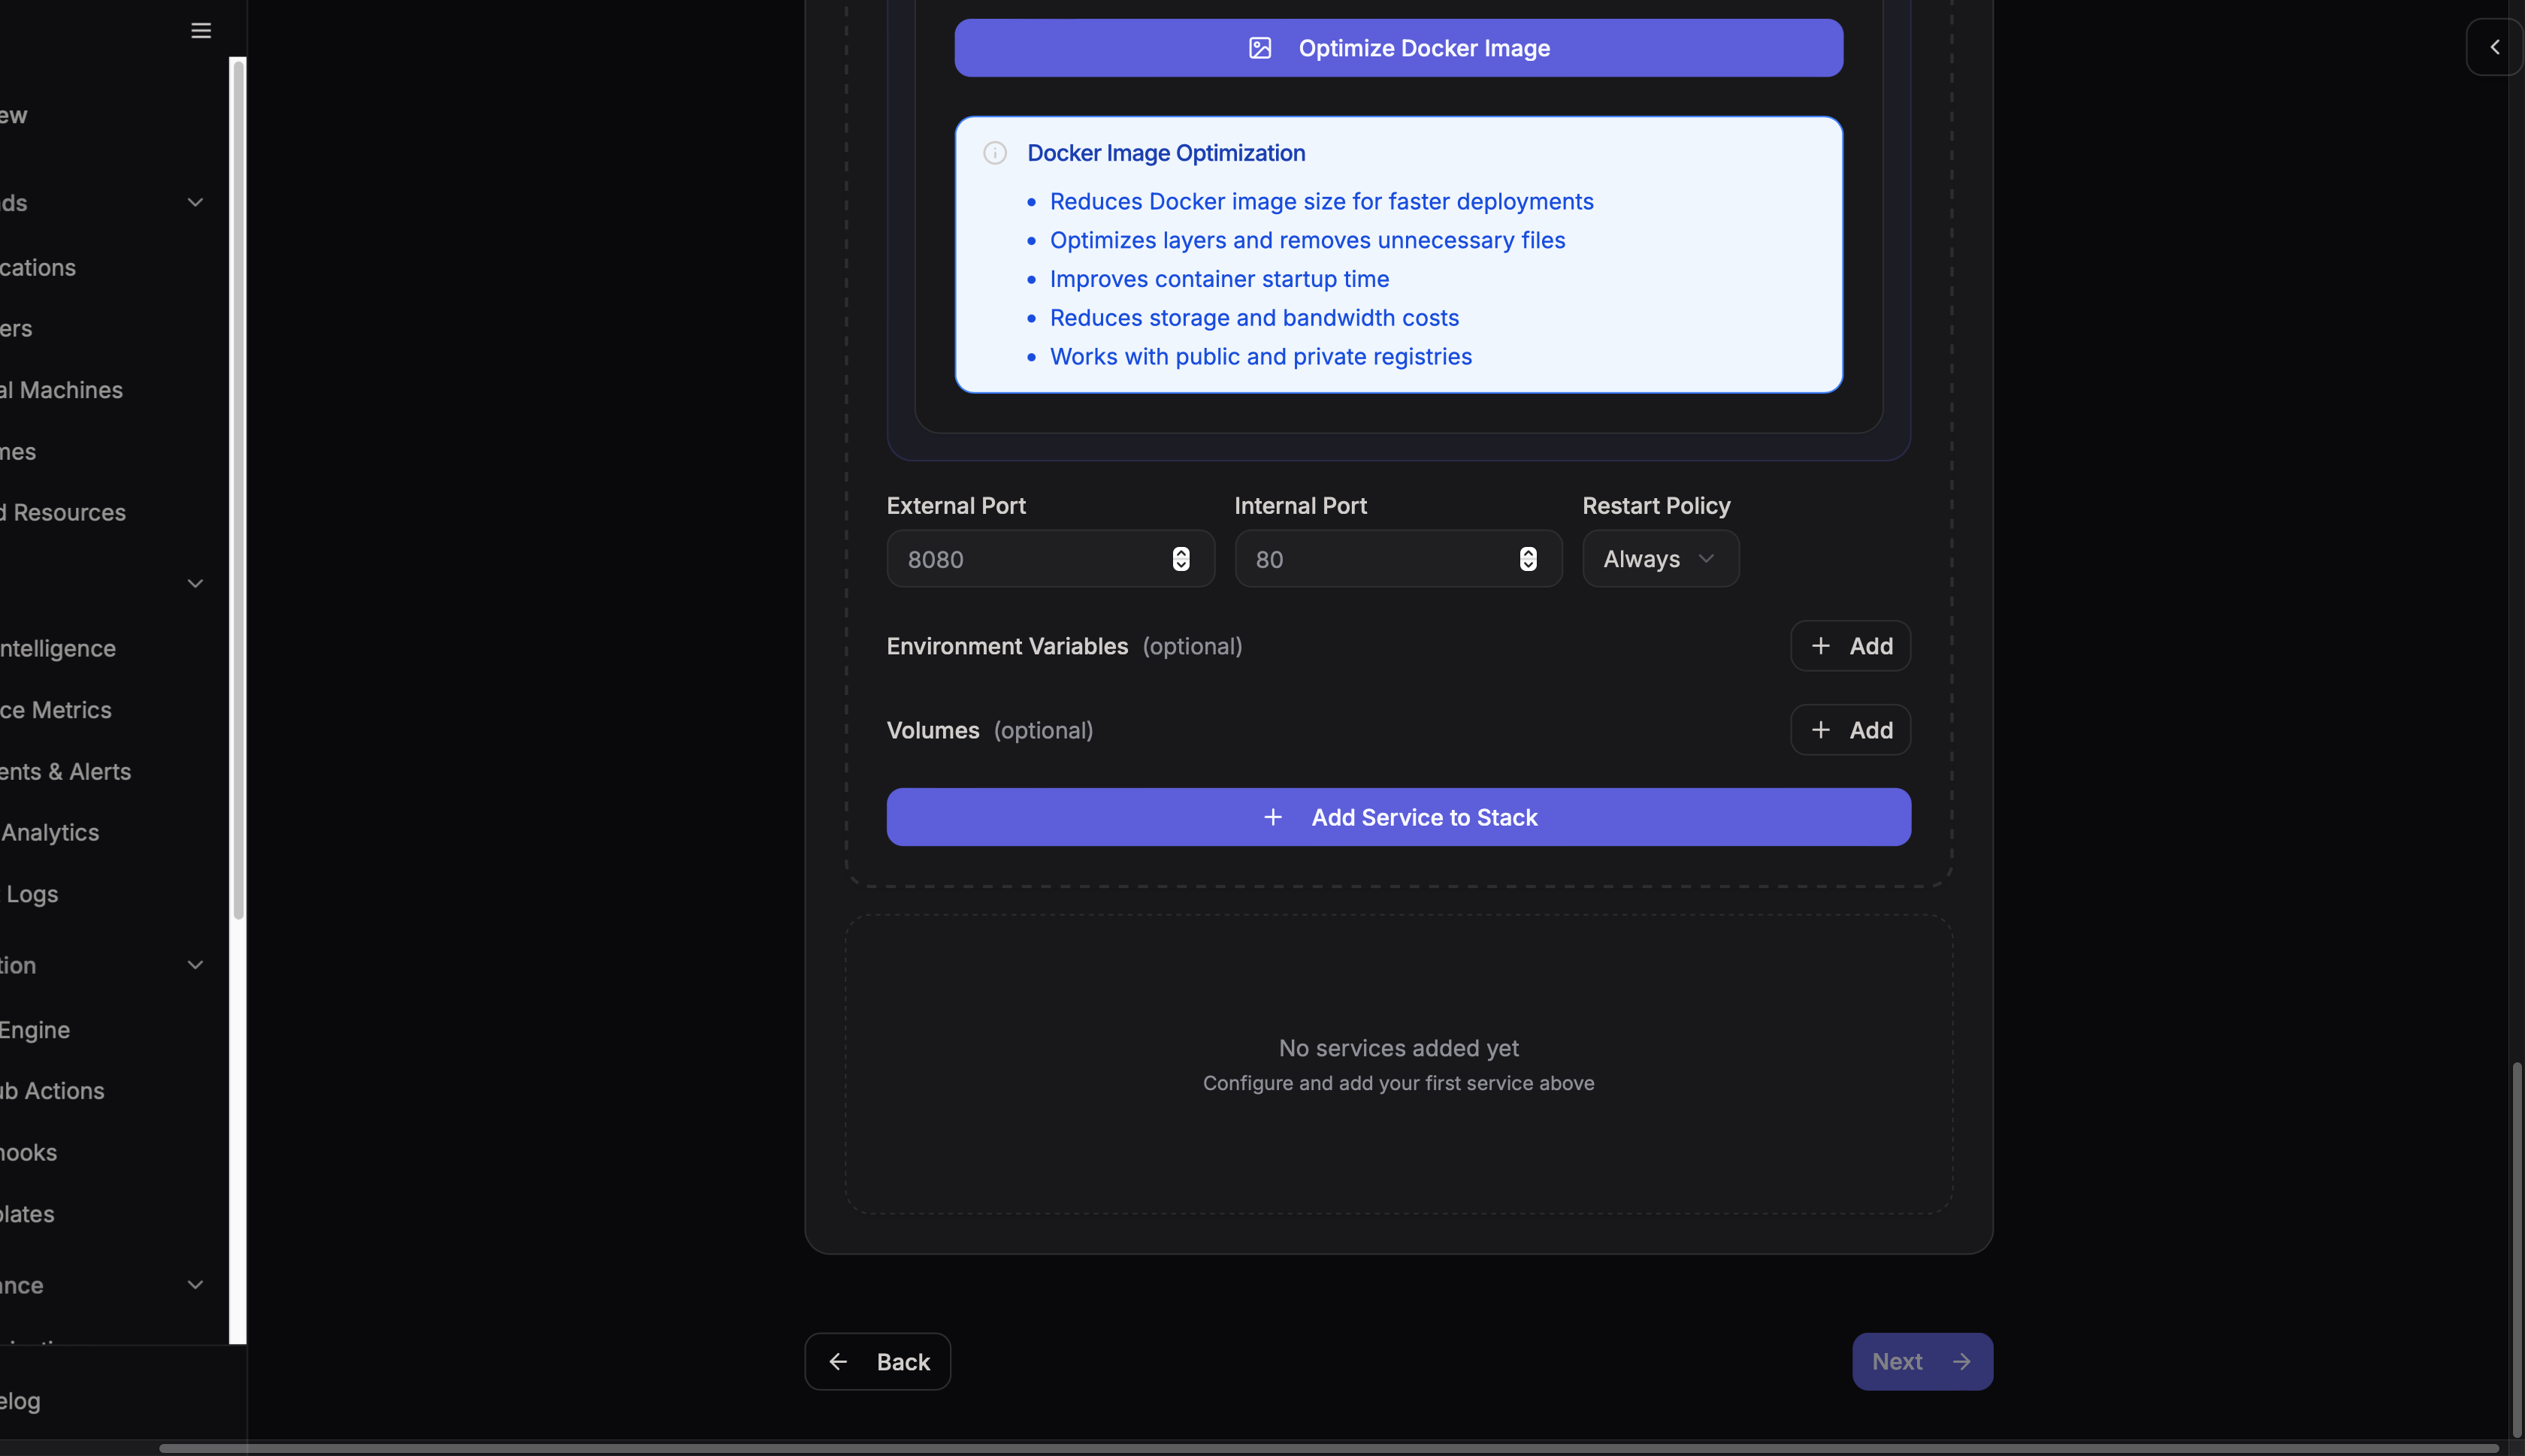
Step 3 — Configure Build Settings
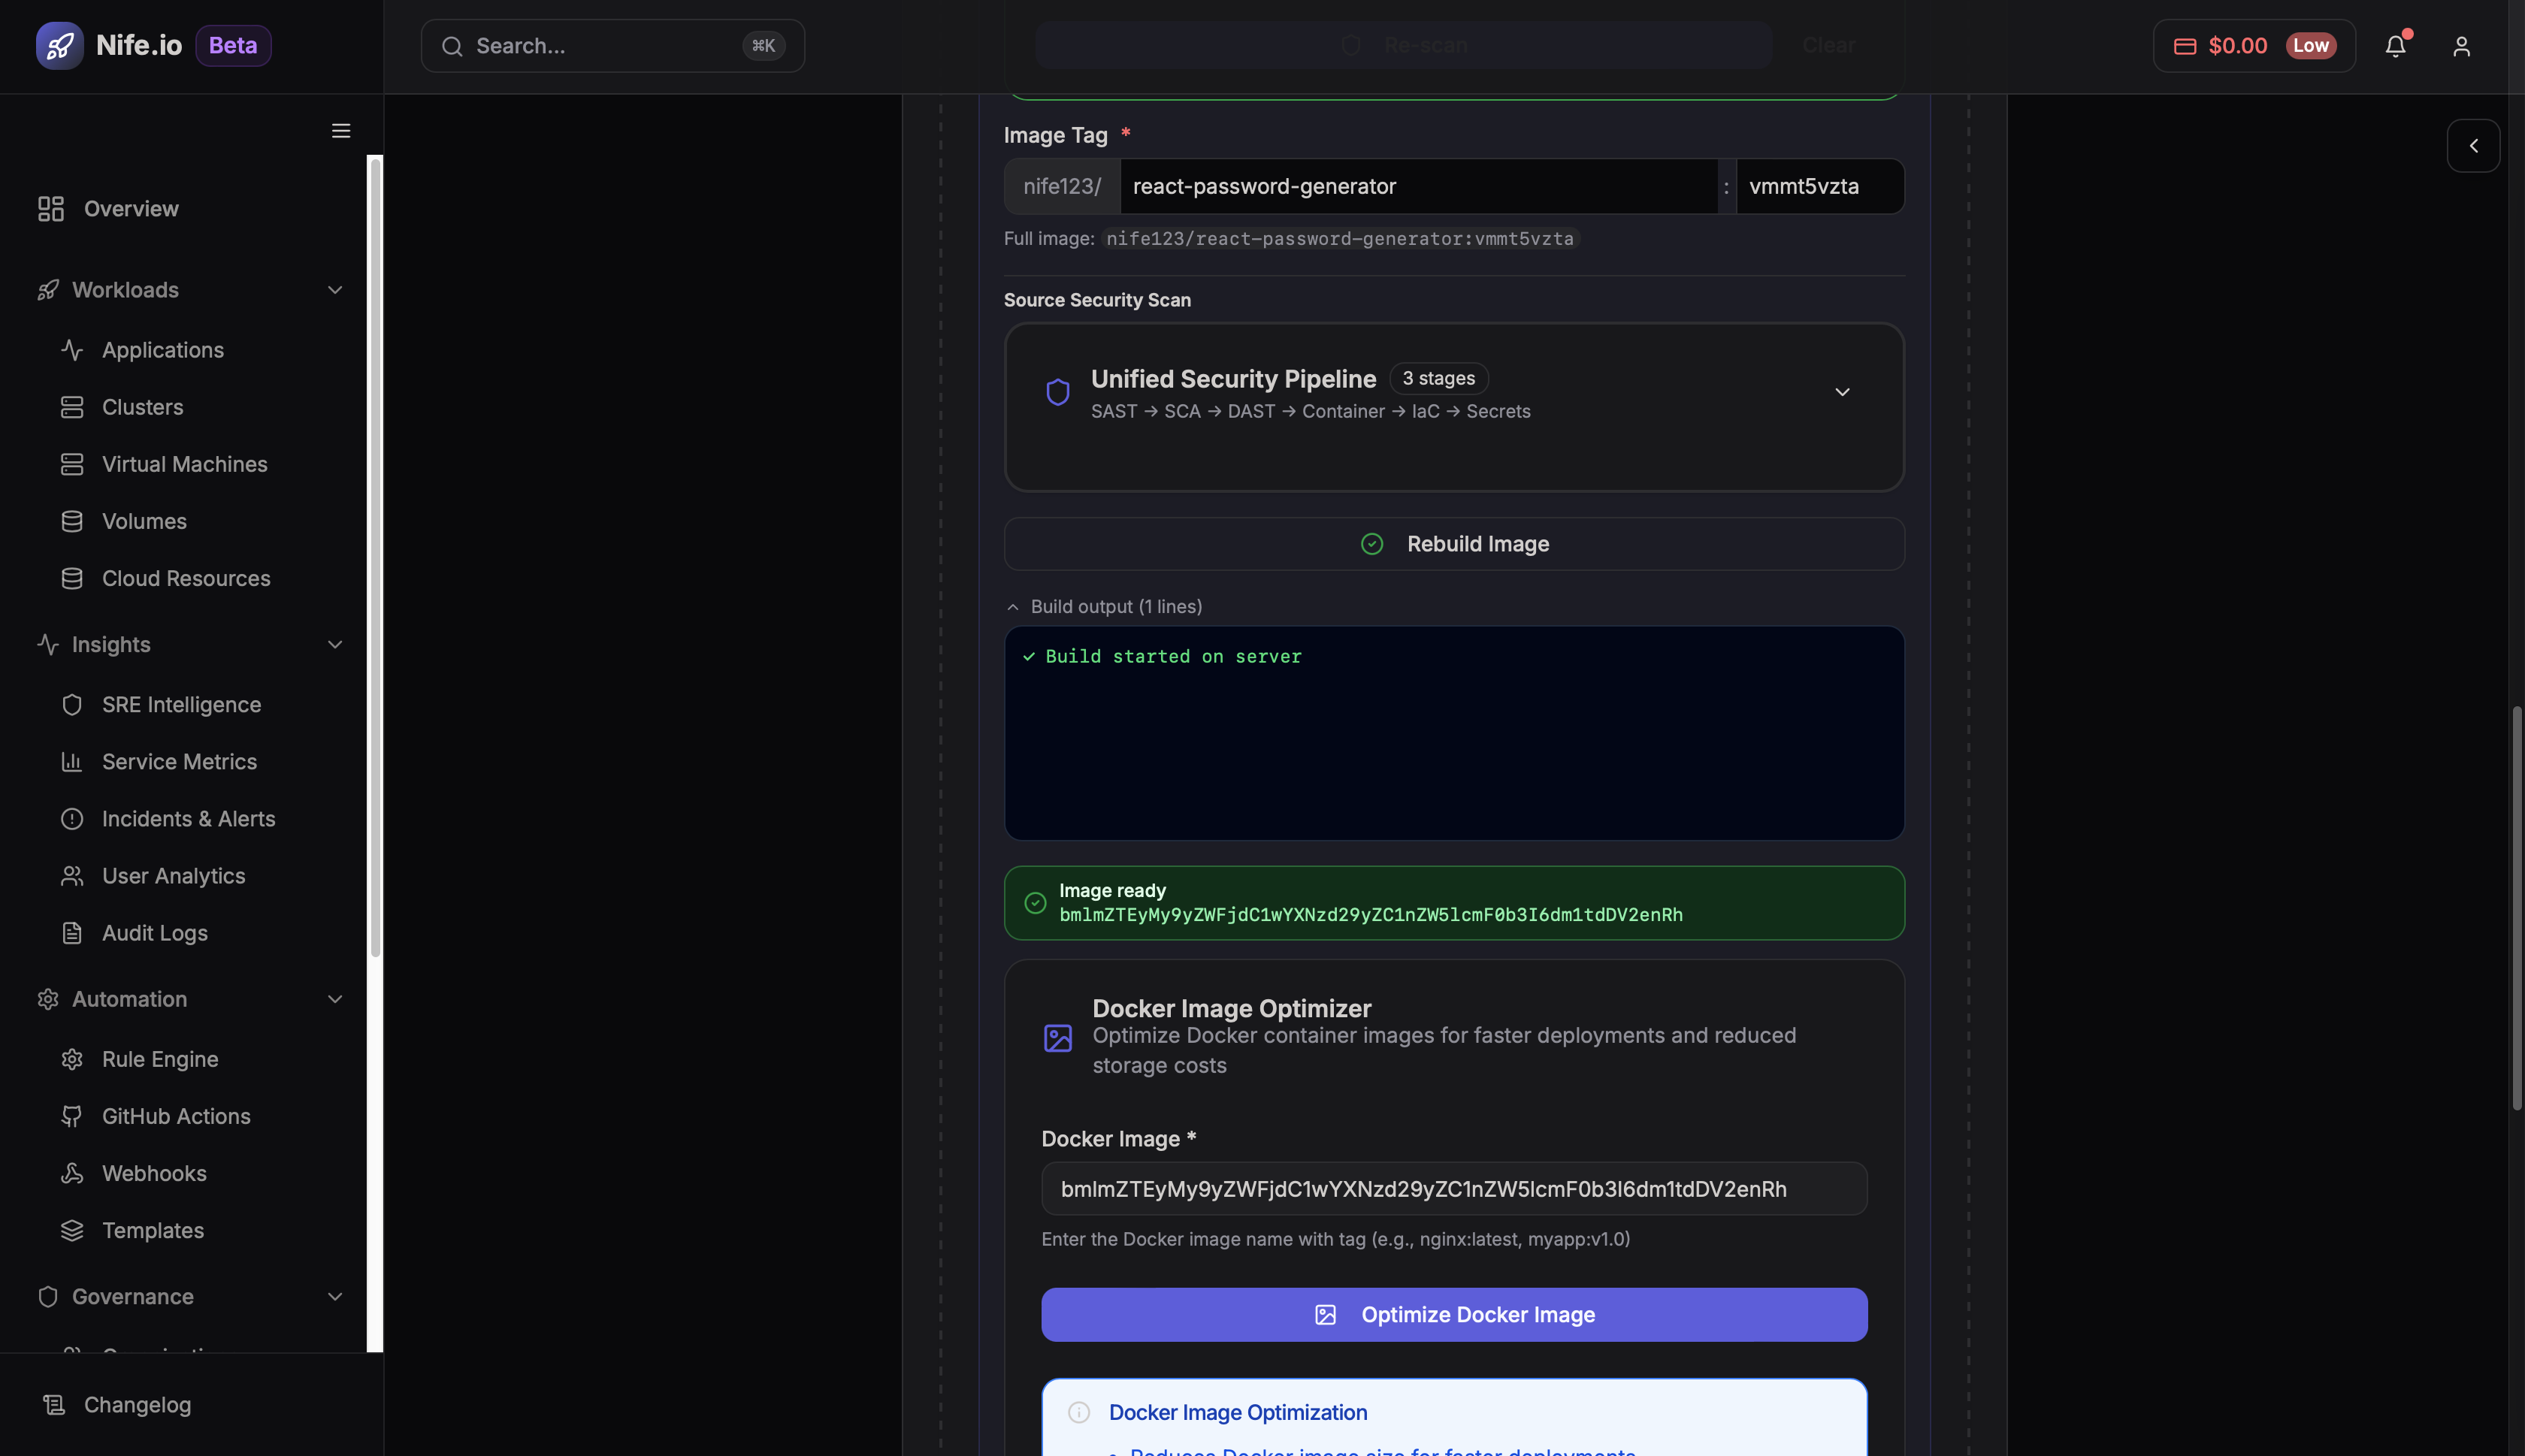
At this stage you can configure additional build parameters such as environment variables or build options.
Step 4 — Review Build Configuration
Verify that:
- The repository URL is correct
- The branch and Dockerfile path are valid
- The image tag is correctly defined
Step 5 — Deploy
Click Deploy.
The platform will:
- Clone the GitHub repository
- Build the Docker image
- Deploy the container to the server
Option 2: Deploy from Docker Registry
Use this option if the Docker image already exists in a container registry.
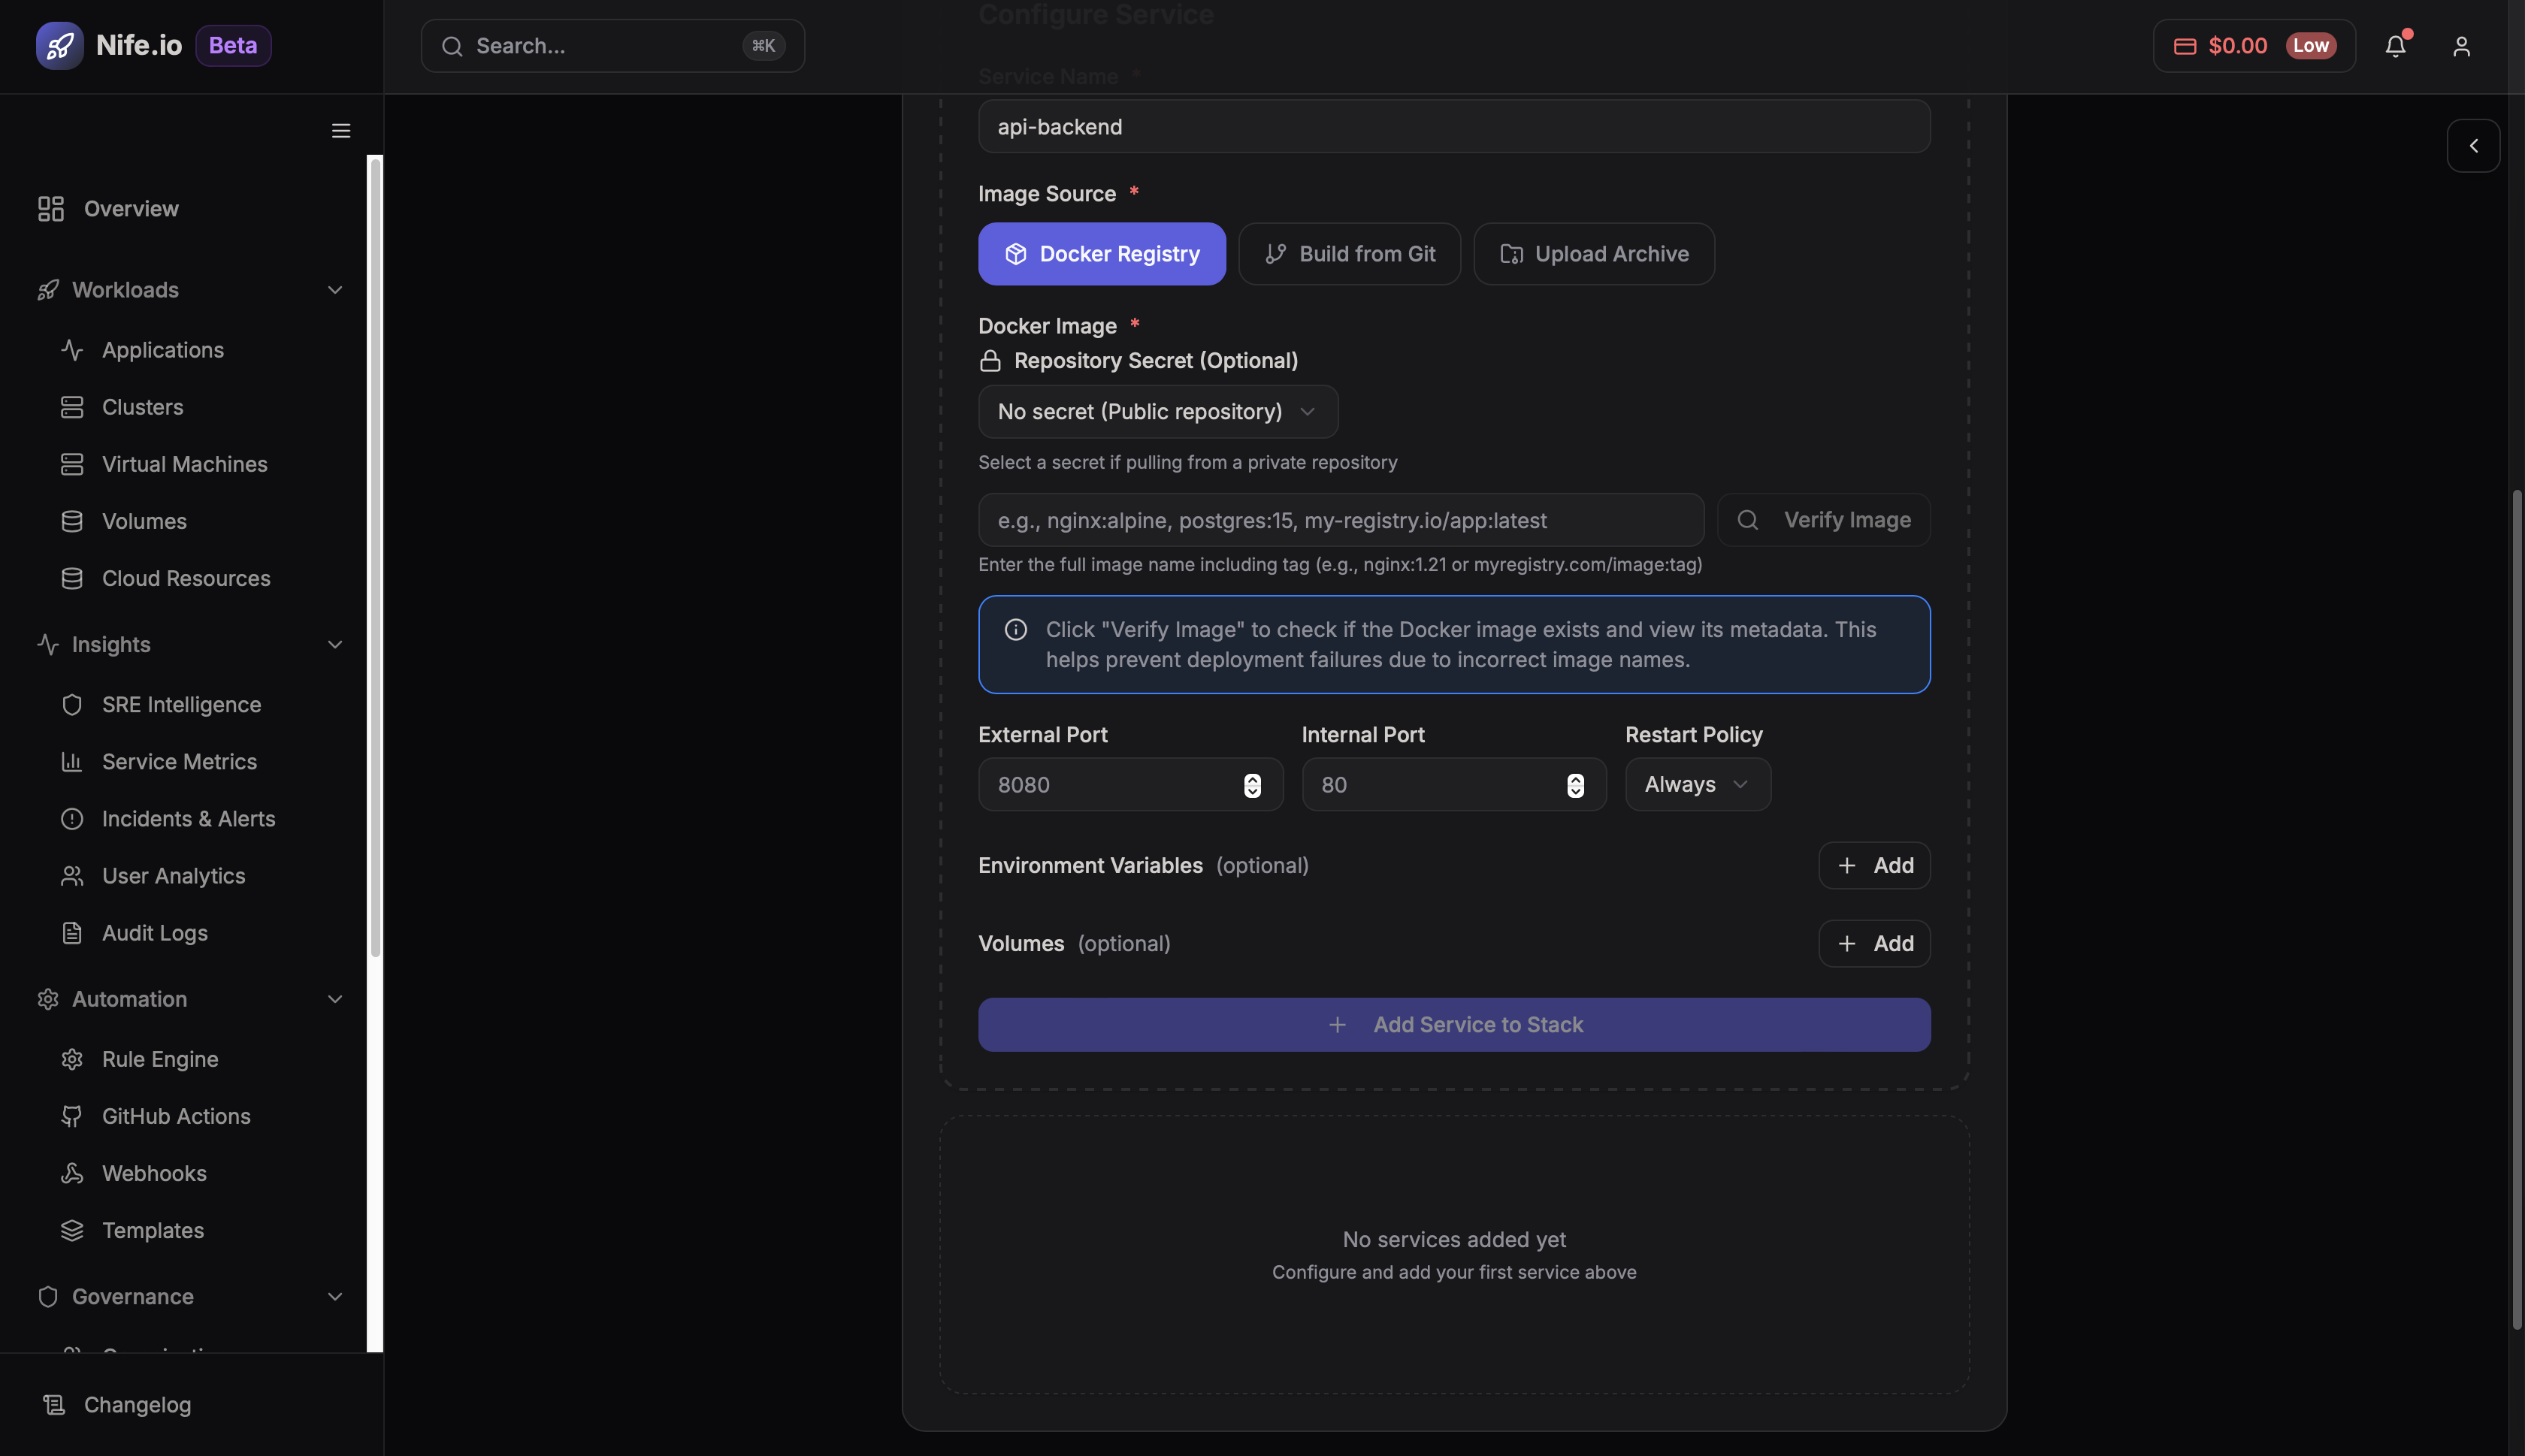
Step 1 — Select Docker Registry
Choose Docker Registry.
Step 2 — Enter Image Information
Provide:
- Image Name
- Image Tag
- Registry URL
If the registry is private, you must also provide authentication credentials.
Step 3 — Deploy
Click Deploy to pull the image from the registry and run it on the selected server.
Option 3: Upload Docker Archive
This option allows you to deploy a container image stored locally as a Docker archive.
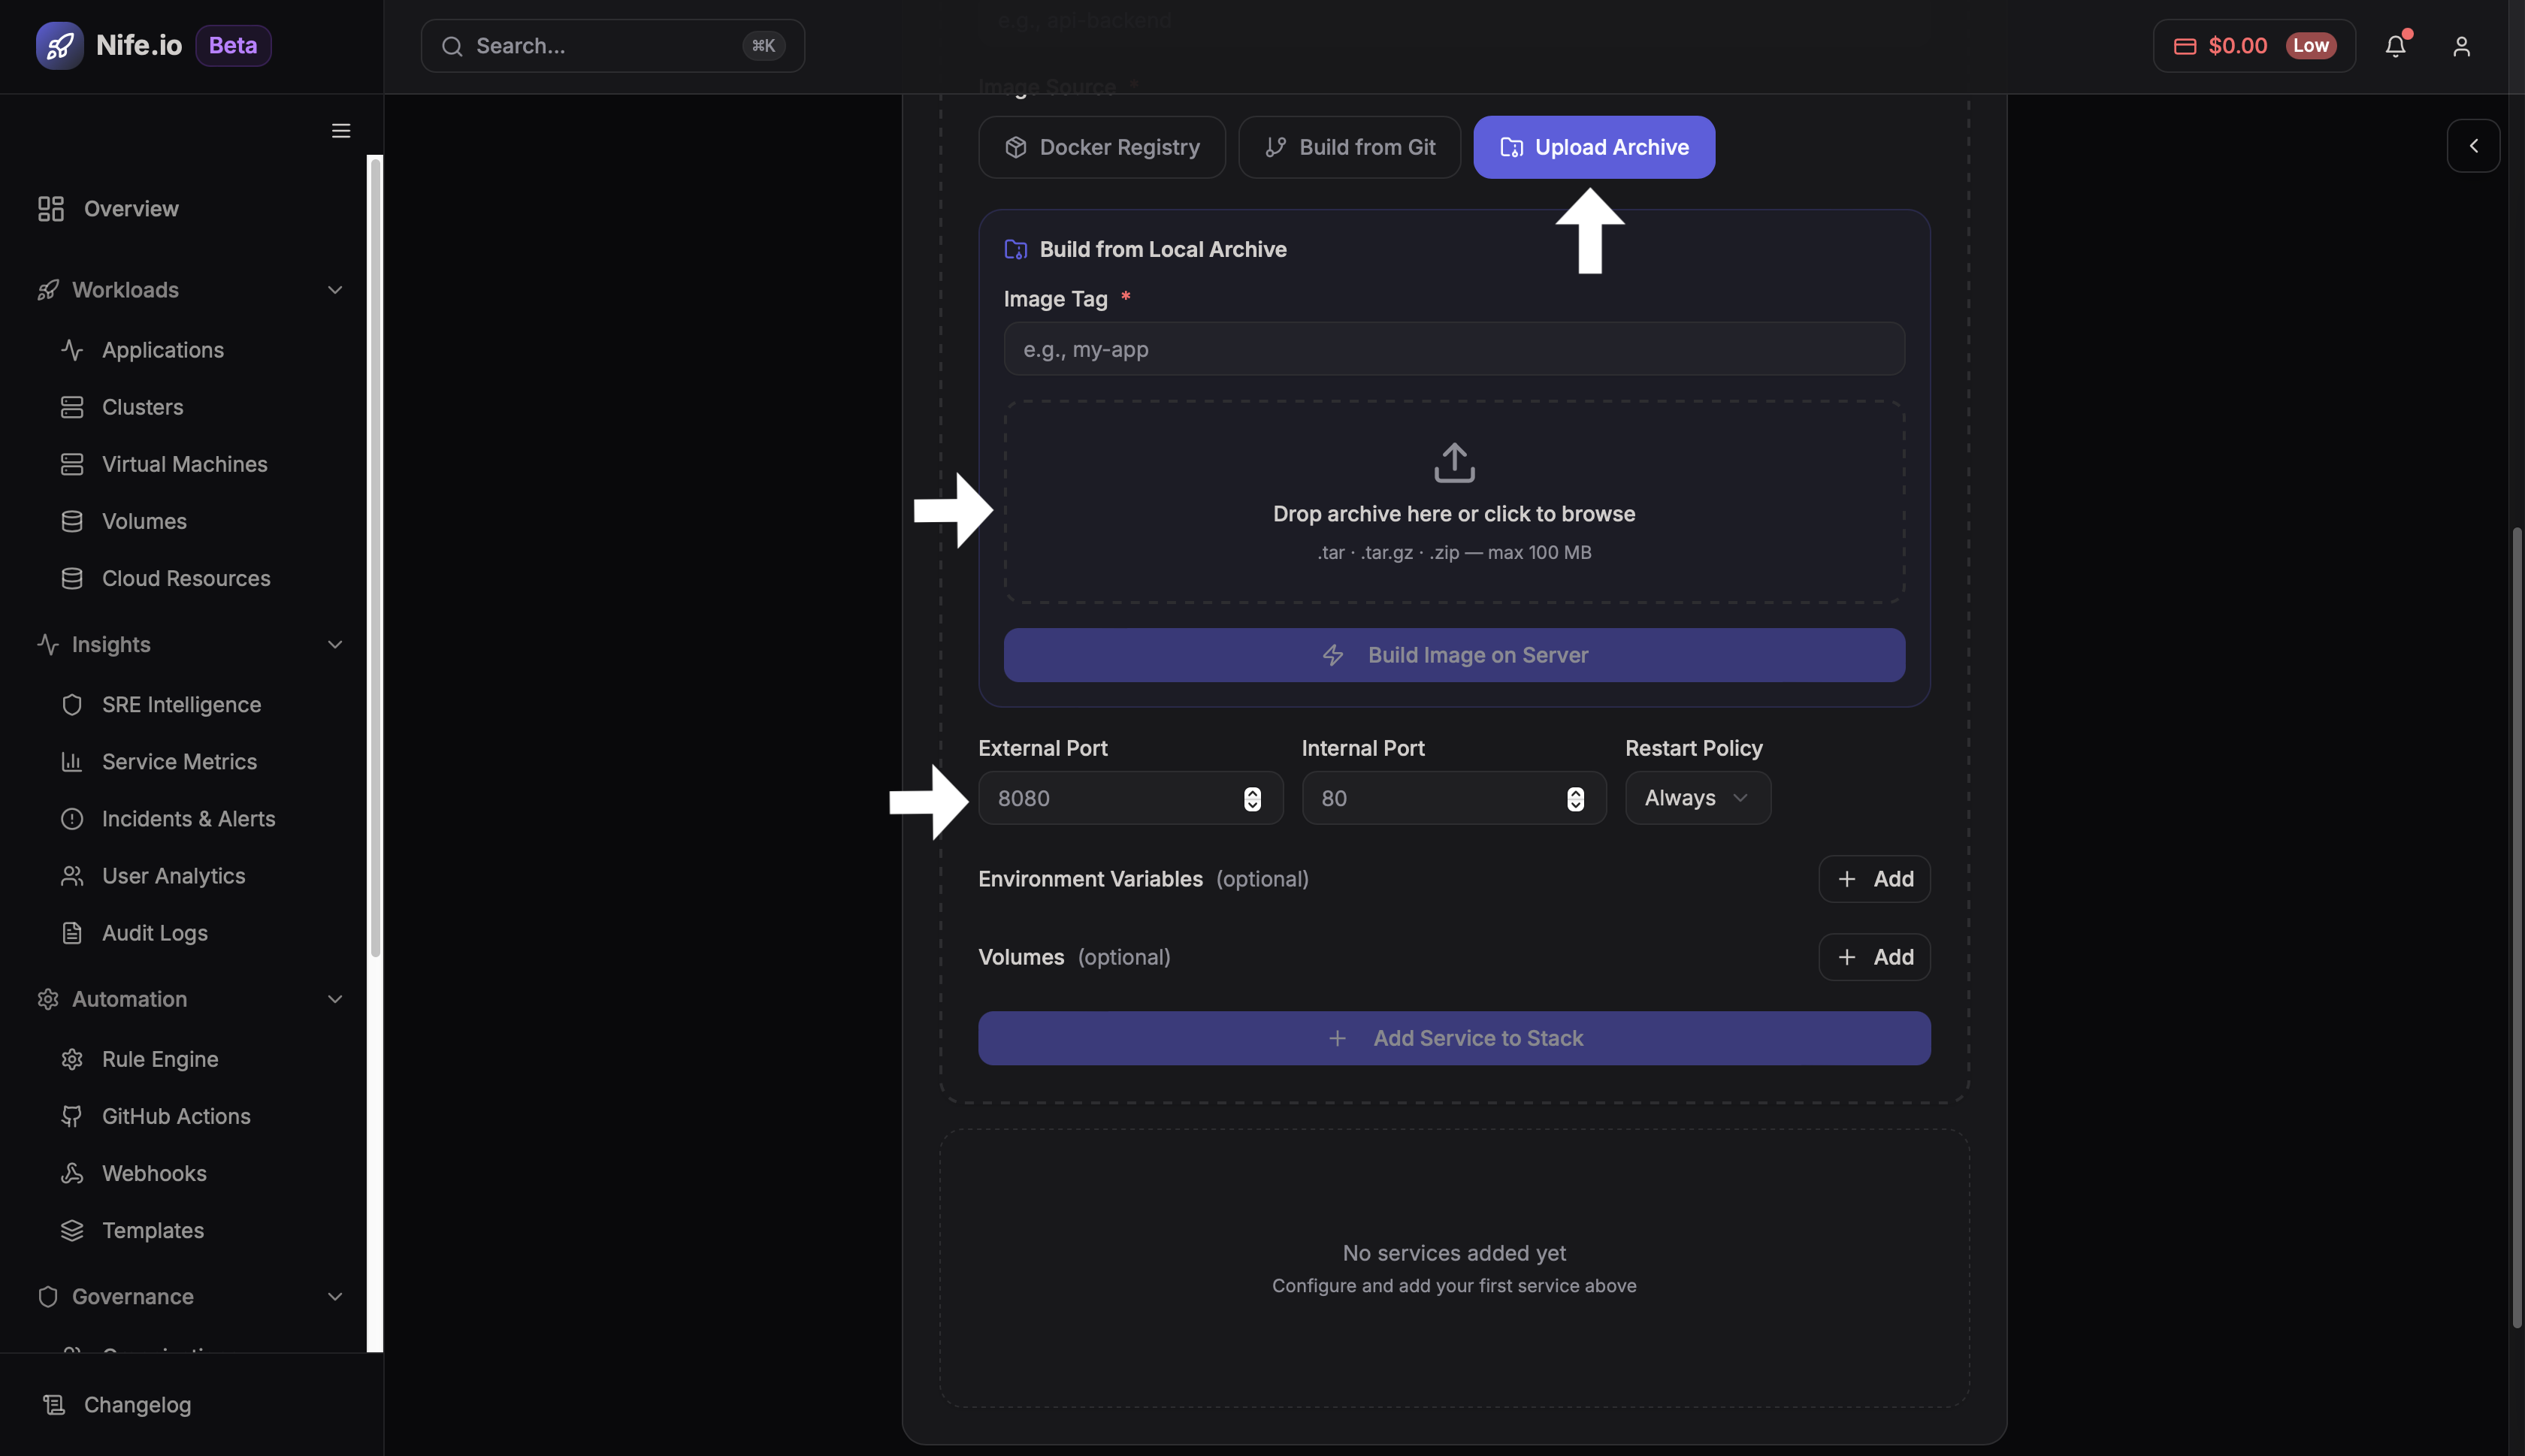
Step 1
Select Upload Archive.
Step 2
Upload the Docker image archive file.
This file typically contains a pre-built Docker image exported from another environment.
Step 3
Click Deploy to run the container.
Step 5: Deploy Using Docker Compose
Docker Compose allows you to deploy applications consisting of multiple containers.
Examples:
- Web server + database
- Microservices architecture
- Full stack applications
Option 1: Upload Compose File
If you already have a docker-compose.yml file locally, you can upload it directly.
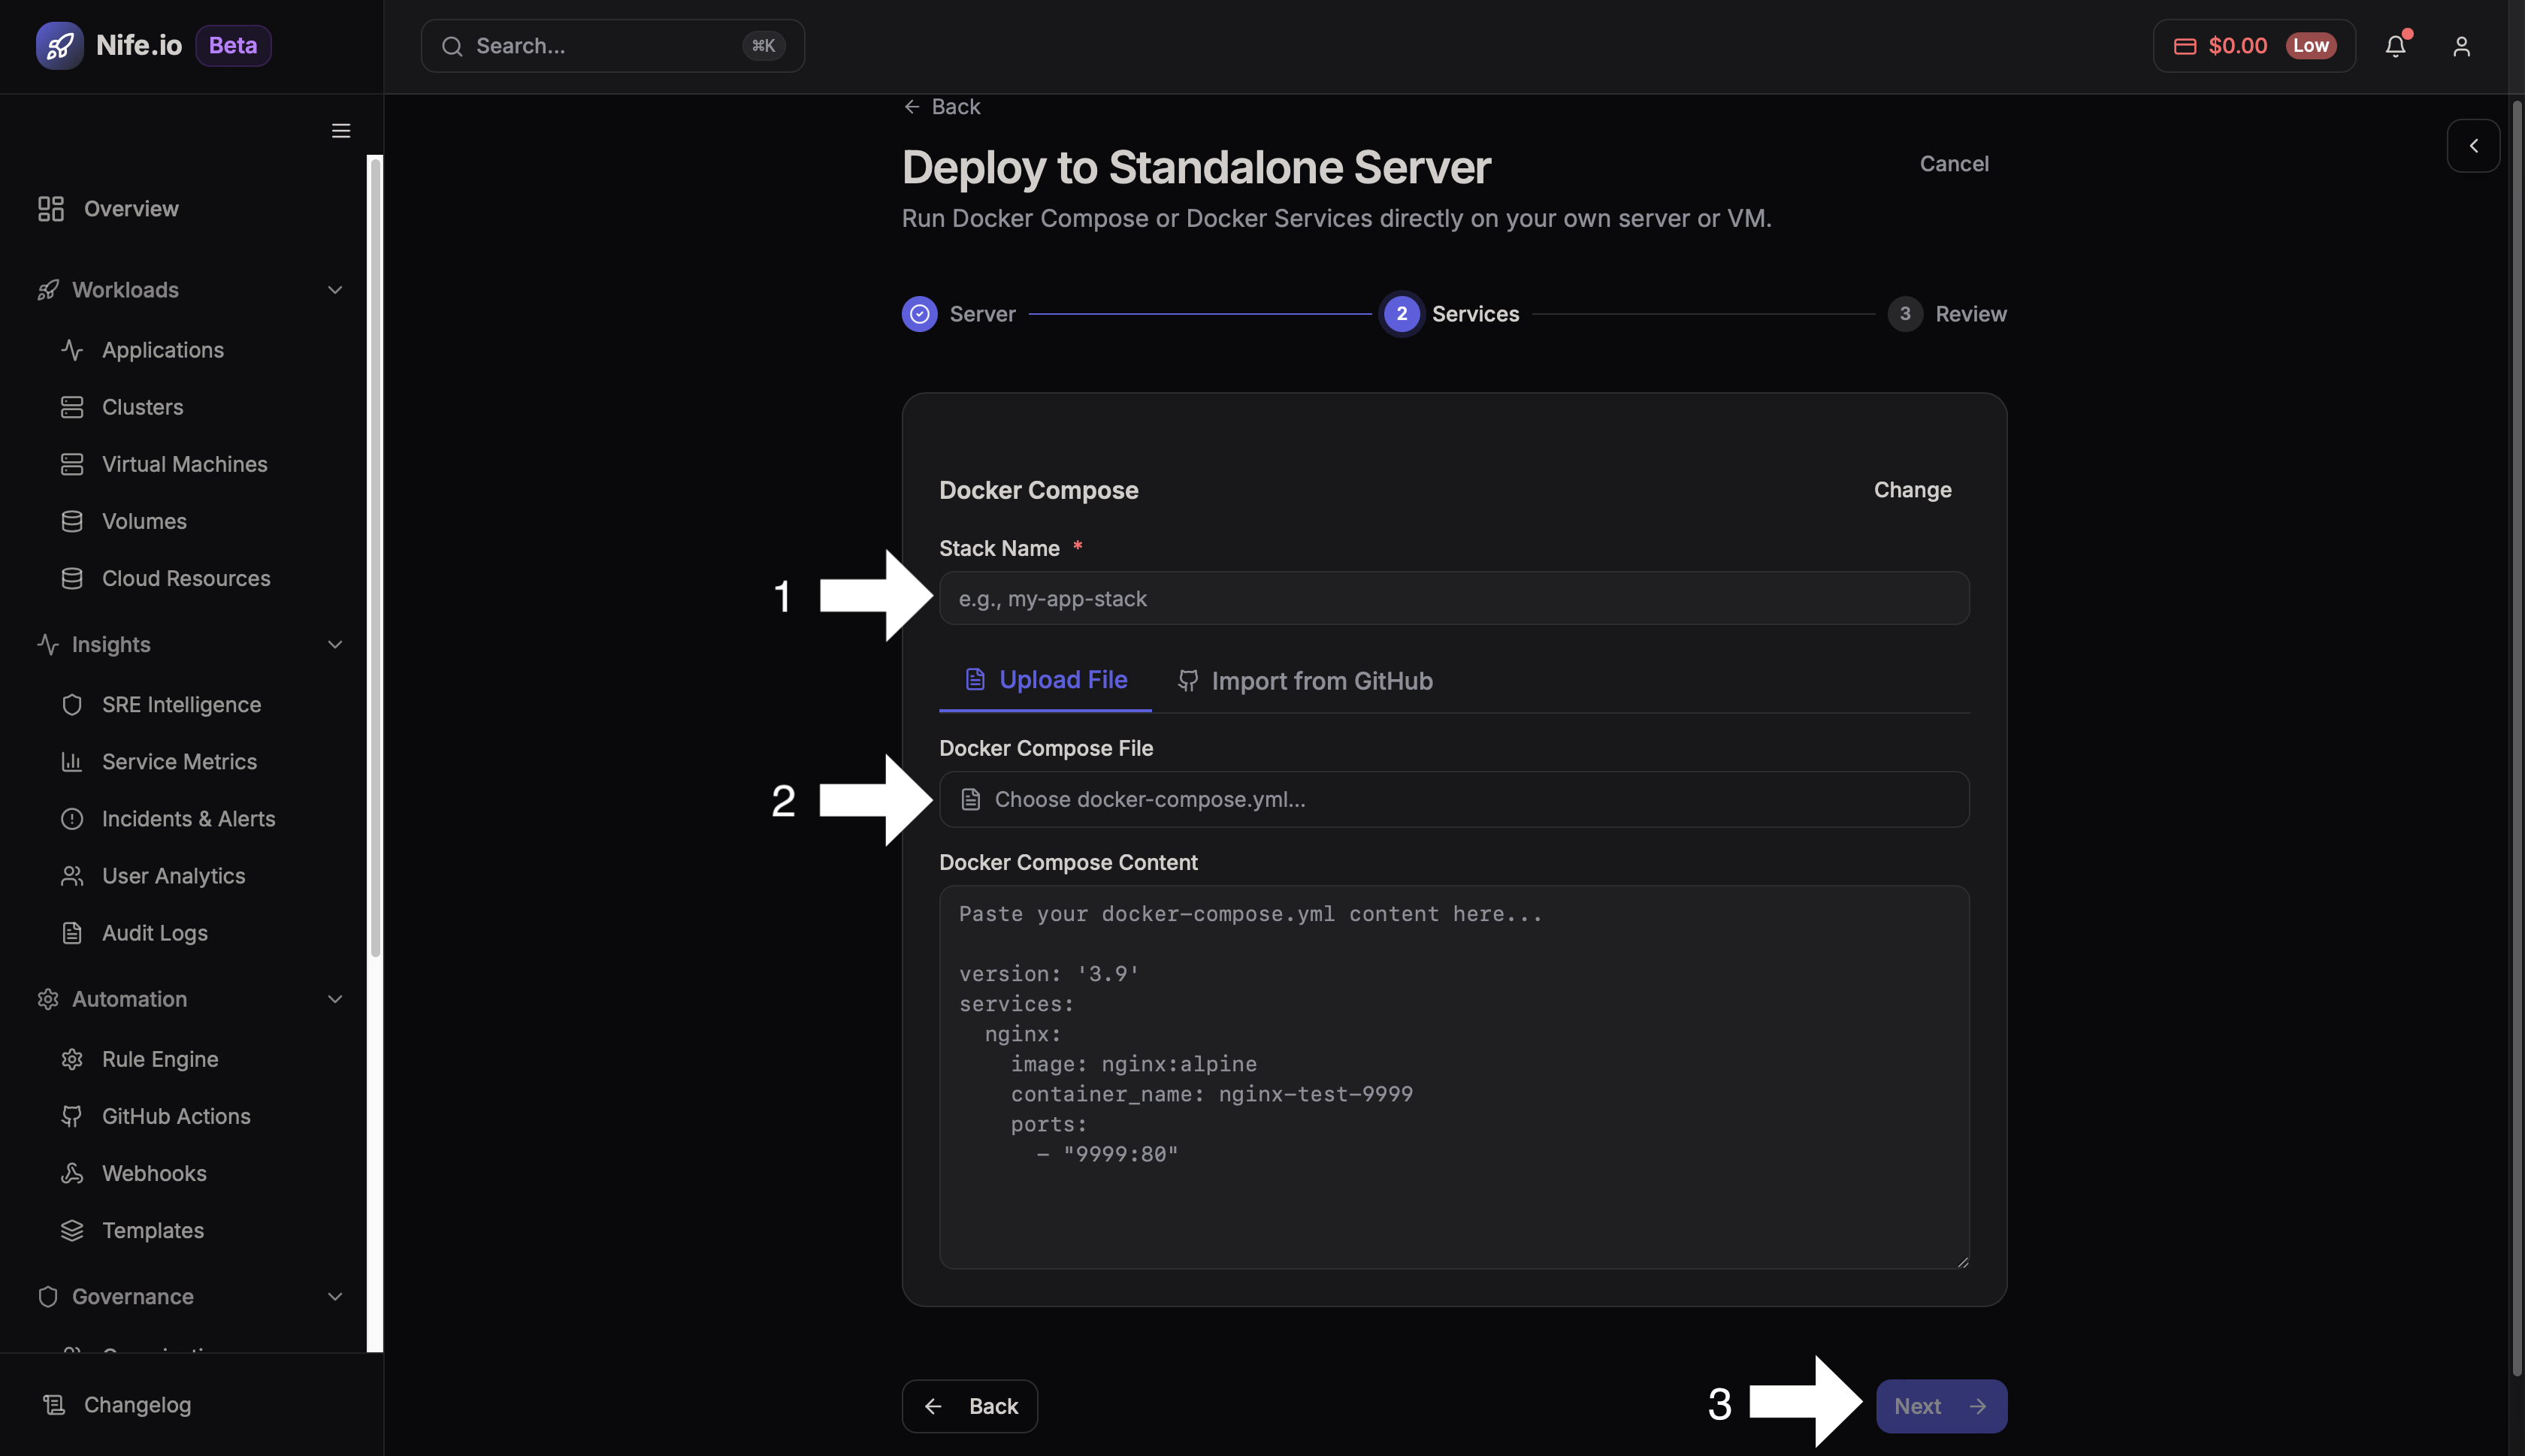
Step 1
Select Upload File.
Step 2
Upload the docker-compose.yml file.
Step 3
The platform will automatically detect the services defined inside the compose file.
Step 4
Click Deploy to start the services.
Option 2: Import Compose File from GitHub
This option allows the platform to retrieve the compose file directly from a GitHub repository.
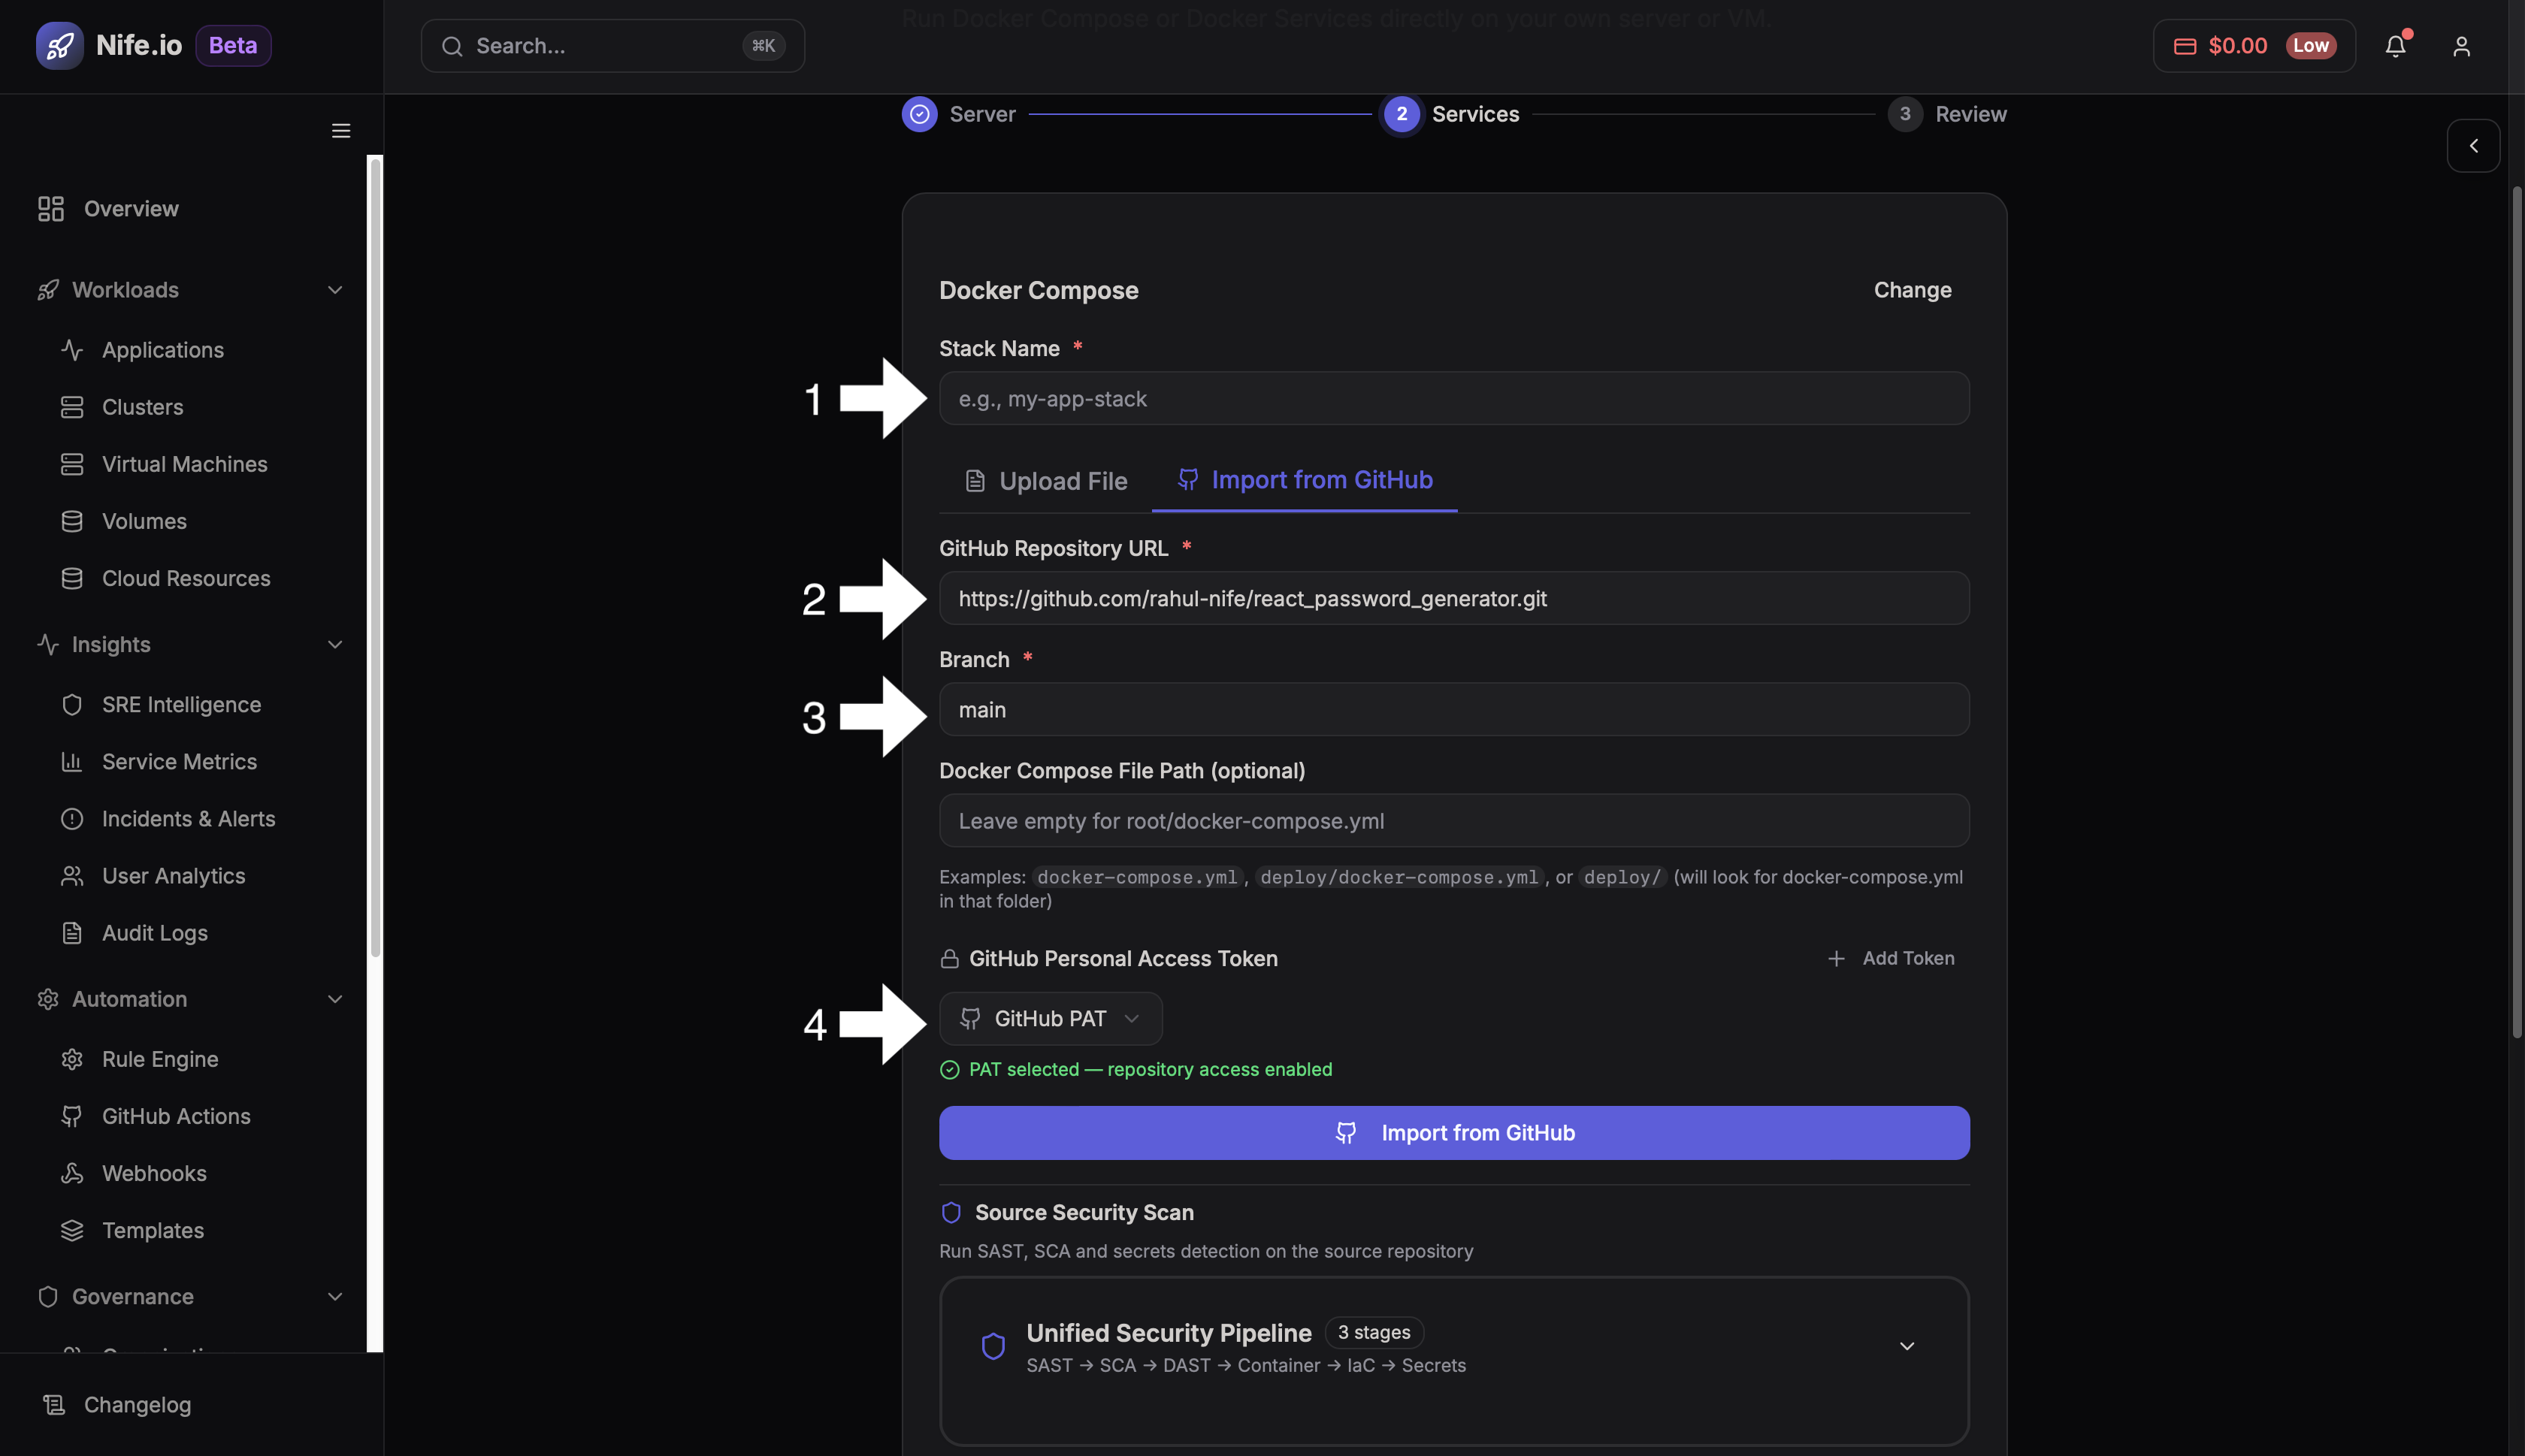
Step 1
Select Import from GitHub.
Step 2
Provide repository details:
- GitHub repository URL
- Branch
- Path to the compose file
- GitHub access token (if repository is private)
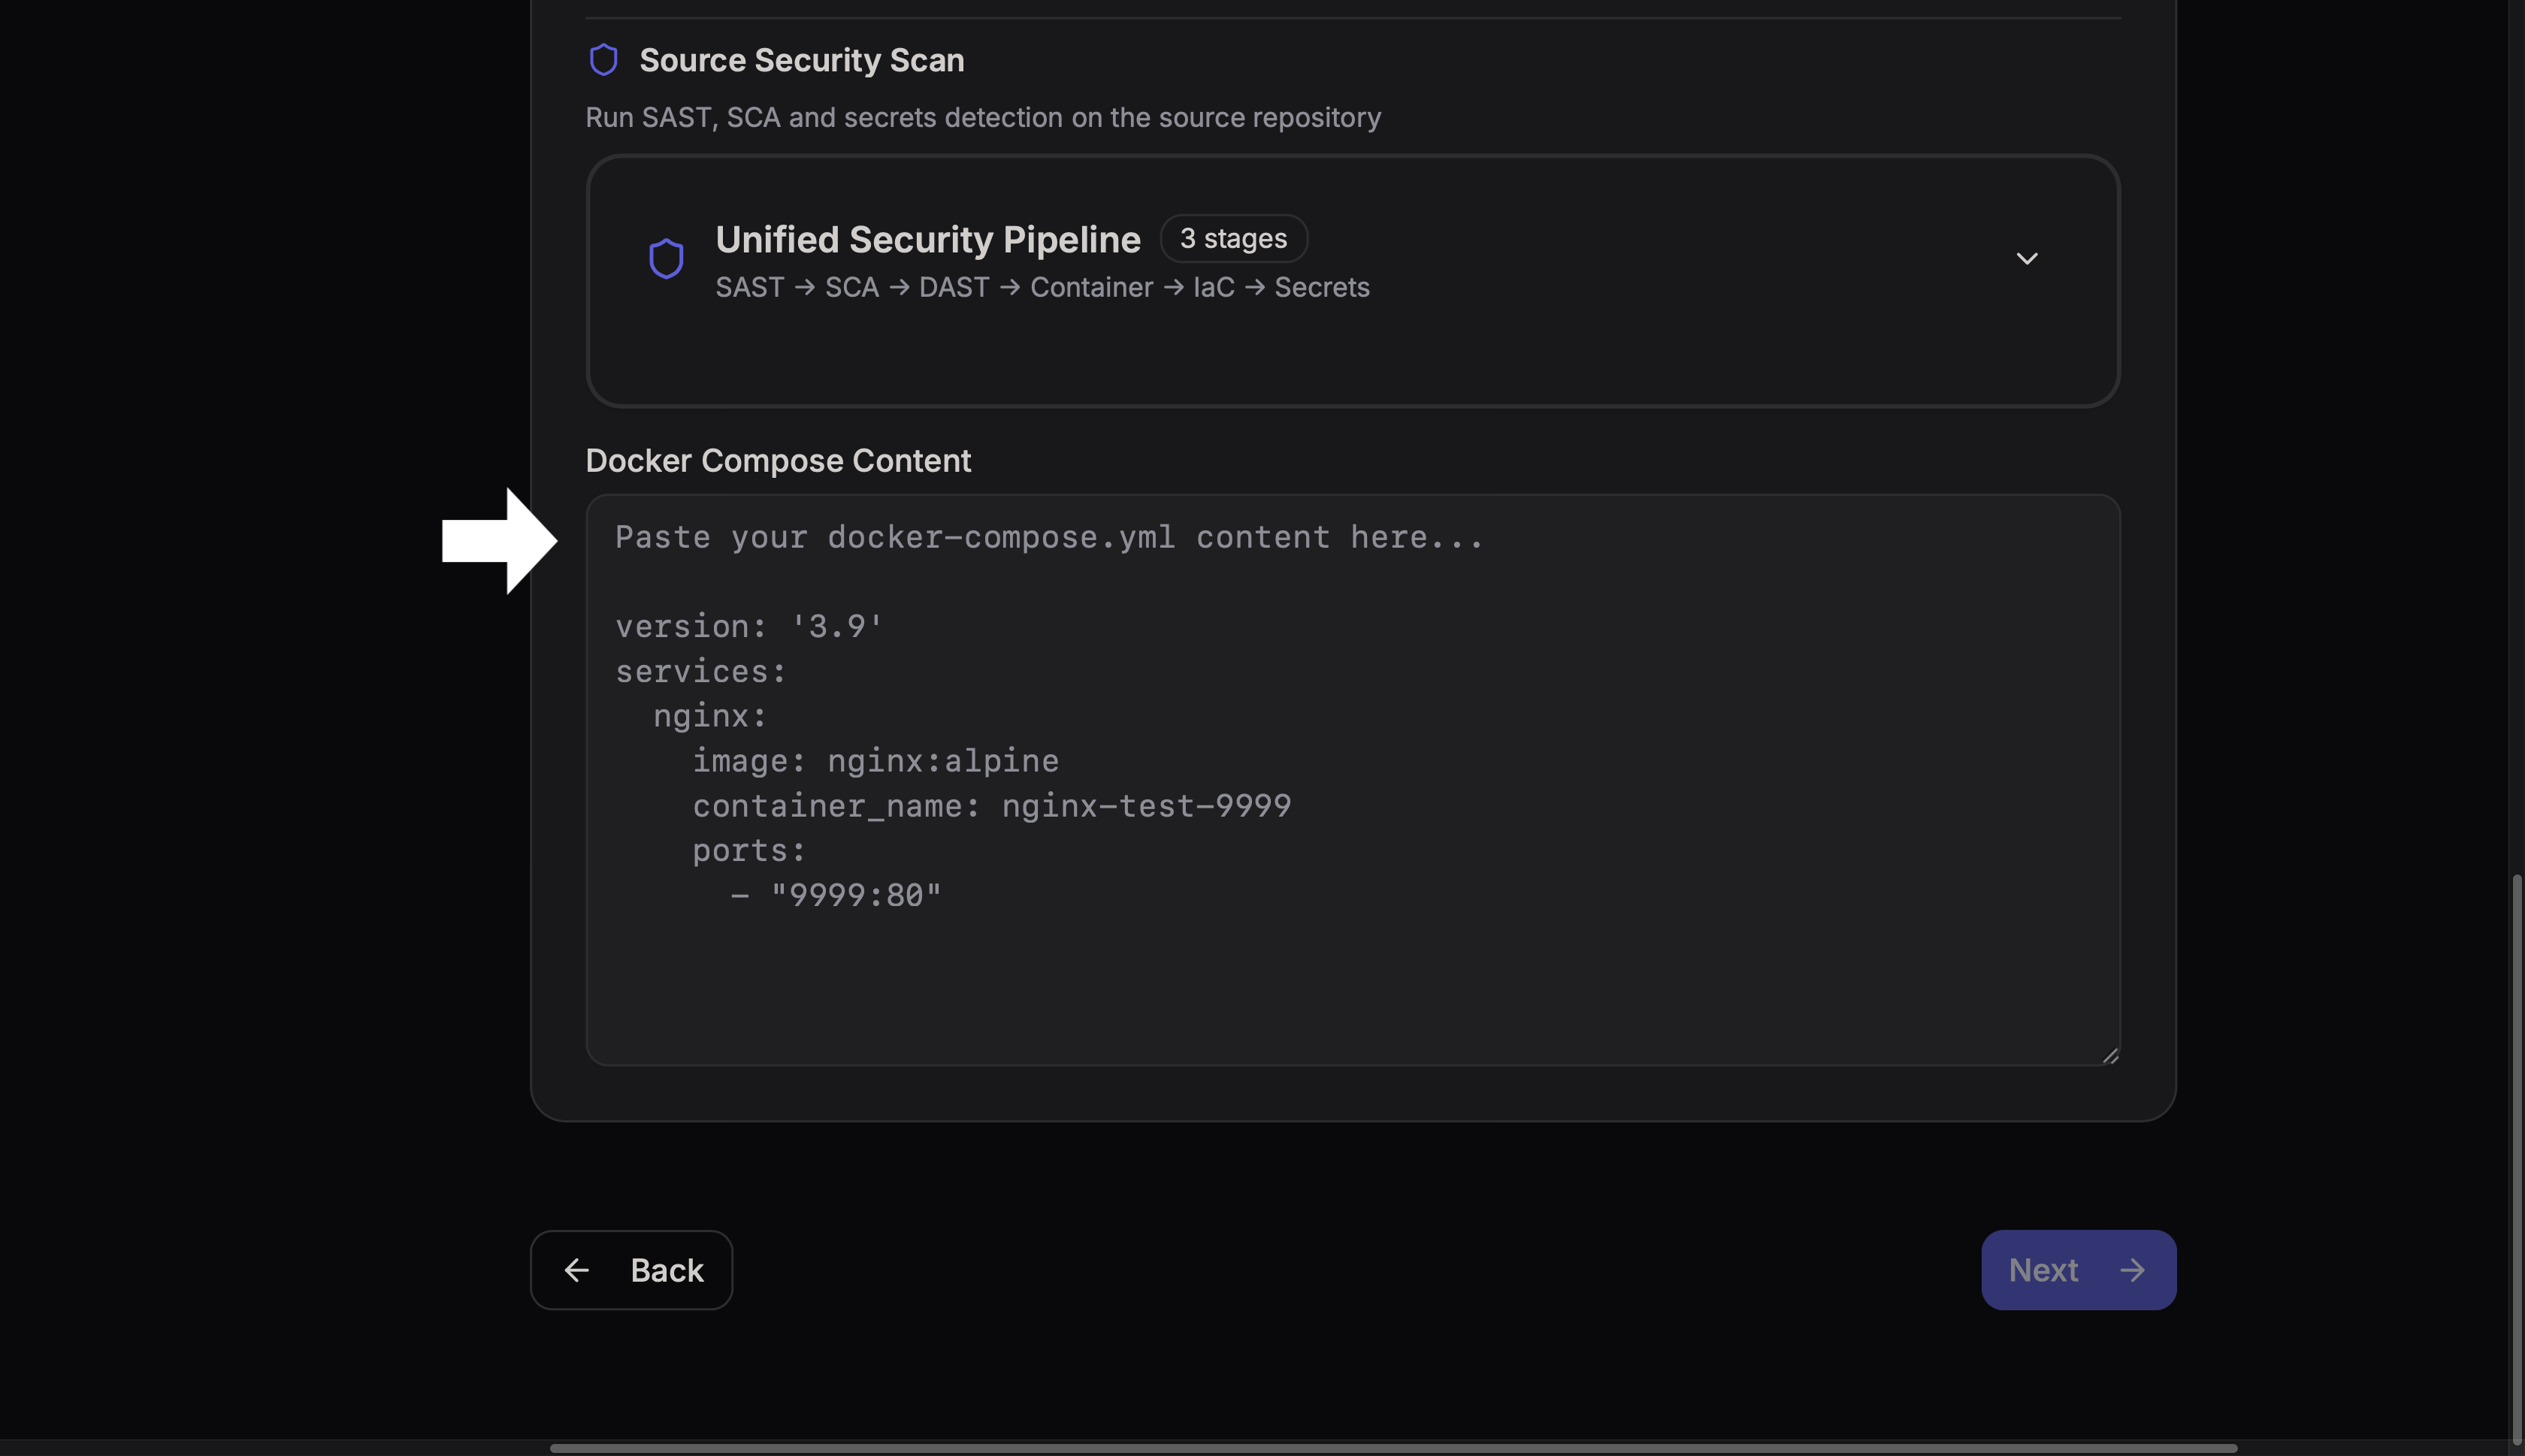
Step 3
Review the configuration and verify that the compose file path is correct.
Step 4
Click Deploy.
Step 6: Review and Deploy
Before starting the deployment, review all configuration details.
Confirm the following:
- Target server
- Deployment method
- Image source or repository
- Container configuration
Final Step
Click Deploy to launch the application.
The platform will then provision the container or services on the selected standalone server.