Build from Source
The Build from Source method allows you to upload your project source code and let the platform automatically build and deploy the application.
This method is useful when the application has not been built locally and you want the platform to handle the build process.
Steps to Deploy Using Build from Source
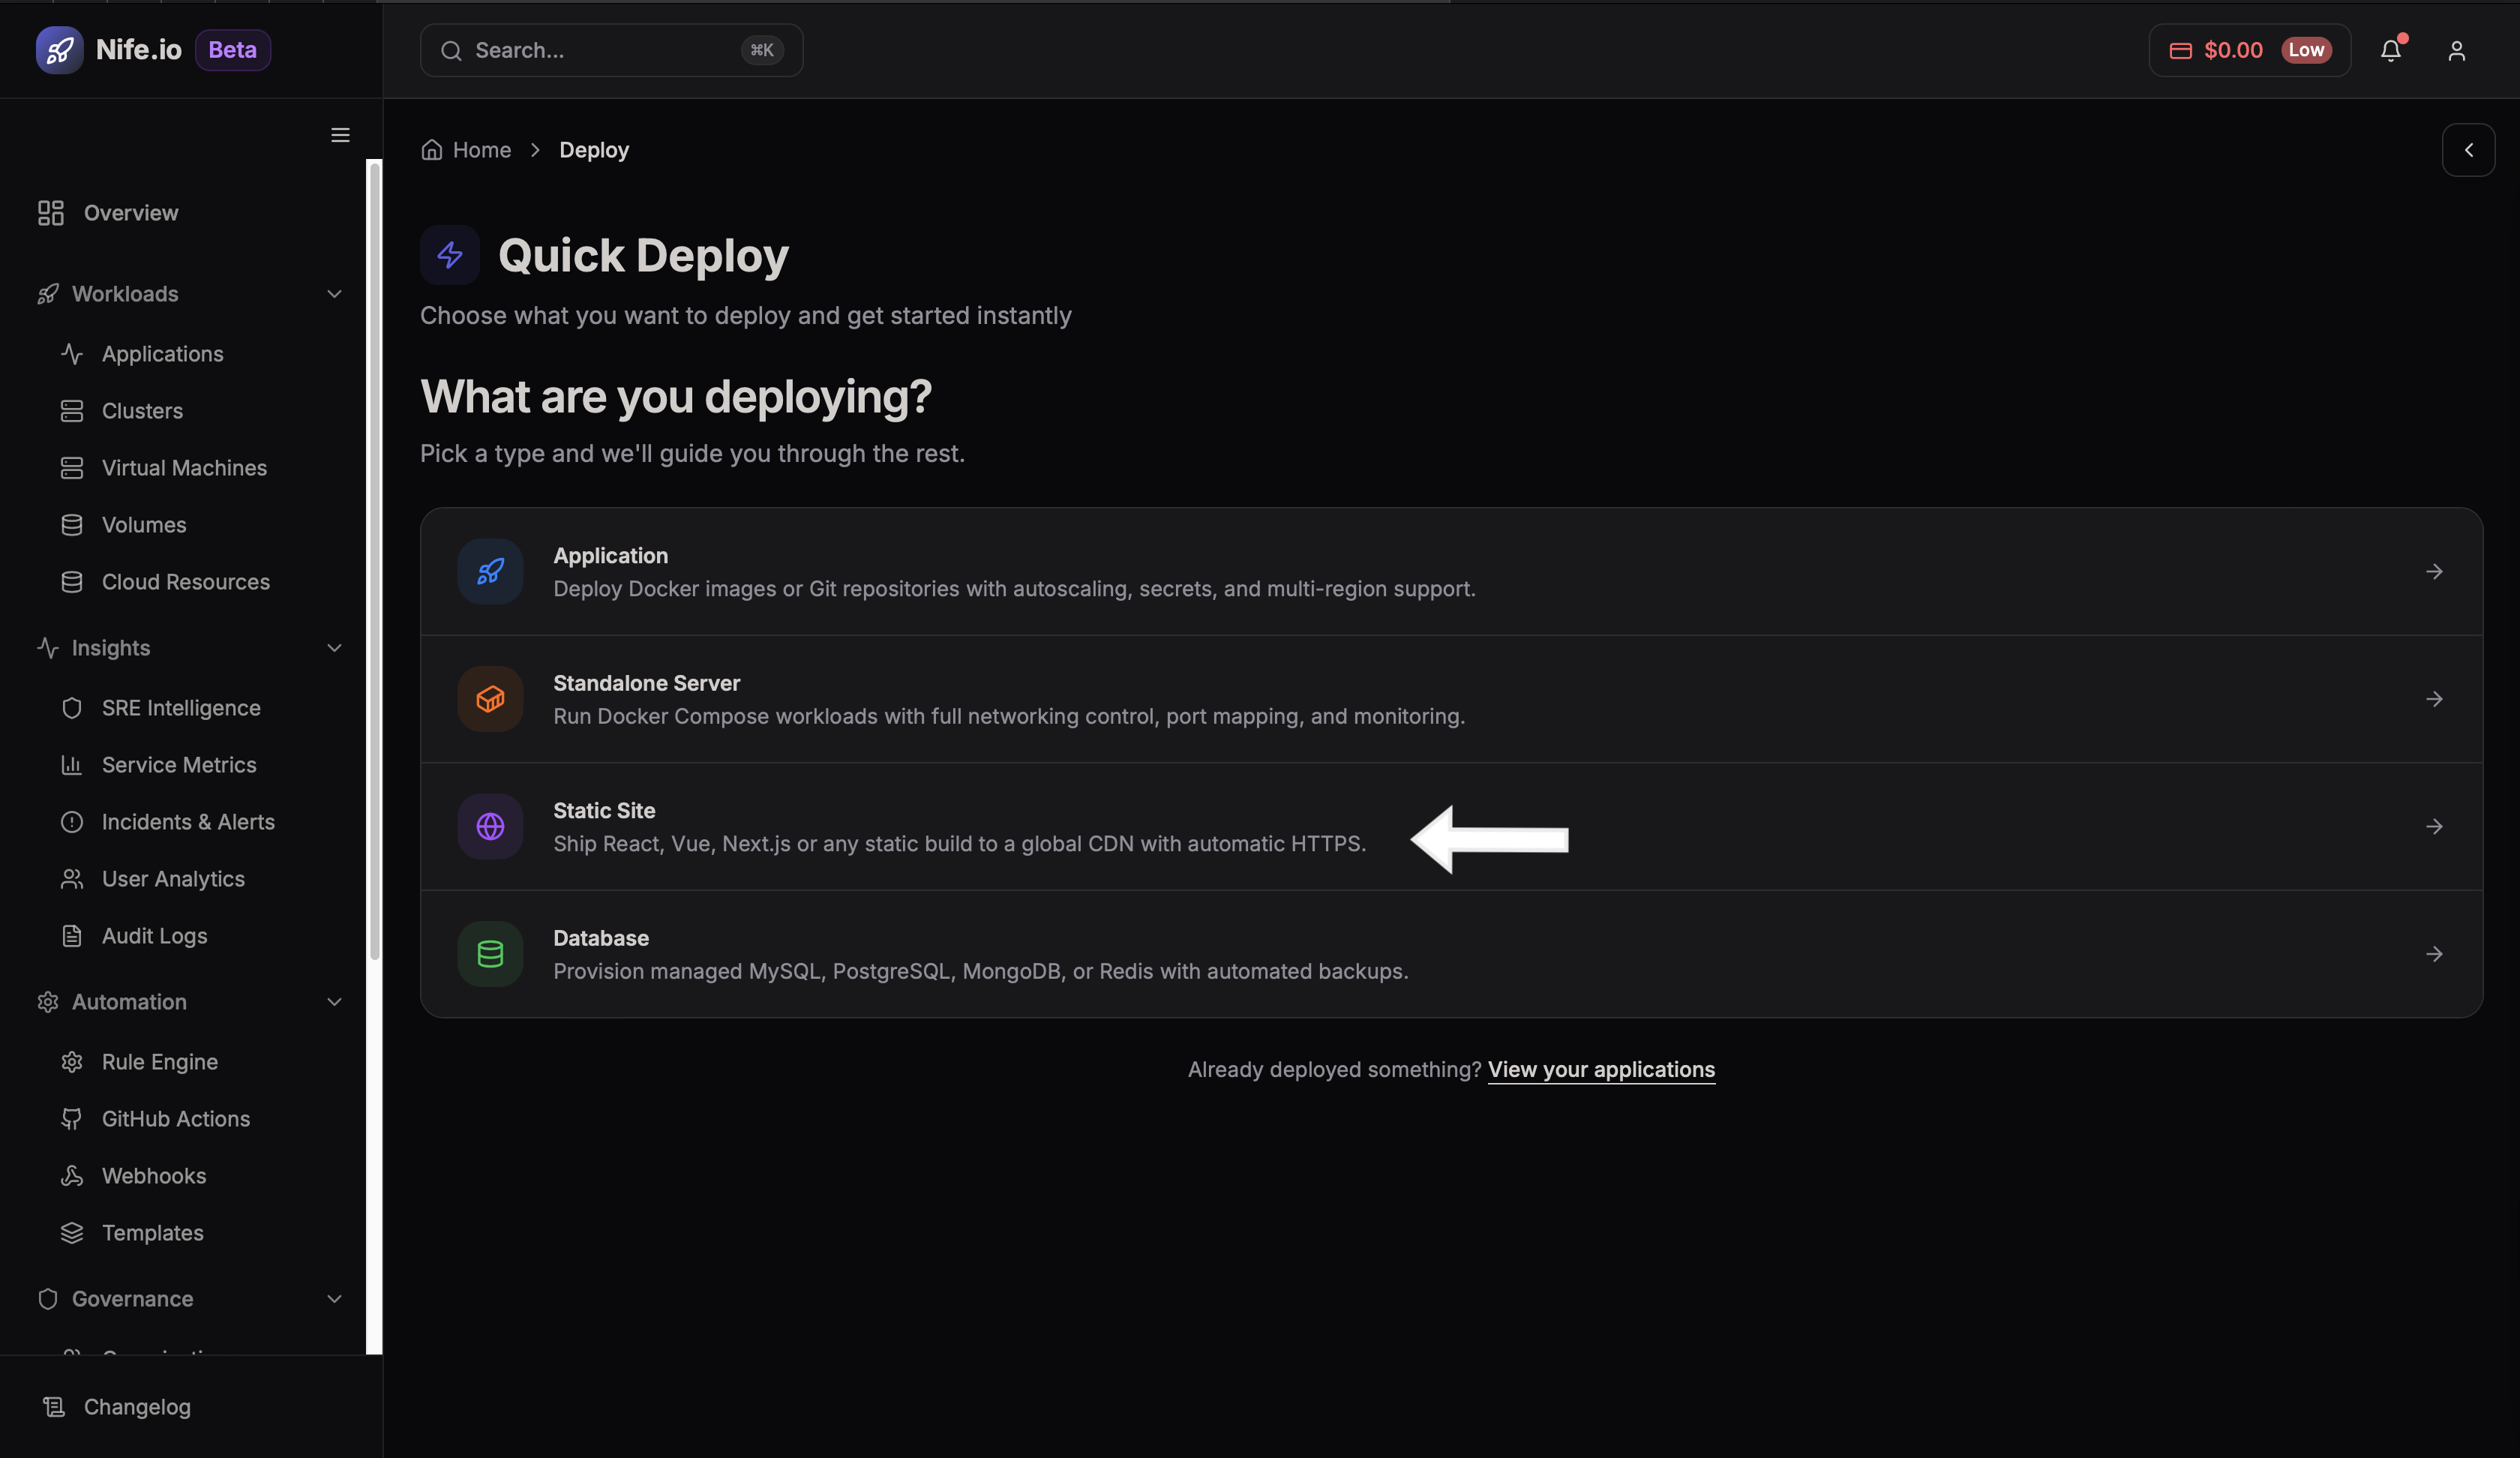
Step 1: Navigate to Deploy Site
Open the dashboard and select Static Site.
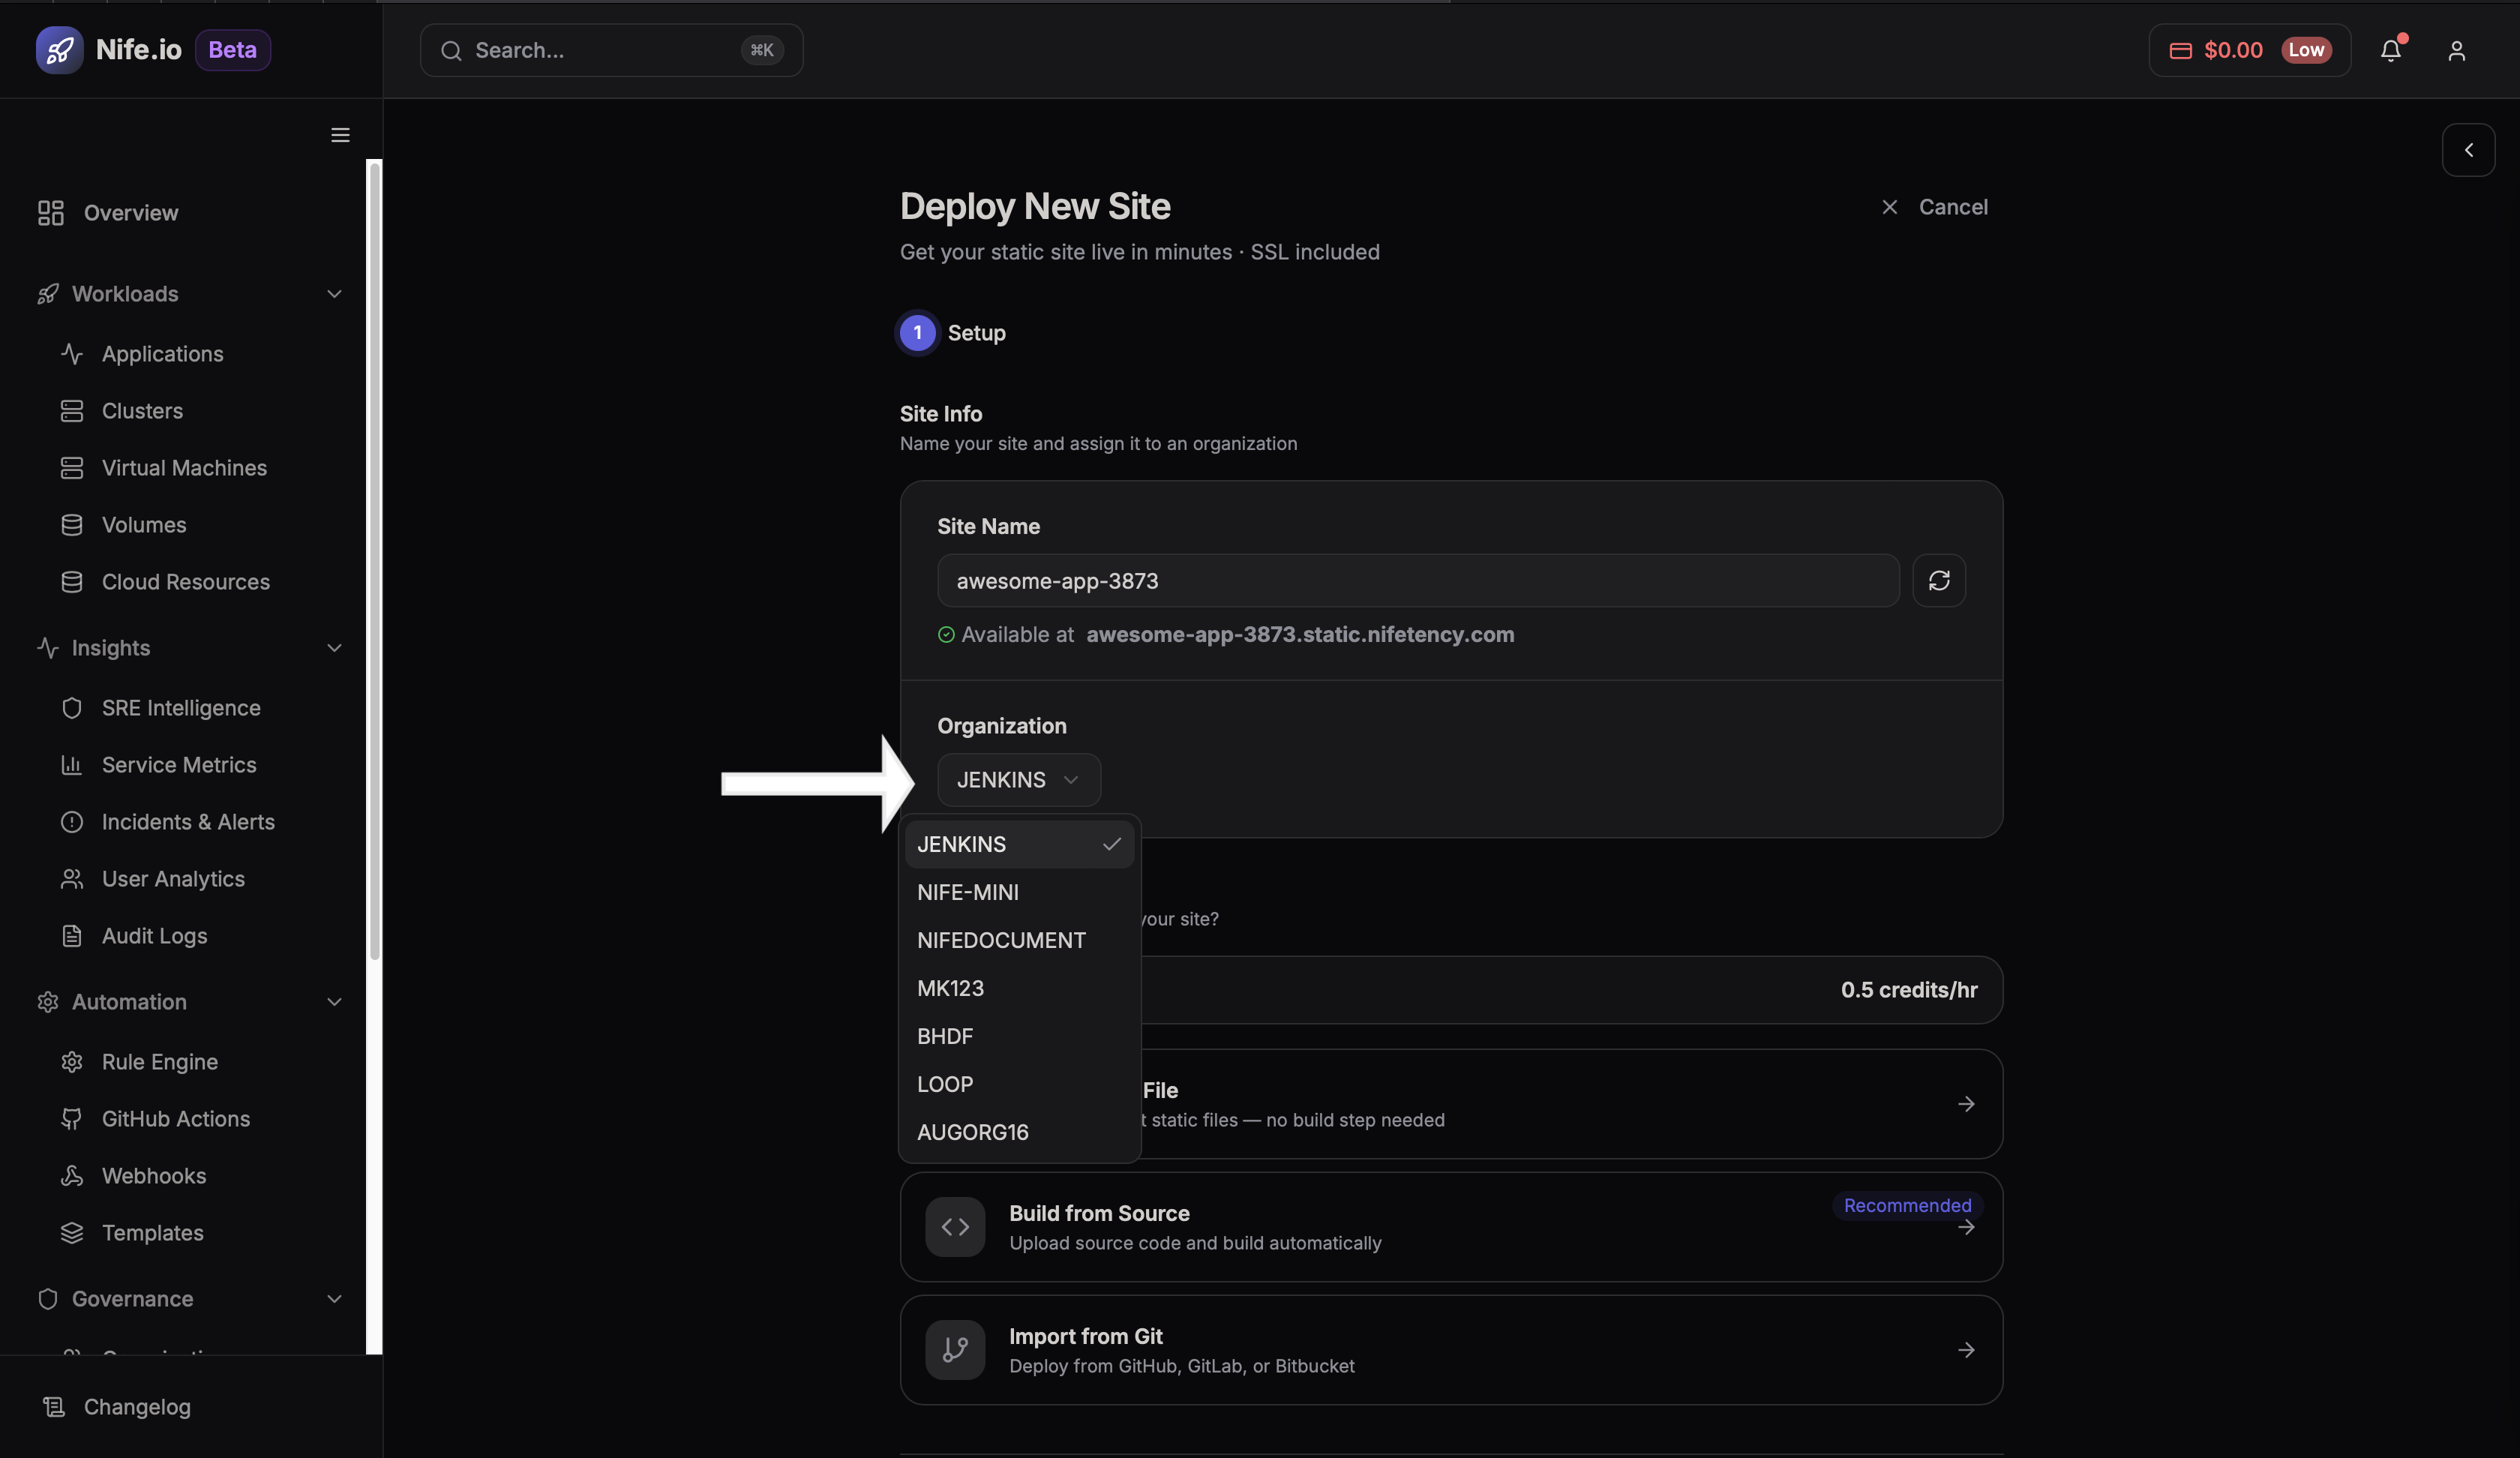
Step 2: Select Organization
Choose the organization where the application will be deployed.
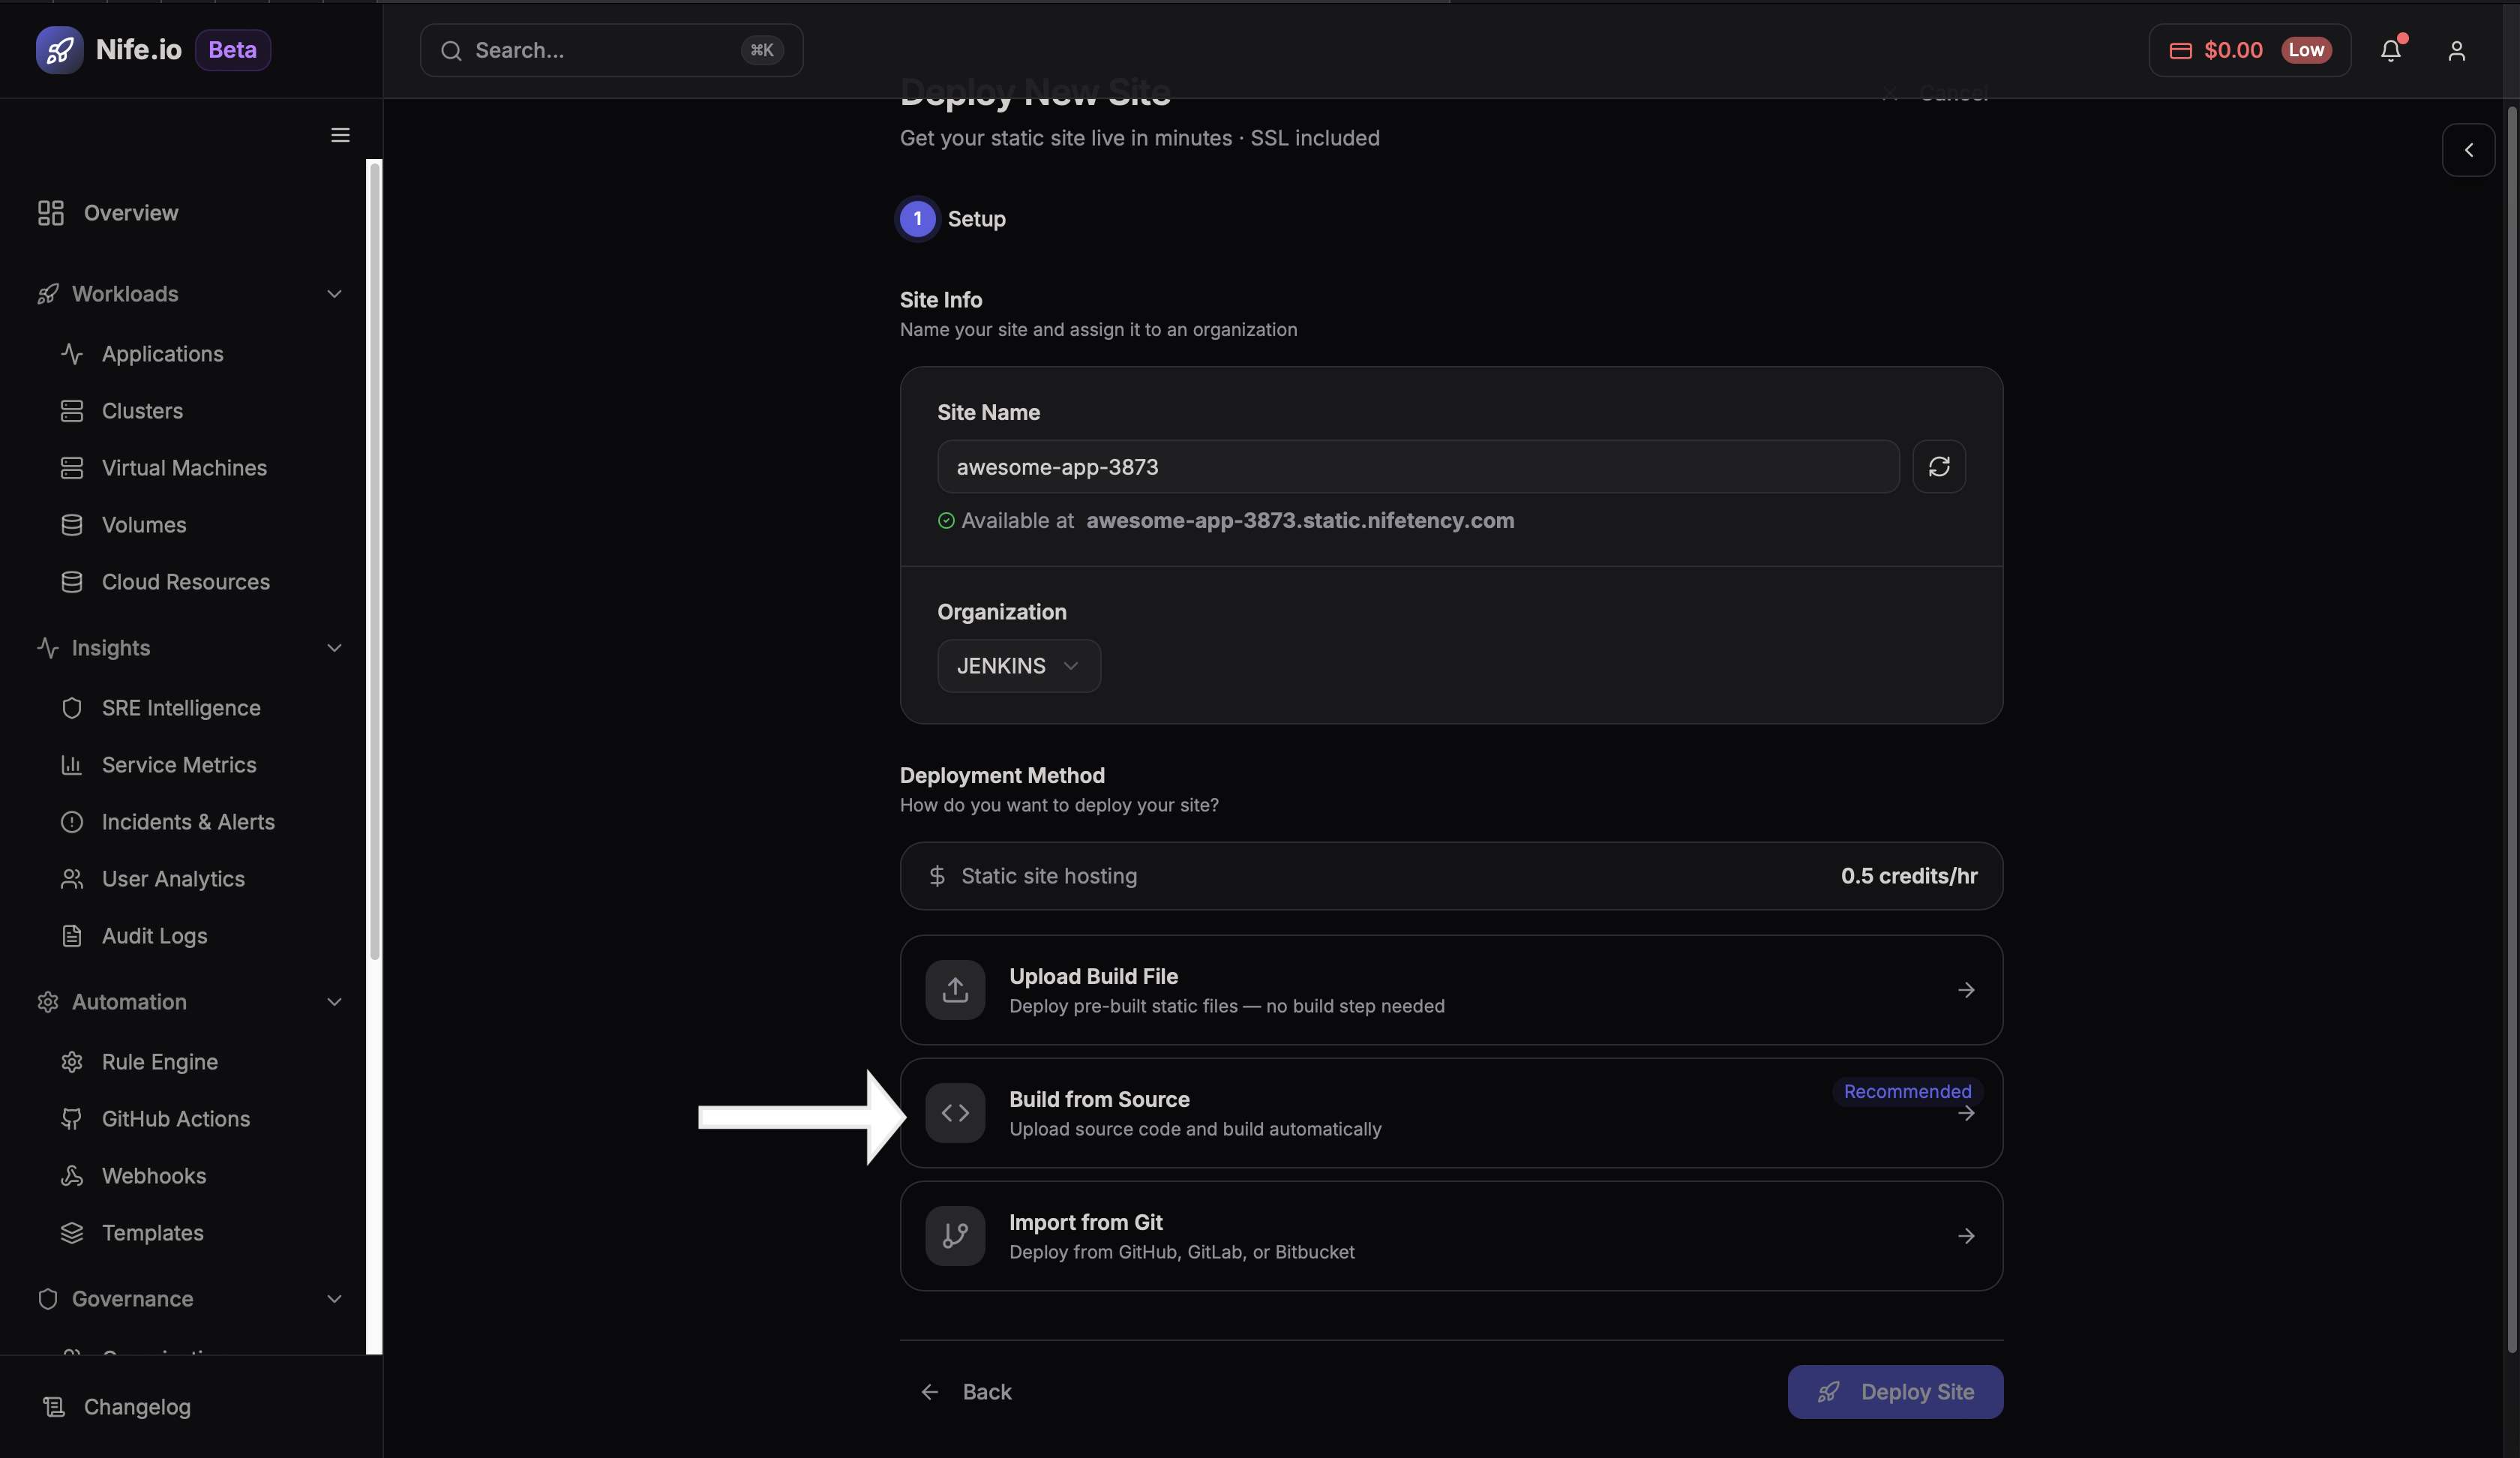
Step 3: Select Build from Source
Choose Build from Source from the available deployment options.
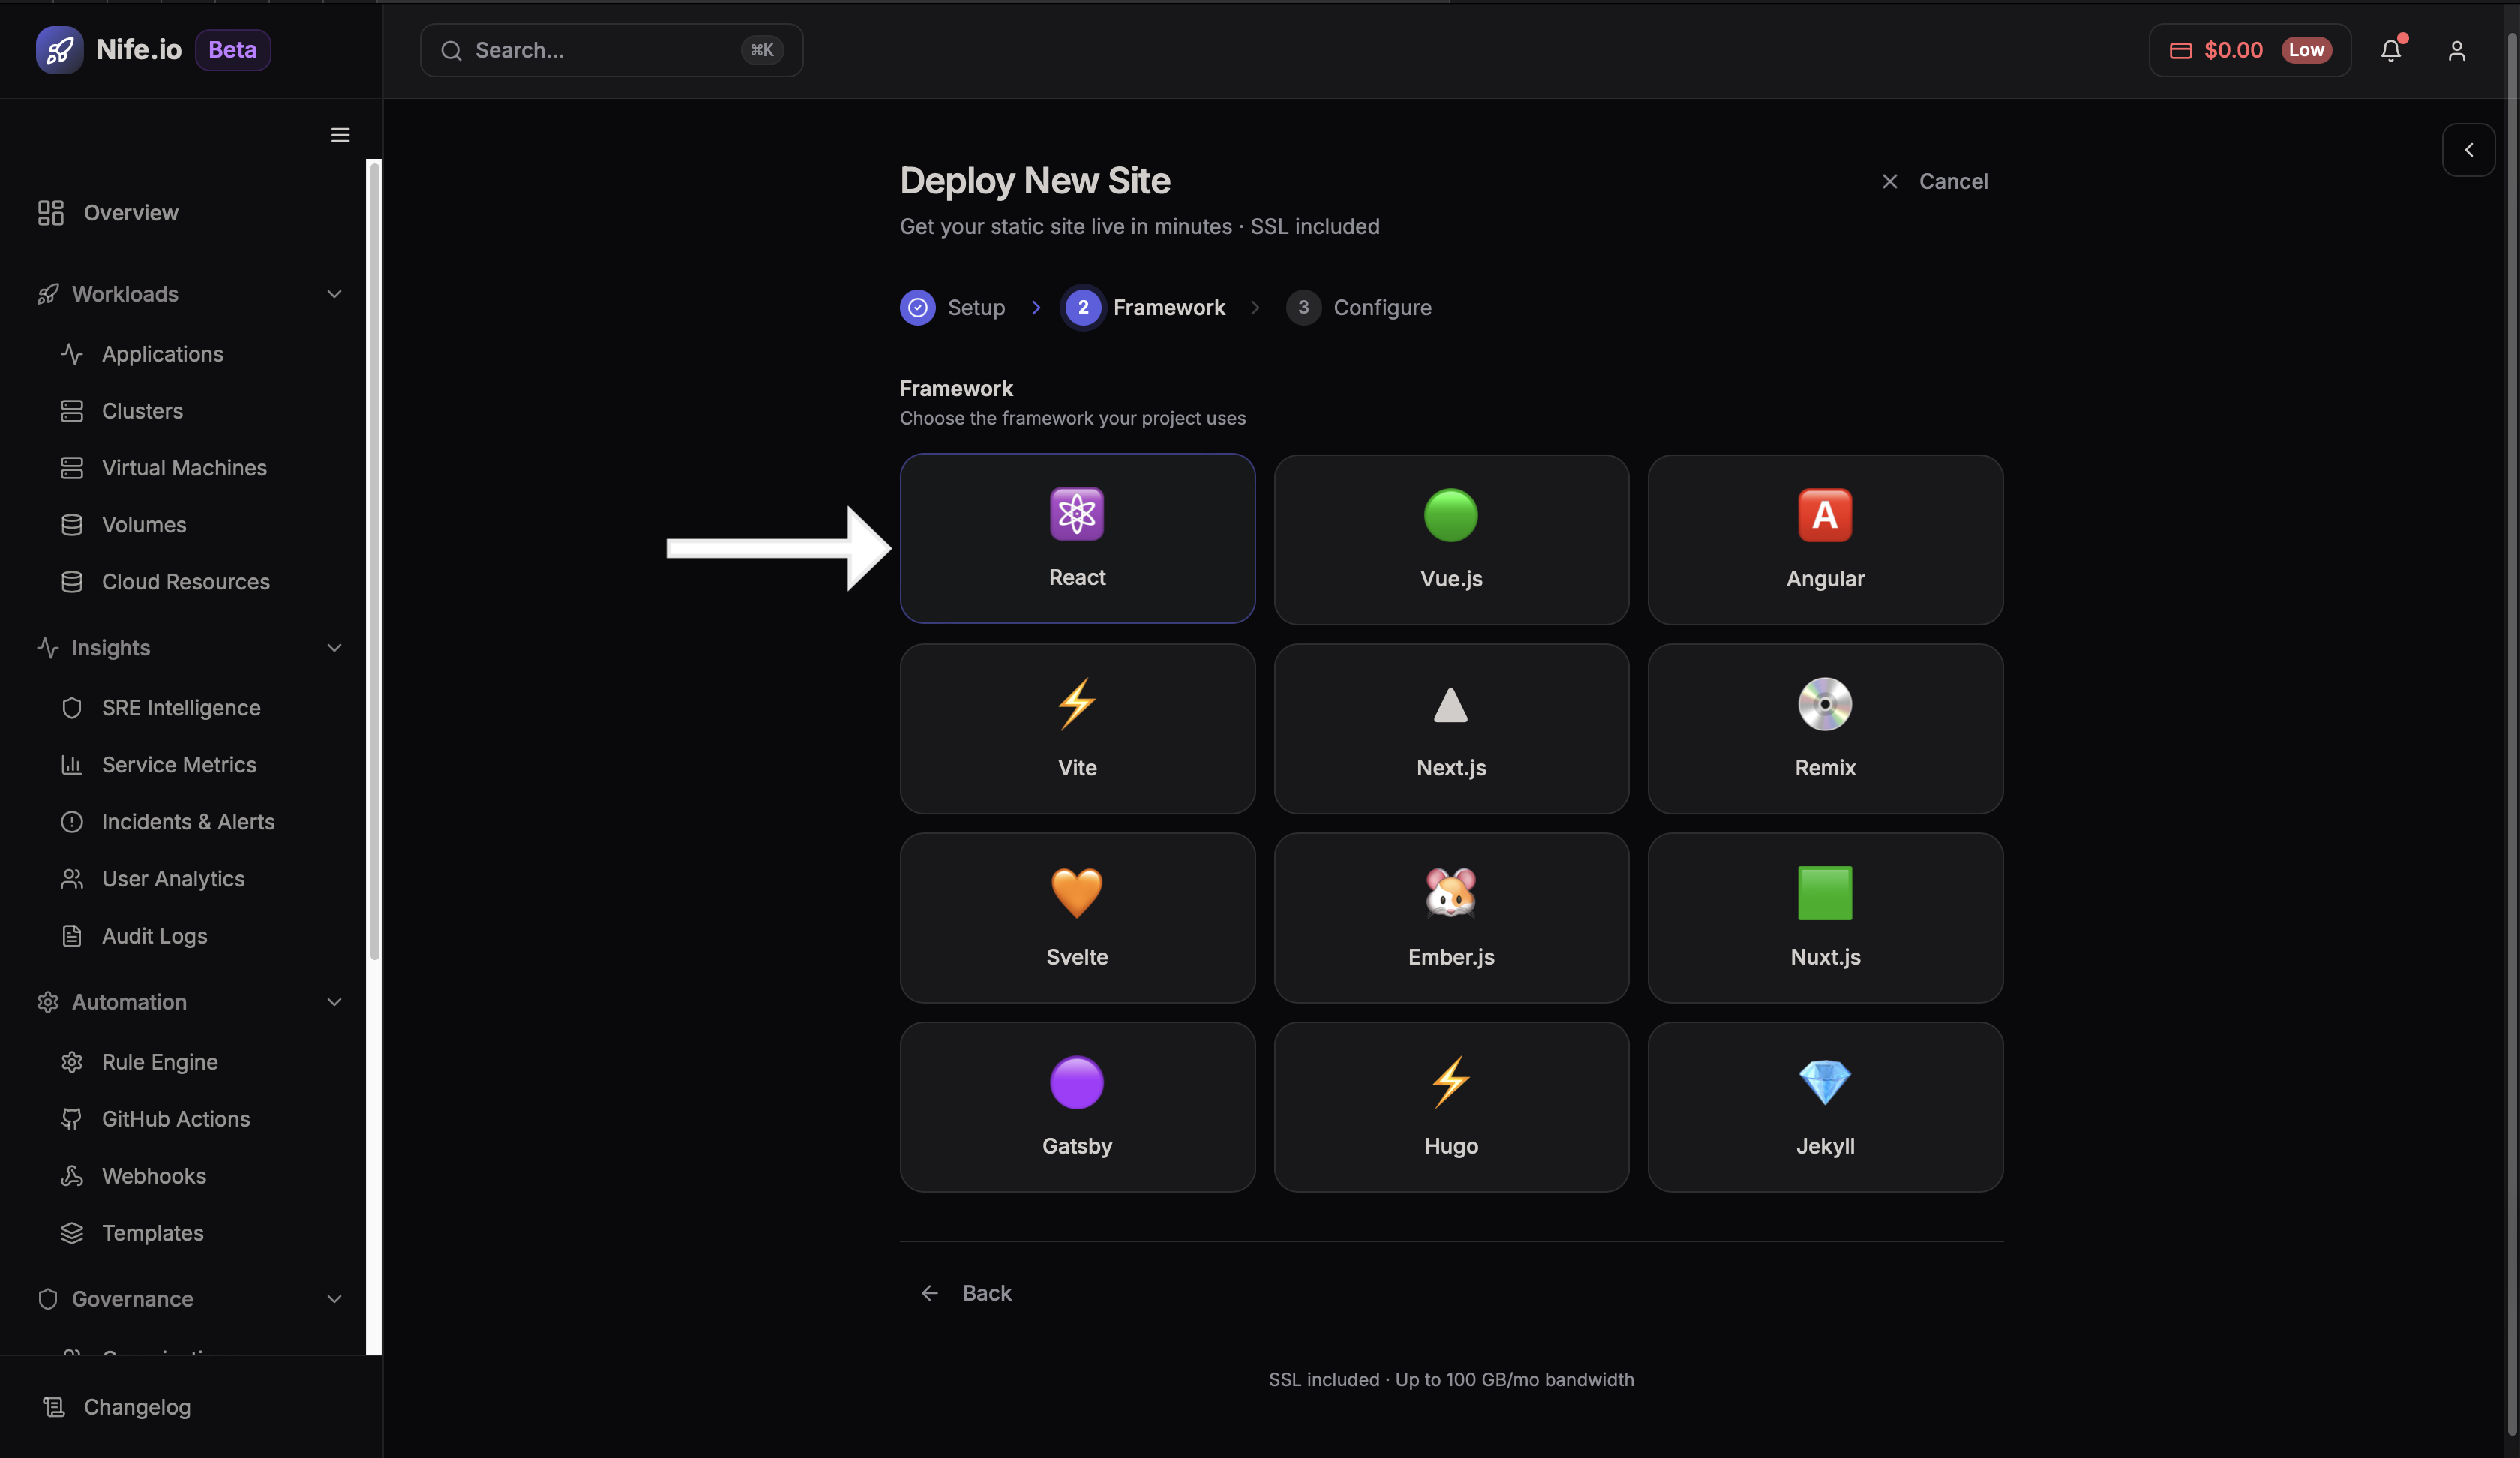
Step 4: Select Framework
Choose the framework of your preference used for your project from the available options.
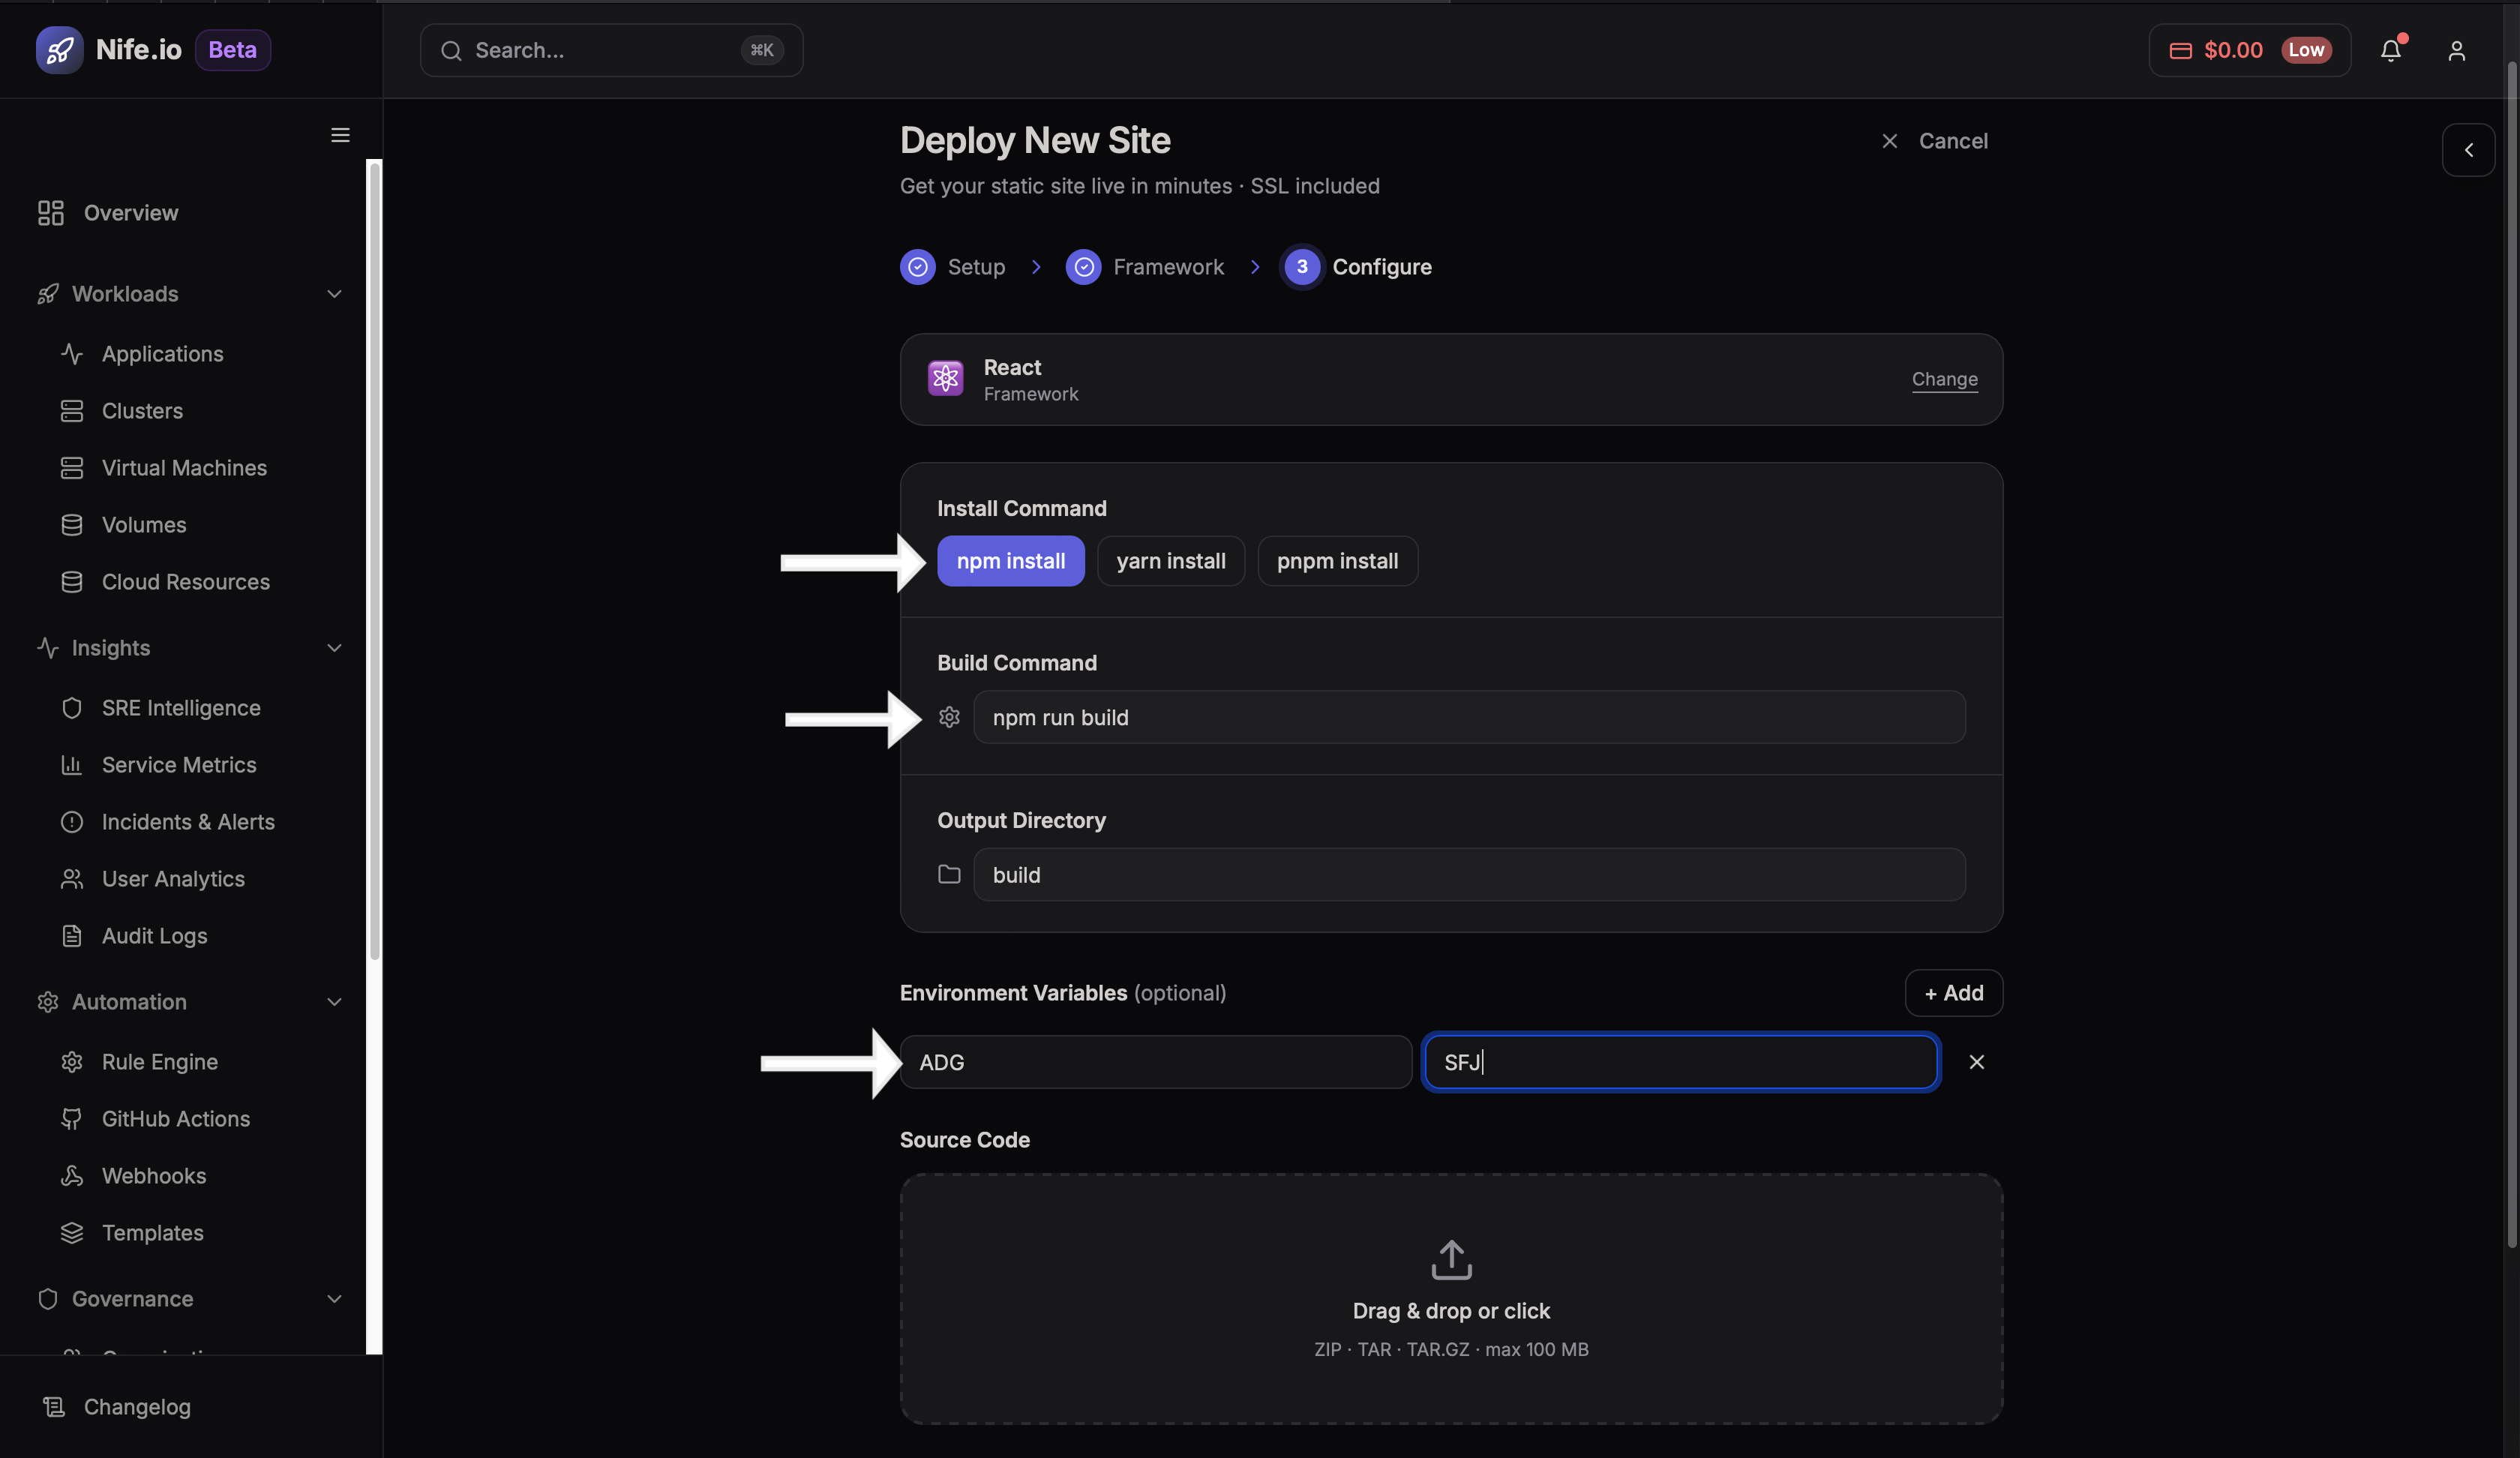
Step 5: Select Command & Add Environment Variables (Optional)
The Build Process
Install Command: The tool used to download your project's dependencies. In this case we have selected npm install, which is standard for most React apps.
Build Command: Is an command that compiles your React code into optimized, production-ready files. Here, it is set to npm run build.
Output Directory: This is the folder created after the build command runs. For React, this is almost always named build. This is the only folder that actually gets served to your users.
If your project requires environment variables, you can add them in the configuration section.
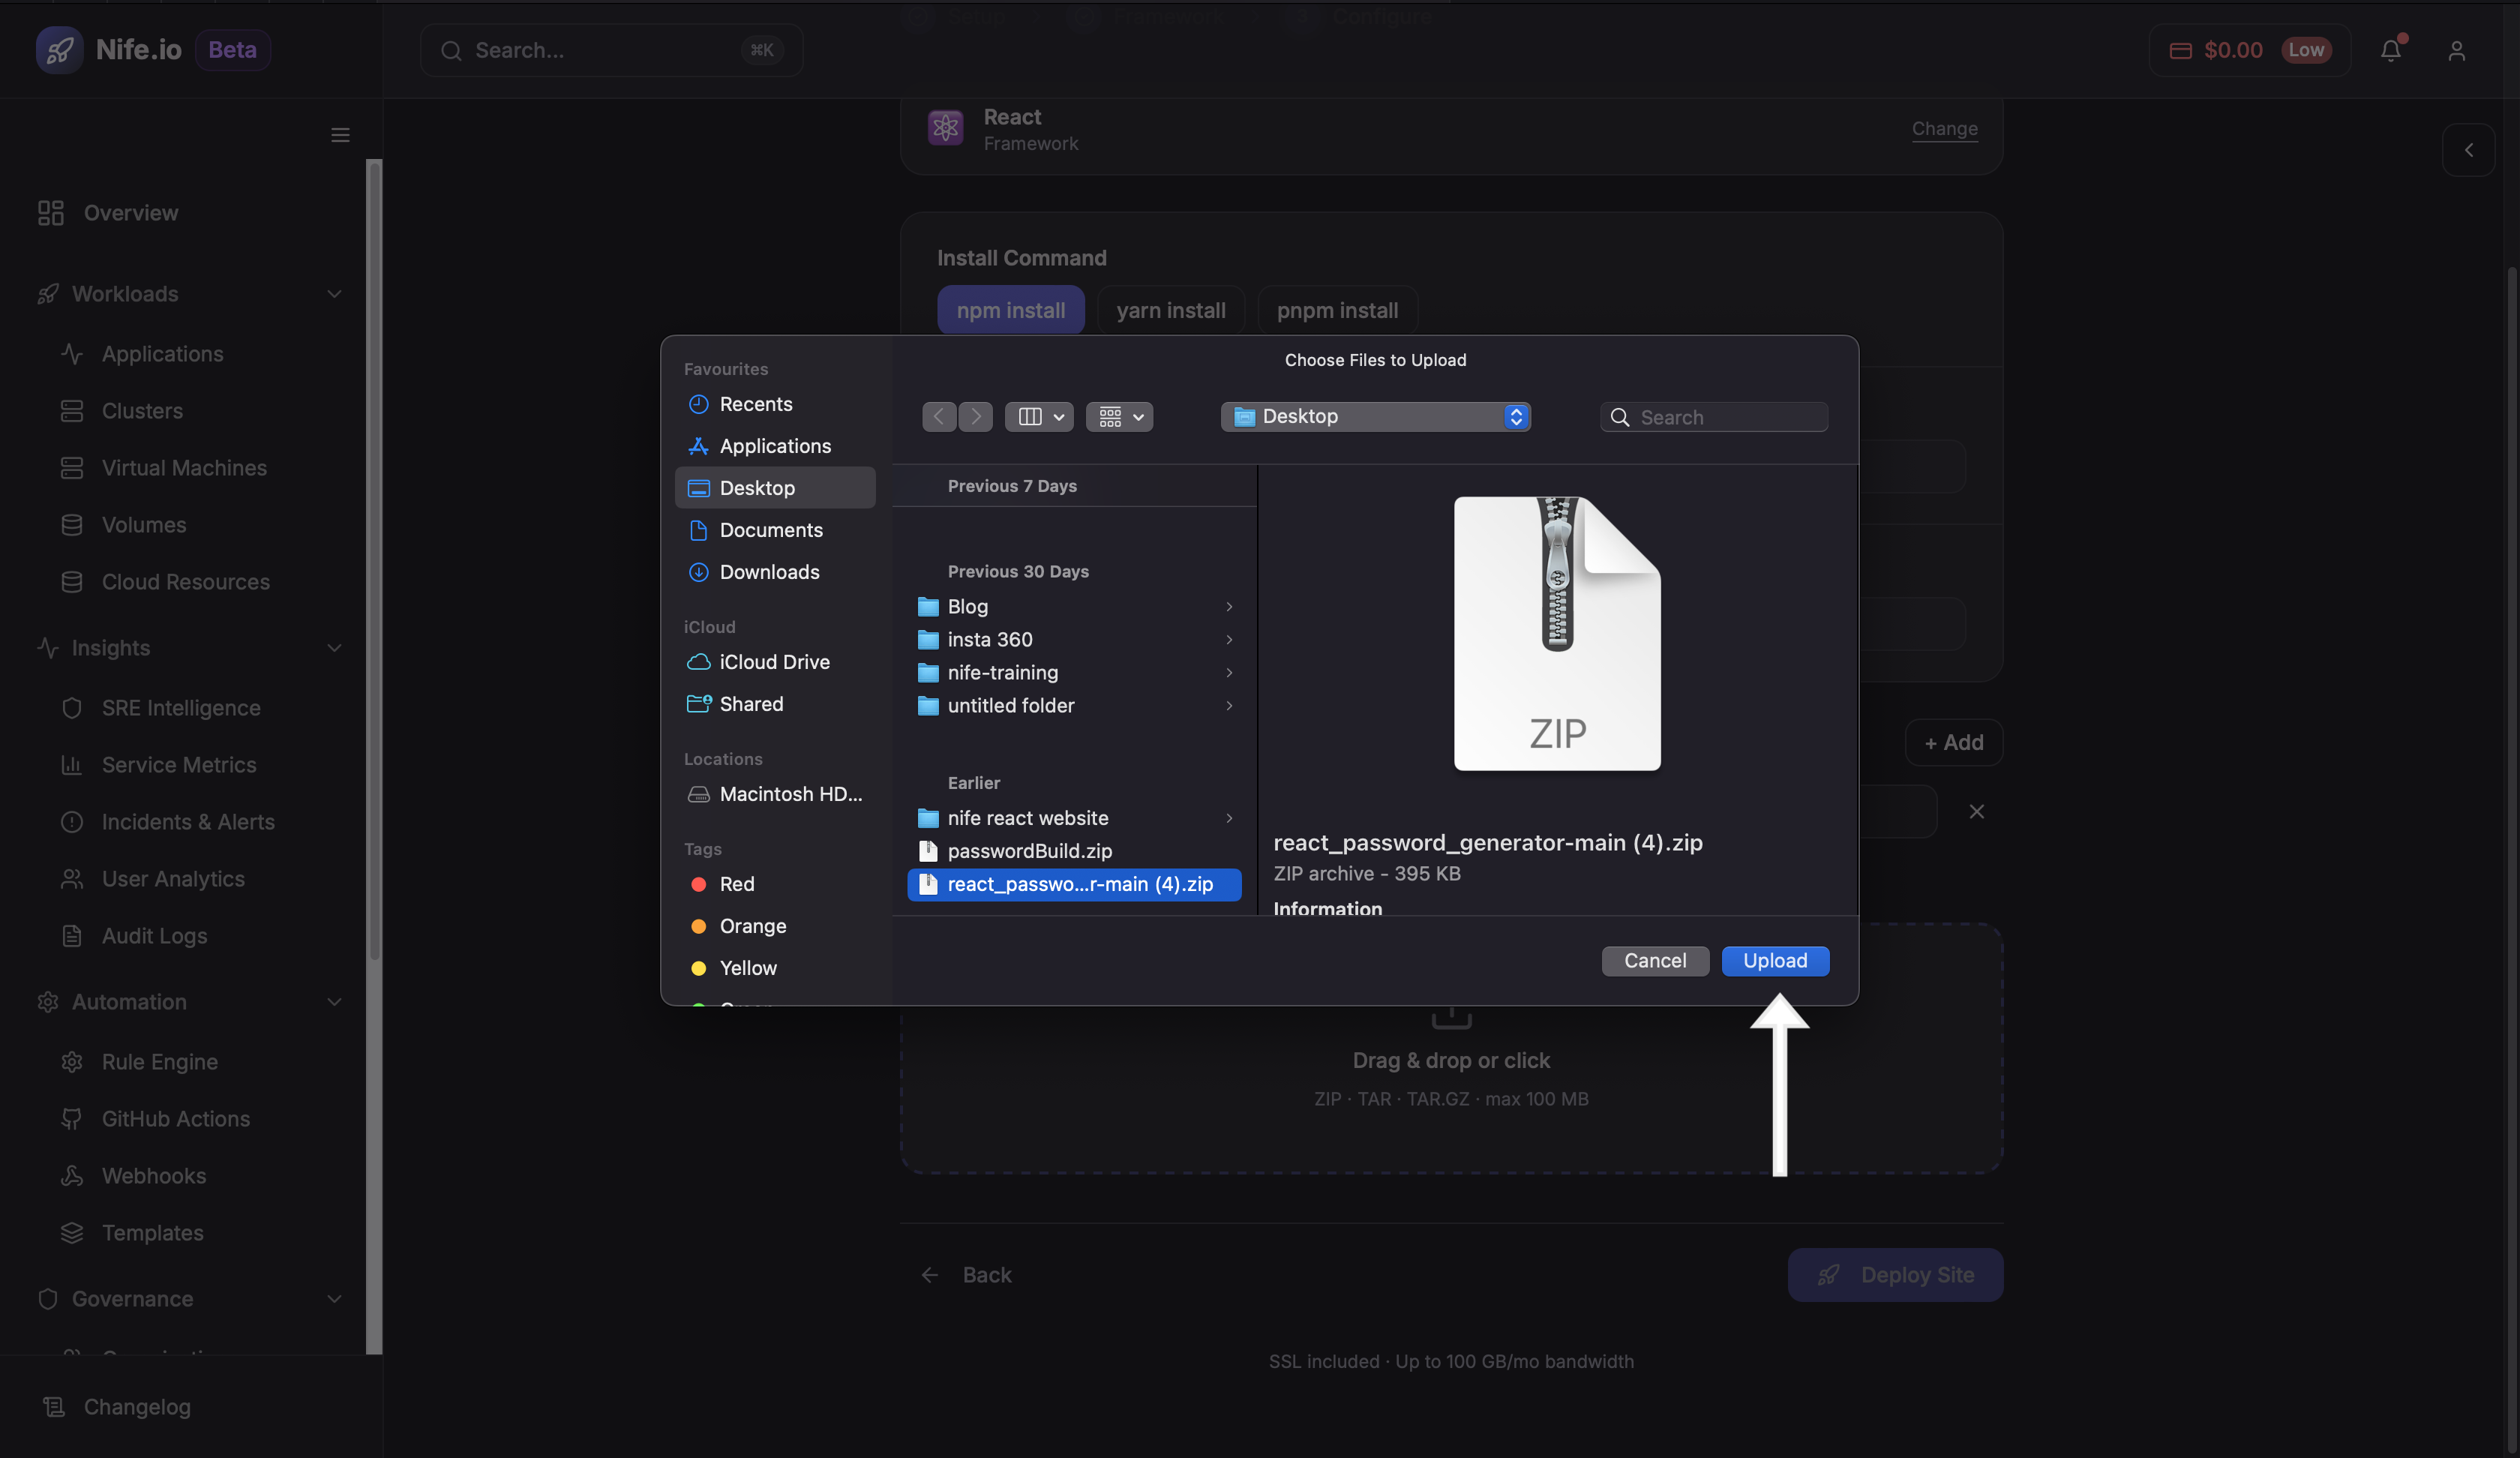
Step 6: Upload Source Code
Upload the source code of your application from your local system.
Step 7: Deploy the Site
Click Deploy Site to start the build and deployment process.
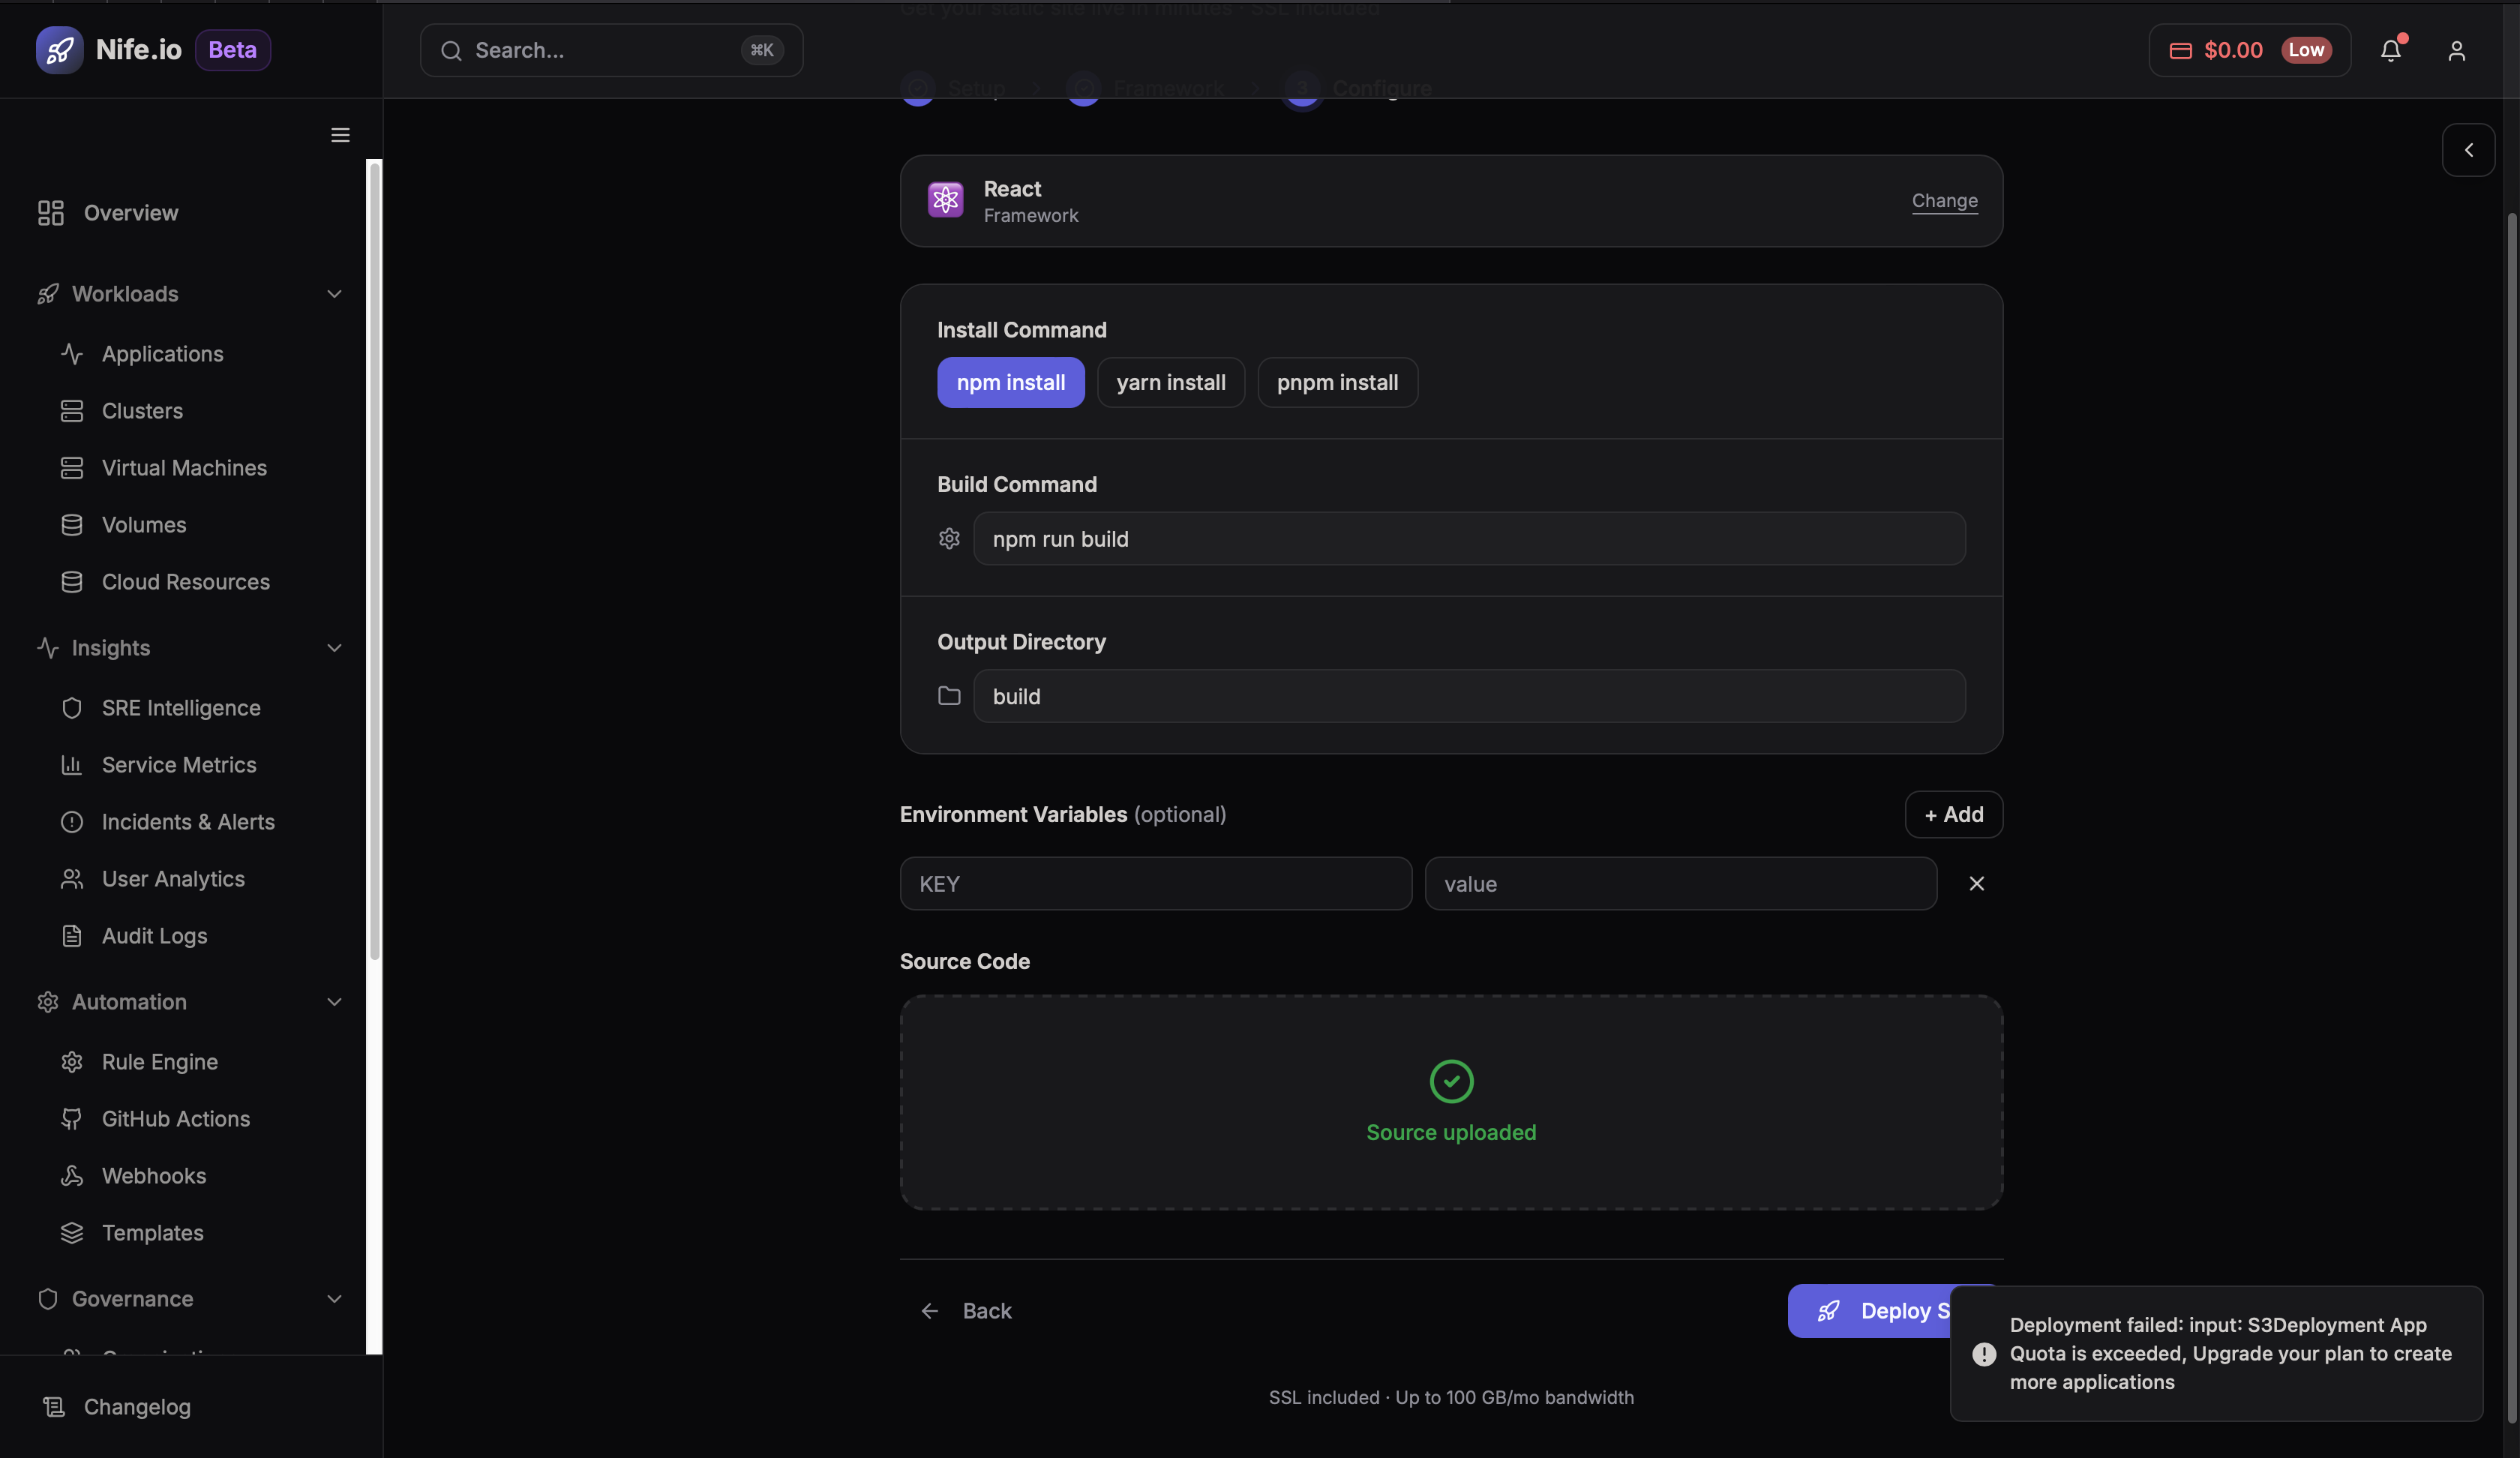
The platform will automatically build the application and deploy it.
Step 8: Verify Deployment
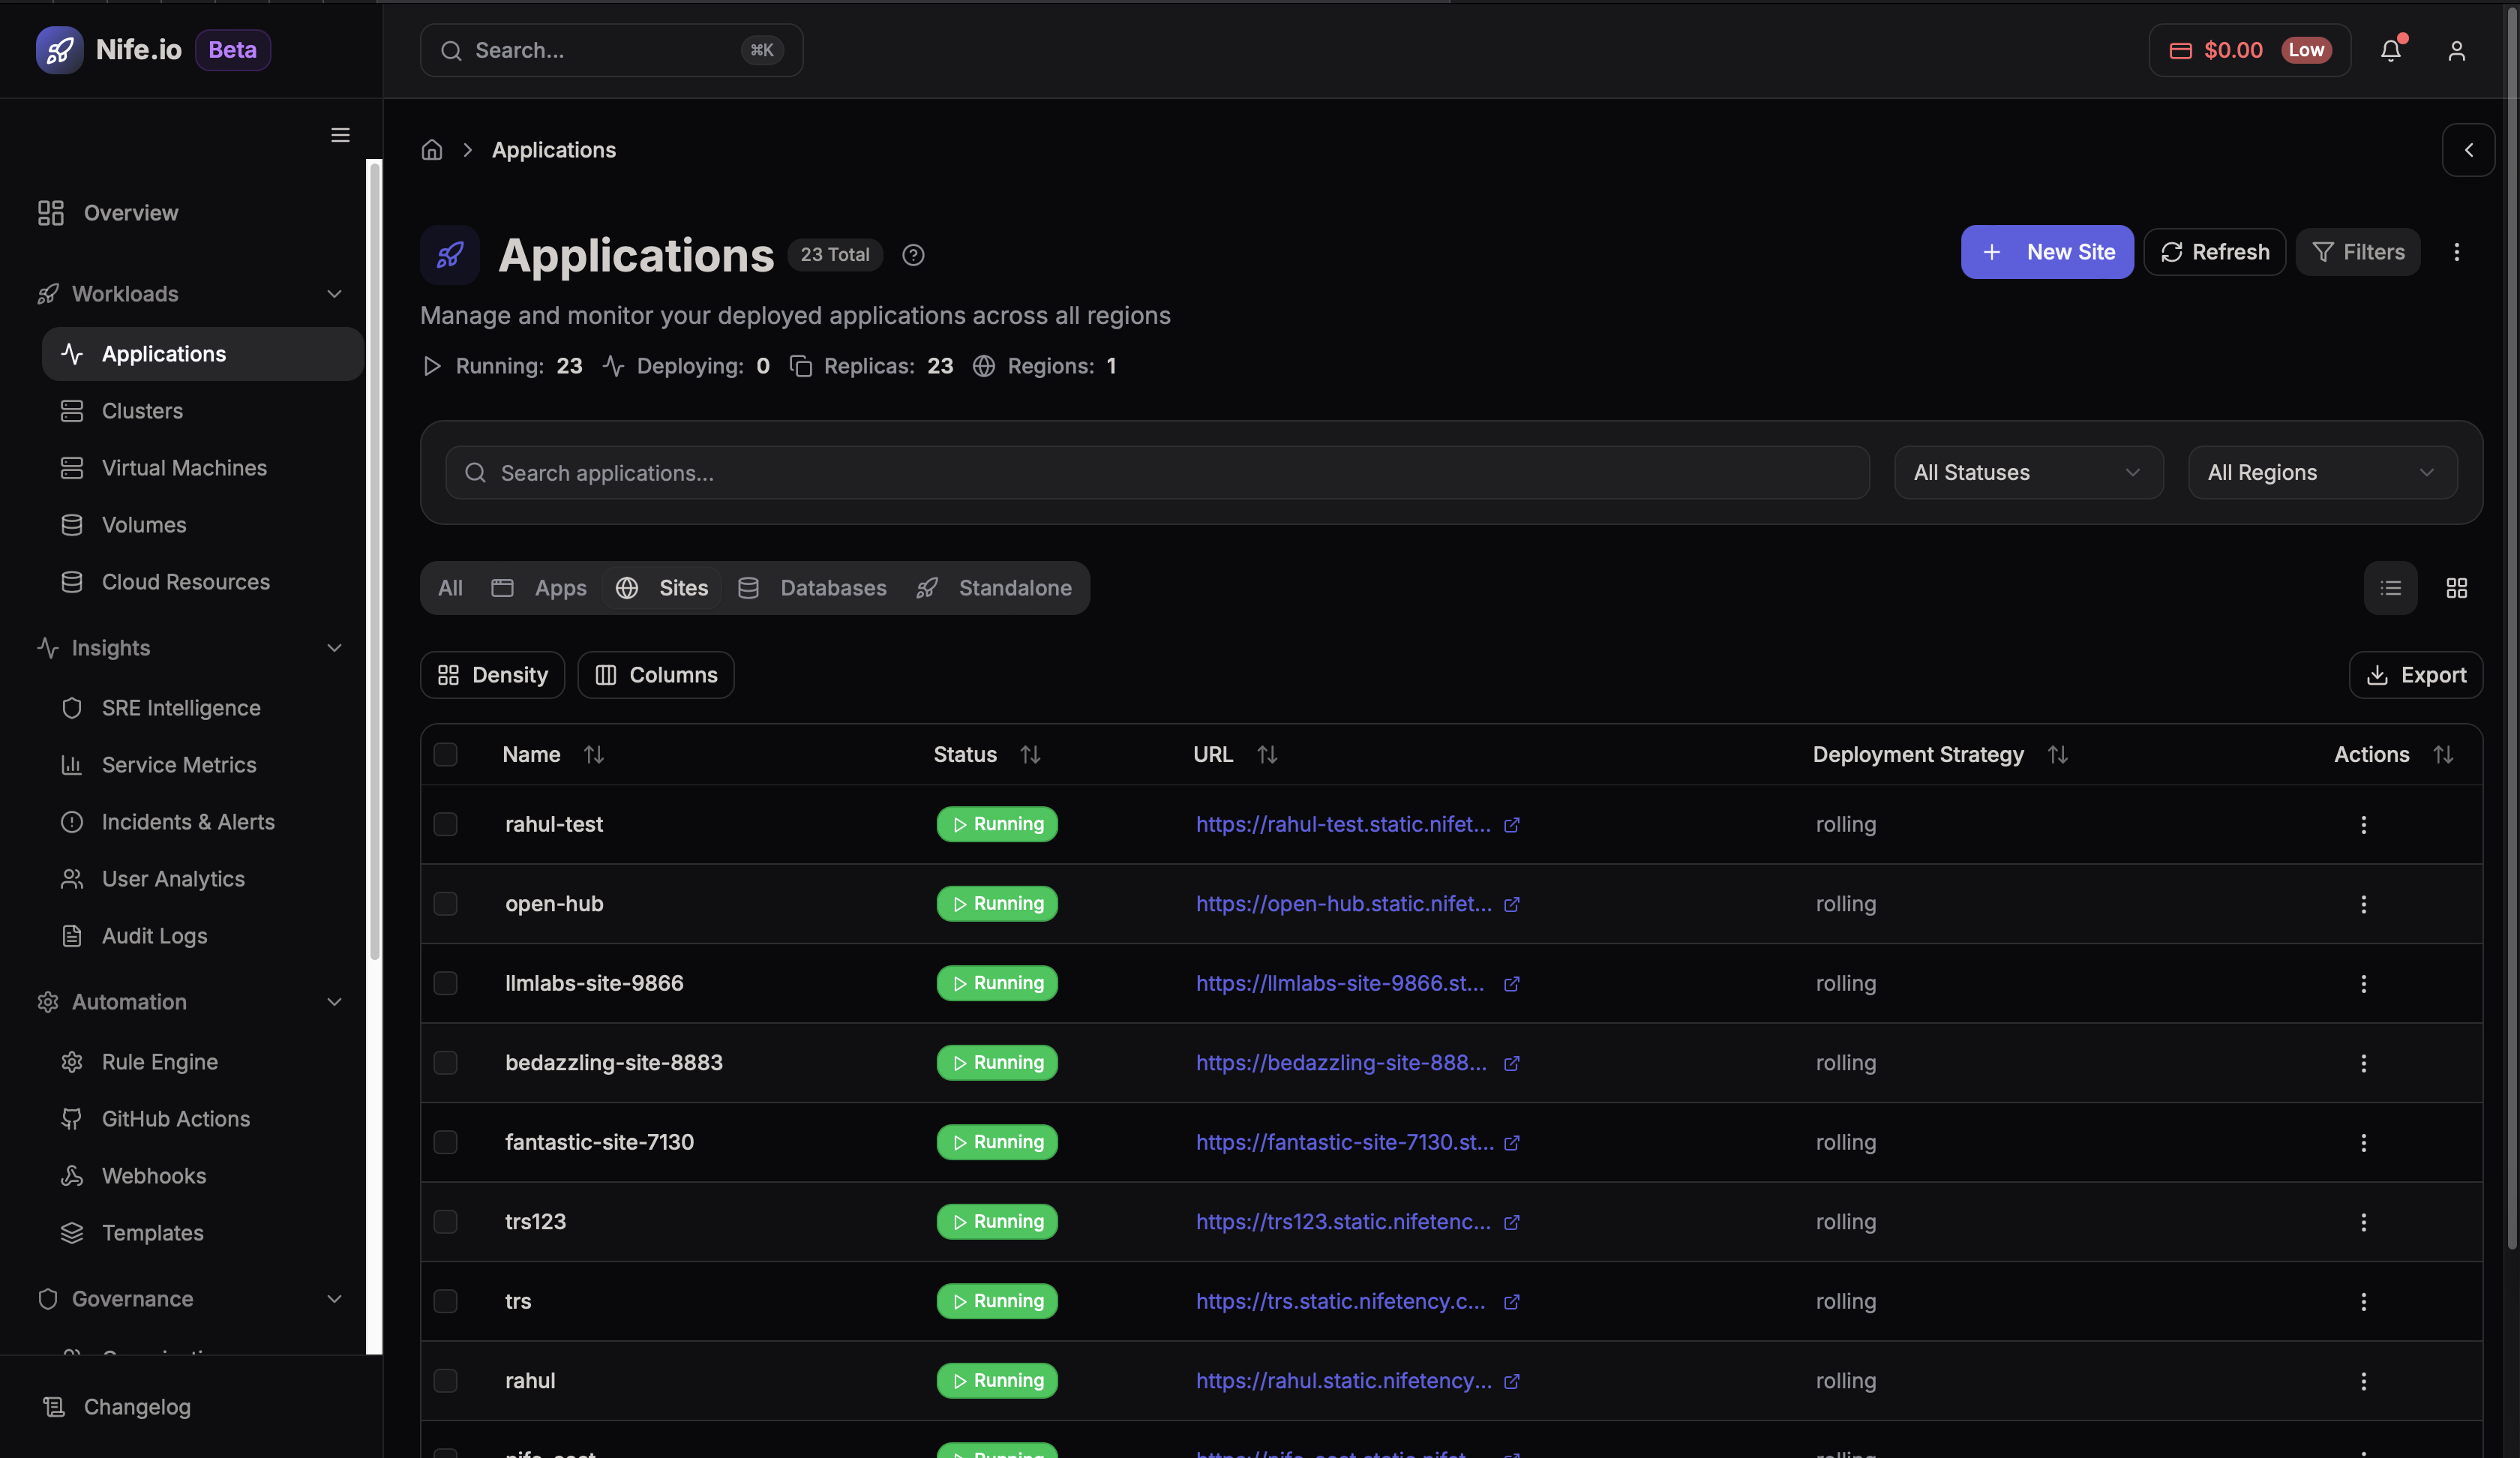
After deployment finishes, open the application page and click Sites to view the deployed application.